by Scott Muniz | Jun 28, 2020 | Uncategorized
This article is contributed. See the original author and article here.
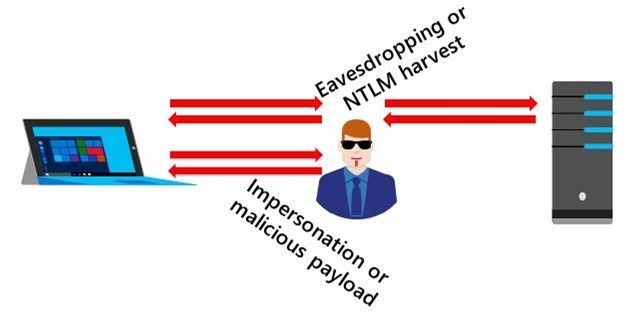
Hey folks, Ned here again with another guest post. Today we discuss hardening the SMB protocol in Windows against interception attacks, previously referred to as “Man-in-the-Middle” attacks. As you know, interception attacks involve manipulating communications between client and server. An attacker might be eavesdropping, stealing credentials, or diverting a client to an evil endpoint masquerading as a friendly server.

Interception doesn’t always mean attack; a packet-inspecting firewall or a WAN accelerator are both examples of friendly intercepting devices. For the purposes of this blog post though, everything in the middle is an enemy and your goal is to keep your users and organization safe from them. No distributed system protocol security is foolproof; we just want an attacker to move on to easier prey.
This blog post is for IT Pros and Infosec Red & Blue teams working in organizations, not home users. I assume you have basic familiarity with Windows, TCP/IP networking, SMB, Kerberos , NTLM, Active Directory Domain Services, & Group Policy. This post will also become – without the Nedisms and soul-patched bad guy pics – a technical article on docs.microsoft.com next month.
You don’t need to implement all the options I discuss in this post to start seeing tangible results. Information security deployments aren’t a marathon, they’re the preparation for a marathon.
Dang, that was pithy phrasing. Or dumb. Never mind, let’s do this!
SMB Interception Attacks
Some of the ways an attacker might attack you are:
- Intercepting or tampering with data that users are copying, reading, or writing remotely. These might be for industrial or state-level espionage, blackmail, or finding sensitive security data stored in files. Most individual SMB usage is as a remote file system for users, no different than a local hard drive. Most organizations keep much of their data in files on SMB shares.
- Relaying and capturing NTLM challenges or Kerberos tickets that a client sends to allow authentication of SMB connections. By influencing a client to connect to a malicious server – perhaps by tricking them into opening a shortcut in an email or on an unsecured share – an attacker might get an NTLM credential to brute force or reuse elsewhere.
- Causing a client to believe automatically invoked executable code lives on a trusted server. For instance, impersonating a domain controller that clients use to run logon or startup scripts containing malicious payload.
SMB Interception Defenses
There’s no single step to prevent all interception attacks on any network protocol other than removing the protocol completely. It’s a tough job to secure a distributed system, especially when they otherwise provide value to users and organizations through ease of use at scale. The earth’s computing would be much “safer” without the Internet too, but the same way a villain might poison a city’s water supply, no one suggests we get rid of plumbing. The goal here is to create a highly discouraging target through layered defenses; don’t be worth the trouble of attacking!
Here are ten recommended steps you can take:
- Install updates
- Remove SMB1
- Remove guest authentication and fallback
- Disable the WebDAV protocol
- Restrict outbound SMB destinations by firewall
- Use UNC Hardening to require signing, encryption, and mutual authentication
- Use SMB 3.1.1
- Map drives on the fly with mandated signing or encryption
- Block NTLM & increase Kerberos Security
Install Updates
Ensure that you update Windows clients and servers with Microsoft-supplied security updates released every month to Microsoft Update, Windows Server Update Services, Microsoft Endpoint Configuration Manager, Microsoft Update Catalog) and Azure Update Management. Security updates are your best defense against known SMB vulnerabilities, and you should apply them as soon as your testing and change control process allows. The same goes for your third-party products using SMB; contact vendors for their update methods and patch those appliances and software.
Notice how I am not saying “if you don’t patch that Tuesday, you’re a dumdum.” I am saying patch as soon as you can. Defense in depth gives you the breathing room to deal with patching, big fleets, and technical debt. Notice how I am also not saying “always wait six months,” because I don’t depend on ad clicks to live.
Remove SMB1
Who could’ve seen this one coming? The SMB1 dialect dates to the 1980s with IBM and Microsoft DOS, a time when computer security was non-existent. It has significant architectural issues around interception attacks:
- SMB1 depends on the server to tell the client what security capabilities to use. A malicious server pretending to be your server can reply with “don’t be secure” and a client will connect unsafely.
- SMB1 doesn’t stop a malicious actor from altering the security capabilities response even from a legitimate server.
- SMB1 always tries user credentials, but if there is a failure, it then tries guest credentials. A malicious server pretending to belong to your organization – and didn’t have your credentials to begin with – can allow the connection and then steal your files or execute malicious code from its own provided files.
- SMB2 and later have many effective security features. A malicious actor who can intercept the initial SMB Dialect conversation can reply with “this server only supports SMB1” and client will then negotiate that unsafe protocol.
If you don’t know, I’m the grim reaper of SMB1
Solution: Uninstall or disable the SMB1 client on every device in your organization, regardless of their operating system. For Windows devices, review How to detect, enable and disable SMBv1, SMBv2, and SMBv3 in Windows and Windows Server. You should also remove or disable the SMB1 server on every device as an added best practice, as it has its own architectural security issues. Starting in Windows 10 and Windows Server 2019, the SMB1 protocol is no longer installed by default on most editions and is uninstalled automatically if not used on consumer and small business devices. Review the SMB1 Clearinghouse to see if you own any third-party products that require SMB1, then upgrade or replace them.
Remove Guest Authentication & Fallback
In Windows’ and other implementations of SMB1, if credentials fail from a bad password, the SMB client will try guest access. This is another legacy artifact of a time before NT and Active Directory domains, where workgroups often used guest access. For interception attacks, a malicious actor creates a server and tricks users into accessing it. The user password will fail, but then guest credentials work and the user connects and accesses malicious files. SMB2 and later also allow this behavior, but unlike SMB1, you can disable it and we did so by default in later operating system versions.
Solution: Disable the use of SMB guest fallback via Windows 10 and Windows Server 2016 and later OSes.
To stop use of guest fallback on Windows devices, configure the following group policy:
Computer configurationadministrative templatesnetworkLanmanWorkstation
“Enable insecure guest logons” = Disabled
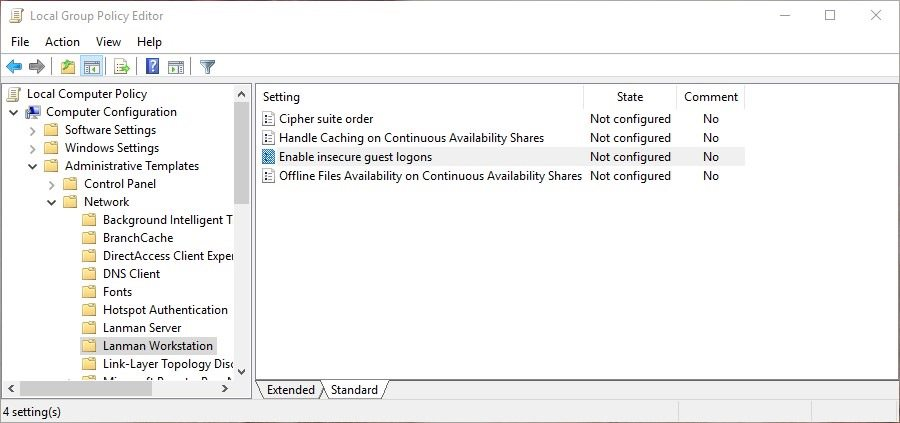
Alternatively, set the following DWORD registry value:
HKEY_LOCAL_MACHINESYSTEMCurrentControlSetServicesLanmanWorkstationParameters
"AllowInsecureGuestAuth"=0
Starting in Windows 10 Version 1709 Enterprise Edition and Windows Server version 1709, guest fallback is off by default. Windows 10 and Windows Server 2016 were the first to support this option.
Windows itself has not enabled guest authentication in the SMB server component since Windows 2000 and connections to a Windows server will never use guest unless an administrator intentionally enabled it. Many third-party SMB server implementations and devices allow this guest behavior however, and worse, many consumer storage devices intentionally rely on guest for “ease of use.” Nothing like someone’s photos folder on unsecured Wi-Fi with no SMB password.
Disable the WebDAV protocol
The Web Distributed Authoring and Versioning (WebDAV) protocol is a 1990s extension to HTTP for file access defined in IETF RFC 4918. Windows implements WebDAV via the “WebClient” service. When using WebDAV, access to a UNC path is converted to HTTP to allow access to a web server, exposing files. A server may implement HTTPS WebDAV, but many do not and by default the Webclient connects to HTTP/80 instead of HTTPS/443 unless a user specifies “@SSL” on the end of their server name in the UNC path.
It’s not possible to reliably upgrade the connection to TLS because many servers will not have certificates configured or even supports WebDAV over HTTPS. This means that most WebDAV connections for UNC paths are unencrypted. It’s also possible for a client to be configured to require SMB signing or encryption, then encounter a WebDAV-enabled server on the local network which does not allow either, which then forces the Windows client to downgrade to an unencrypted WebDAV connection.
Solution: Disable the WebClient service in Windows.
To stop use of WebDAV on Windows devices, configure the following Group Policy Preference:
Computer configurationPreferencesControl Panel SettingsServices
Service Name: Webclient
Startup: Disabled
Service action: Stop service
Alternatively, you can use an elevated PowerShell session:
Set-Service WEBCLIENT -StartupType DISABLED
Stop-Service WEBCLIENT
On Windows Servers, WebClient is a removable feature, called the “WebDAV Redirector”. You can uninstall it with Windows Admin Center, Server Manager, or Powershell. It’s not installed by default.
Note: enabling UNC hardening (see below) also prevents the use of WebDav. Two birds and all that.
Restrict outbound SMB destinations by firewall
Any kind of trick that sends a user to an evil destination server – like emailing them UNC links or dropping shortcuts into friendly SMB shares – counts as an interception attack in my book. One of the best defensive measures you can make is ensuring there’s no way to get redirected to a malicious server in the first place, by controlling your Defender and edge firewalls.
Solution: Follow the guidance I provided in Beyond the Edge: How to Secure SMB Traffic in Windows to stop access to server that aren’t specifically part of your org. That’s it, that’s the whole solution. :)
Use UNC Hardening to require signing, encryption, and mutual authentication
UNC Hardening is an SMB security option added in 2015 to Windows Vista/Windows Server 2008 and all later OS versions. It changed the SMB security model to start using client-defined security requirements instead of legacy server-defined requirements. UNC Hardening added the ability to check UNC paths for mandated security settings and refuse to connect if a server could not meet them. It’s a highly effective tool against redirection attacks because the client can authenticate the identity of the server to block spoofing attacks as well as guarantee SMB payloads aren’t tampered with or read, and refuse to connect.
Solution: Enable UNC hardening for some or all SMB shares in your environment, using the steps in KB3000483 under section “Configuring UNC Hardened Access through Group Policy”. You can specify a variety of UNC path patterns:
- <Server><Share> – The configuration entry applies to the share that has the specified name on the specified server.
- *<Share> – The configuration entry applies to the share that has the specified name on any server.
- <Server>* – The configuration entry applies to any share on the specified server.
For your list of servers using SMB you might want to refer to my earlier post on Beyond the Edge: How to Secure SMB Traffic in Windows.
You should require at least mutual authentication (Kerberos) and integrity (SMB signing), and you should evaluate using privacy (SMB encryption) instead of signing. Only SMB 3.x supports encryption; don’t require encryption unless all your machines are at least Windows 8 and Windows Server 2012 or are third parties with SMB 3 and encryption support. Requiring Kerberos doesn’t prevent an attempt at NTLM, so keep reading below.
There’s no need to configure both signing and encryption in SMB; encryption implicitly includes those signatures, and the SMB client ignores orders to do both. For more information on how UNC Hardening works, review MS15-011 & MS15-014: Hardening Group Policy.
Note: Windows 10 and Windows Server 2016 first enabled UNC Hardening by default for all shares named “SYSVOL” and “NETLOGON,” requiring mutual authentication and integrity when connecting. If neither of these share names mean anything to you, crack those AD books.
Use SMB 3.1.1
SMB 3.1.1 first shipped in Windows 10 and Windows Server 2016 and it includes a new mandatory security feature called pre-authentication integrity. This protects against any tampering with Negotiate and Session Setup messages by using cryptographic hashing, which enables the client and server to mutually trust the connection and session properties. This new feature supersedes “secure dialect negotiation” introduced in SMB 3.0. In simple terms, it signs or encrypts the early phases of SMB connections that define security capabilities later. You can’t turn pre-authentication integrity off, but if a client uses an older dialect, it won’t be used.
Solution: Ensuring all your devices and virtual machines in your organization support SMB 3.1.1 is the first step; Windows always negotiates to the highest available protocol and is going to use 3.1.1 if the server allows it.
But you can take this further by mandating the latest dialect. I describe this in Controlling SMB Dialects, which means setting two DWORD registry values:
HKEY_LOCAL_MACHINESYSTEMCurrentControlSetServicesLanmanWorkstationParameters
MinSMB2Dialect: 0x000000311
MaxSMB2Dialect: 0x000000311
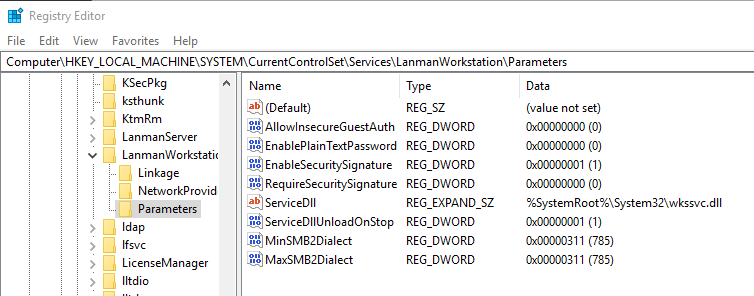
Remember that your environment isn’t just Windows. If some third-party device or software in your org doesn’t support SMB 3.1.1, requiring that dialect will break them. This is another candidate for Group Policy Preferences configuration of your fleet.
Map drives on the fly with mandated signing or encryption
Windows versions 1709 and later went a bit further and allow you to create encrypted or signed mapped drives on the fly from the command-line. While this is outside the reach of the average user, it’s a great option for logon scripts and admins.
Solution: Map drives that require signing or encryption. You can use the NET USE command or New-SmbMapping PowerShell cmdlet to map drives by specifying “RequireIntegrity” (signing) or “RequirePrivacy” (encryption).
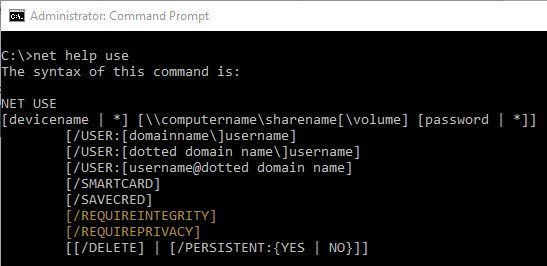
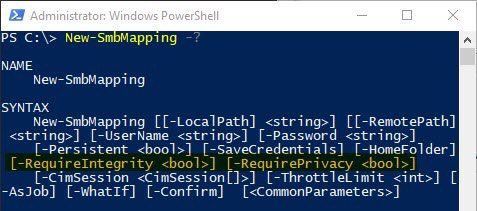
This feature doesn’t change how signing or encryption work or the dialect requirements. It just means that if you try to map a drive and the server refuses to honor your requirement for signing or encryption, the drive mapping will fail. The idea being that it’s better to not connect than connect unsafely.
Block NTLM & increase Kerberos Security
Finally, we come to the one solution that’s not about SMB at all: preventing the use of the unsafe legacy NTLM protocol and all its variants, then increasing Kerberos’ default security. If you really want to stop harvesting of credentials, pass-the-hash, SMB relay and that entire class of attacks that are really about the security provider and not the network protocols used, you need to end your use of NTLM. It’s not always easy, but it is certainly easier now than when I first discussed this option 11 years ago. Furthermore, if you want to prevent more sophisticated attacks like pass-the-ticket and Kerberoasting, you’ll need to increase your Kerberos security defaults.
11 years ago, ohnoes, I am so old.
Solution: Restrict or stop use of NTLM, then increase Kerberos security.
For NTLM, this means auditing your environment to find which clients and applications are using NTLM and either reconfiguring them to use Kerberos (because it was a mistake, like using IP addresses) or upgrade them. Windows has a full event log auditing mechanism for client, server, and domain controller NTLM usage. You can assess your usage by enabling that auditing mode, reviewing logs, and start turning NTLM off in a controlled and staged fashion. One option that wasn’t available when I wrote that blog post in 2009 is Azure Sentinel and its insecure protocols dashboard. If you have a Premier contract with us, dive into that option instead of doing things by hand. And it finds SMB1 too!
For Kerberos, this means adding increasingly effective protection layers for offline and ticket passing attacks:
- Longer passwords and phrases: 15 characters or more without dictionary words makes offline brute force extremely time consuming. Avoiding dictionary attacks with pass phrases makes that even better. Hard to enforce or train users but Azure AD Password Protection can help here. Increasing password length and complexity with NTLMv2 can help too, but… ick.
- Windows Hello for Business/smart cards: Two-factor authentication with Windows Hello For Business or smart cards adds an entire new layer of protections, as well as switching to Public Key Cryptography for Initial Authentication (PKINIT) in the Kerberos protocol instead of just using passwords. If you’re interested in how the Windows Hello passwordless solution works with AD and Kerberos, review the How it works docs or watch some of their short videos.
If you’re not already planning your Windows Hello rollout, it’s time to get hot.
- (gMSA: using group Managed Service Accounts for services makes brute force and dictionary attacks to crack passwords effectively impossible, with its 127 random character construction. Doesn’t help your end users though)
- FAST: Kerberos Armoring (Flexible Authentication Secure Tunneling) prevents Kerberoasting because the user’s pre-authentication data is protected and no longer subject to offline brute force or dictionary attacks. It also prevents downgrade attacks from spoofed KDCs and now requires you to compromise computers locally to make use of ticket attacks instead of just picking them off the wire. Adding Credential Guard can make that local compromise of tickets even harder, as stealing of a ticket-granting ticket and cached service tickets is now blocked. FAST requires raising your AD domain functional level and ensuring all your computers are at least Windows 8 and Windows Server 2012. You can control it all through group policy. Like Windows Hello for business, it’s the next level you need to start planning.
- SCRIL: Smart Card Required for Interactive Logon is one final choice, but frankly, difficult to deploy. When you configure a user with SCRIL, AD changes the user’s password to a random 128 bit set. Users can no longer use a password to logon interactively and don’t even know their password; it can even have un-typeable bits. Their smart card, with its local protection PIN, becomes their password. And this means anytime anyone needs to know their password to do something, especially if they are an Admin, they are out of luck. All sorts of enterprise thingies are likely to be very unhappy about this.
Last thoughts
Like all security plans, you are on a journey that’s unlikely to end. Your goal is to get secure enough make your environment is very unpleasant to attack. SMB is a hugely important protocol through Windows, Mac, Linux, storage, devices, and mobile. It is transporting the only thing your organization cares about in computing: data. You know, the “I” in “Information Technology.” Securing it from most interception attacks is likely to secure from practical attacks for all but the most demanding threat models.
If you’re interested in learning more about how SMB signing and encryption work, I highly recommend Edgar Olougouna’s SMB 2 and SMB 3 security in Windows 10: the anatomy of signing and cryptographic keys and SMB 3.1.1 Pre-authentication integrity in Windows 10. Edgar leads our protocol documentation team and he’s forgotten more about how the protocol works than I’ll ever know.
A huge thanks to Steve Syfuhs for sharing his in-depth knowledge around Kerberos and to Sean Metcalf for his always-excellent AD Security blog. A couple of menschen.
I hope you found this useful. Until next time,
– Ned Pyle
by Scott Muniz | Jun 28, 2020 | Uncategorized
This article is contributed. See the original author and article here.
Recently I was approached by a customer on concerns and possibilities around going from on-premises to hybrid to cloud only. The customer had successfully gone through the hybrid scenario and was able to remove all known dependencies with their on-premises environment. They decommissioned everything but two domain controllers, an Exchange server and their Azure AD Connect server. All of their services have been moved into Azure as well as their client devices Azure AD Joined. Everything is working as expected and they are ready, albeit apprehensive, to take the next leap. This customer does not have a development environment so any testing is done in real time with no real way to test this without impacting their active users. Taking this next step with caution is smart and advisable.
With that in mind I knew if I was in their place, for which I have been in the past, with this process being not well documented and it does not appear that many have gone through this entire scenario I would feel much better if I could see it done first. I would also breathe a little easier if there was a roll back plan just in case something odd went wrong and I wanted to go back to a state before I began the full cut-over last phase. That is the purpose of this article, to walk through my test from everything being migrated into Azure except user management and unplugging completely from any on-premises presence.
Goal:
The ultimate goal is to become a cloud only environment. I have simulated enabling Password Hash Sync with Password Write Back in order to remove my ADFS farm. I also do not have Exchange in my environment. There are no networking devices or any other servers using my domain controllers for authentication. All user logins utilize Azure AD credentials whose attributes are still managed by the on-premises Active Directory and sync’d through the Azure AD Connect server. In order to best support my customer, my Azure AD Connect server was installed with SQL Express, I am not using a full SQL server installation. These steps would be slightly different if SQL Server was used as it would make the roll back process a little easier. But this is a small environment and SQL Server was not required.
Demonstration
First, I want to make sure I document my Azure AD Connect configurations. This will be needed during the roll back phase. I also want to set the stage for the current configuration of my environment prior to beginning this last step to a cloud only organization.
Let’s look at what is shown within the Azure AD Connect blade within the Azure Portal.
- Login to the Azure portal: portal.azure.com
- On the home screen click on the Azure AD icon
- From the Azure AD blade menu, click on Azure AD Connect
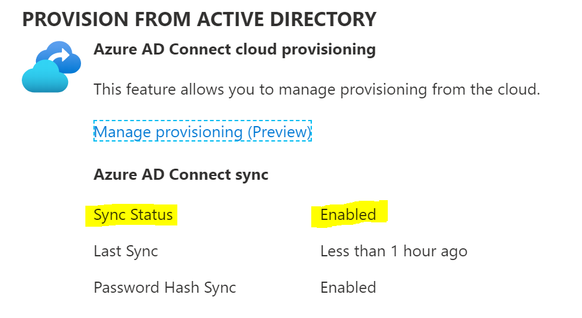
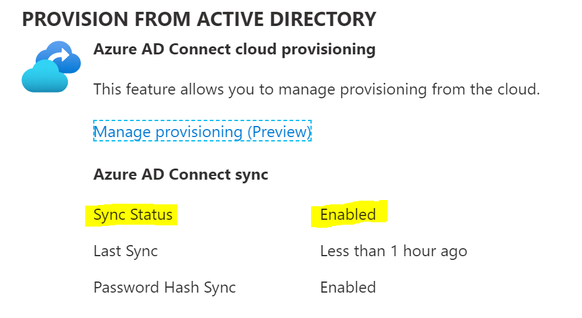
You will notice the Sync Status is set to ‘Enabled’. It also reports that there has been a recent sync cycle performed.
Next let’s get the configuration settings of the Azure AD Connect server.
- Login to the Azure AD Connect server
- Launch the Azure AD Connect console (if there is a current sync cycle going it will not allow you to proceed further until it completes. Here you can wait until it is done or run a PowerShell command or use the sync service console to stop the sync)
- Once the console is opened click on ‘Configure’
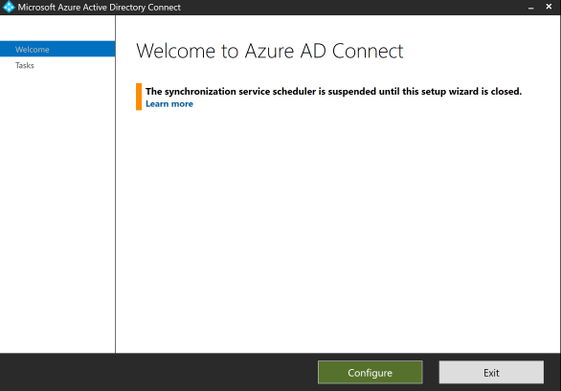
- Click on ‘View current configuration’ and click ‘Next’
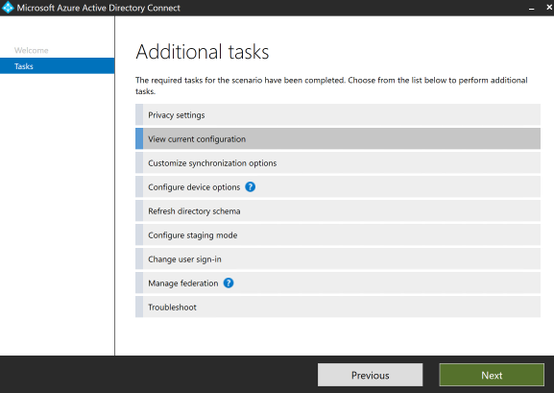
- Take a screen shot of the settings for later reference
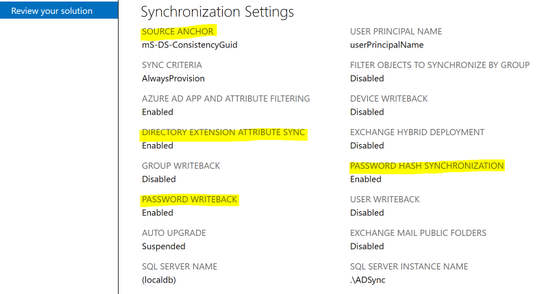
You may also want to take screen shots of the ‘Customize synchronization options’ section just to have a visual of the OUs selected or any extension attributes added.
Test user for the scenario: User is managed within the on-premises Active Directory and sync’d by the Azure AD Connect server. Note Source is listed as ‘Windows Server AD’. This represents the user object being a synchronized account.

Test group for the scenario. Customer was curious what happens to the security groups if a roll back is required. Also note Source is ‘Windows Server AD’.

Disable on-premises sync
After recording the basic configuration settings and making note of the objects we will be using for testing we will begin to disable services in order to perform testing scenarios without hard cut over. In order to continue we first need to determine what version of PowerShell is installed on the server as well as from a remote administrative device if one will be used.
Launch a PowerShell console as administrator on the Azure AD Connect server
Run the follow command to determine the PowerShell version installed. (PowerShell V7 does not support the process used in this document)
Get-Host | Select-Object version
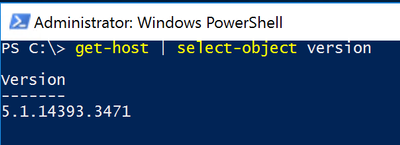
Now that we have determined the version is acceptable for our task, we will disable the sync cycle schedule by running the following command:
Set-ADSyncScheduler -SyncCycleEnabled $false

Verify Scheduler has been disabled (this is similar to shutting down the AADC server)
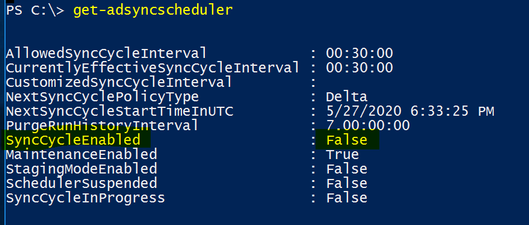
If you look back at the Azure AD Connect blade in the Azure portal you will notice that the Sync services still report as ‘Healthy’. We have not removed the service. Just paused any cycles from running. This does mean that during this time no new accounts can be created nor current accounts modified.

We will be stepping through this process in a very controlled manner so you may feel that some of the testing steps are not necessary. However; I wanted to be sure this process was as seamless as possible to the end users so I strongly believe in testing along the way. This means making sure there is an understanding that by disabling the sync cycle that it will not impact the current objects in Azure AD while their management platform is offline.
To do this we will list all of the users. From a PowerShell console type ‘Connect-MsolService’. Sign in with an account with the Global Administrator role.
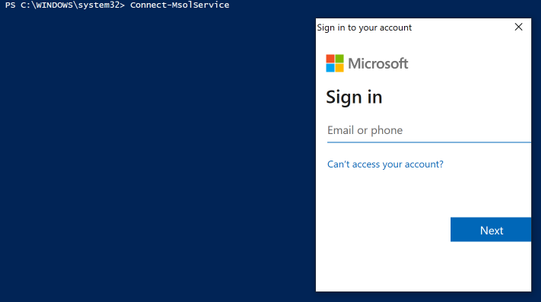
If you successfully connect (no errors received), run the following command to see the list of your users.
Get-MsolUser

Verify and record synchronization configuration by running the following command
Get-MsolDirSyncFeatures

User login testing
At this time I successfully tested user login to portal.office.com (any available Azure resource will do)
Once this step is done and you have verified that your users are still able to successfully sign-in to resources it is time to begin the fun stuff.
Begin the Azure AD Connect Decommissioning Process
The first step in changing your synchronized users to cloud managed is to disable synchronization in your tenant. To see the current configuration run the following command:
(Get-MsolCompanyInformation).directorysynchronizationenabled

You should notice that this command returns ‘True’ meaning that synchronization is enabled for your tenant.
To disable the synchronization run the following command and click ‘Yes’ to proceed. This cannot be undone immediately so be sure you are ready to proceed with this process.
Set-MsolDirSyncEnabled -EnableDirSync $false

Now when you re-run the ‘Get’ command it will report as False. This verifies that the change was successful

Prepare to remove Azure AD Connect services
Our next step is to make sure we have solid information to recover if required.
Because we are using SQL Express on the Azure AD Connect server and it is a virtual machine, we will be creating a backup of the virtual machine. However; the recovery process will not use this to restore the service. This is just an extra step to ensure if there is complete failure and missing information we have an option to review.
We also need to ensure you still have the same version of the Azure AD Connect service installer package that is currently running. This is not a hard requirement with our environment as we are not using SQL Server but will provide a familiar experience when recovering. Copy these files to a backup location off of the server.
Next we will backup the configuration of the Connect service. Let’s create a folder to hold all of this information to quickly move to the off-server location identified above.
Create a folder to store the exported data

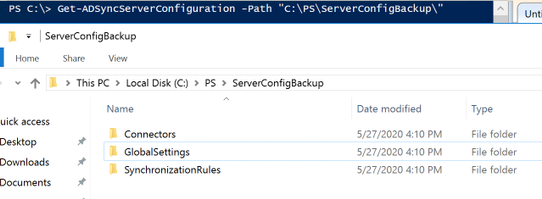
Within a PowerShell console create the backup files and save them to the newly created folder. To do so run the following command and then verify the files were successfully created.
Get-ADSyncServerConfiguration -Path “C:PathToNewFolder”
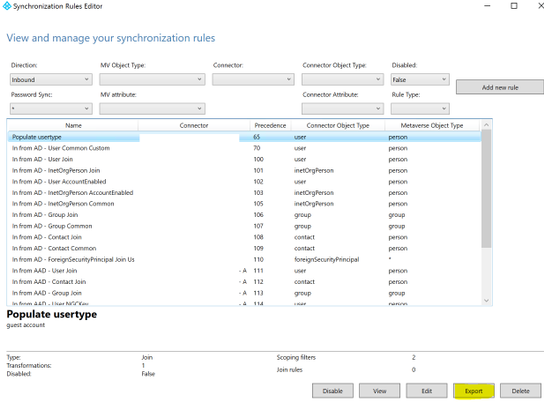
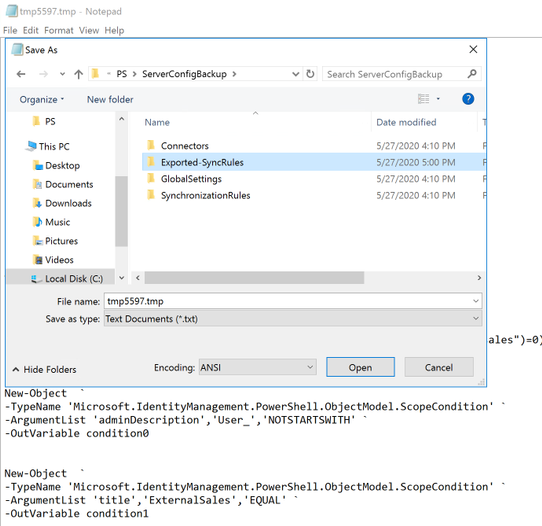
Next, we will export custom enabled sync rules. As this will not be automatically restored during a recovery within our scenario we need to make sure we have this available to recreate. On the Azure AD Connect server launch the Synchronization Rules Editor. For ‘Inbound’ and ‘Outbound’ rules export the custom and any default rules for which you may have modified. To do so, highlight the rule in the editor and click ‘Export’. It will create a file that you will need to save to the newly created folder identified earlier (perhaps a sub folder in this folder specifically for these rules). You can give them a meaningful name instead of the default. This gives us a peace of mind that we have our custom rules even though we exported them in the previous step. It also allows us to quickly identify them by a specific name if troubleshooting is required later in the recovery process.
Our last step to change to a cloud only environment is to uninstall the Azure AD Connect server services. This will signal to your Azure AD tenant to take control of all of the currently synchronized objects.
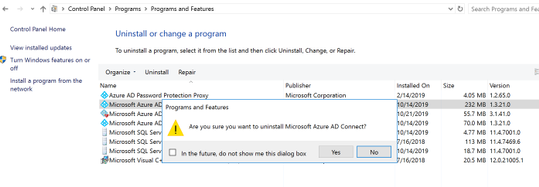
To uninstall Azure AD Connect service, navigate to Programs and Features on the Connect server. Highlight Microsoft Azure AD Connect Server and click on ‘Uninstall’. When prompted click ‘Yes’ to continue.
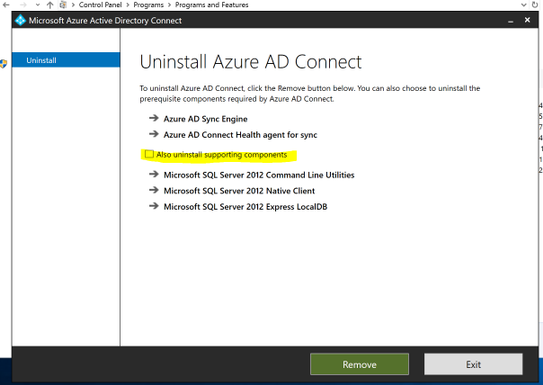
I de-selected to also uninstall the supporting components as I knew I would be recovering my environment and even if not it makes no difference. The main goal is to get rid of this server.
Continue through to the end of the wizard and click ‘Exit’.
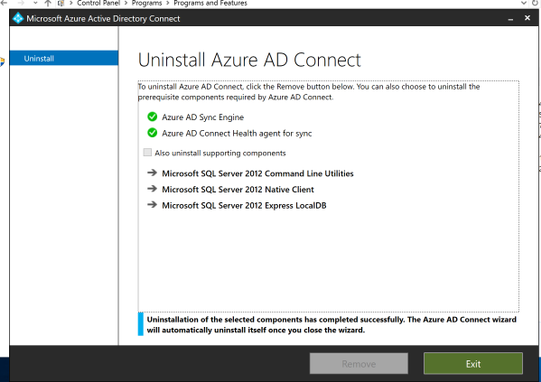
Once the wizard has completed, refresh the program list and note that all of the Azure AD Connect services have been removed.

Once this is complete, you should notice the status has changed in the Azure AD Connect blade within the Azure portal
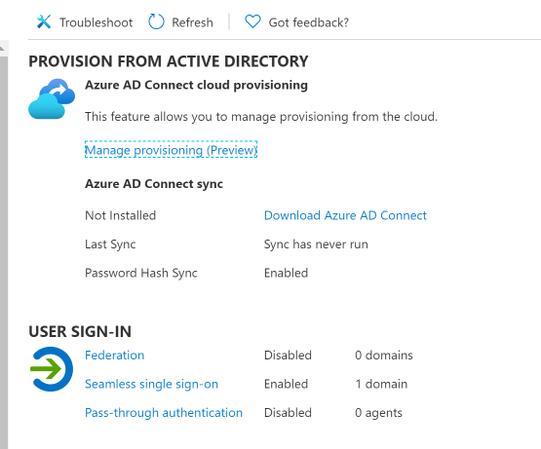
It will take approximately 72 hours before you begin to see user and group objects change source from Windows AD Server to Azure Active Directory. Once you have noticed they have all changed, your environment is cloud only. Congratulations! Hopefully this all went smoothly. However, if not and you need to revert, have no fear and keep reading.
New environment
Because there was a question about what changes would happen to user and group objects if a roll back is required, I wanted to add a few testing steps. So, I added new attributes to the past sync’d test user using the Azure AD portal.

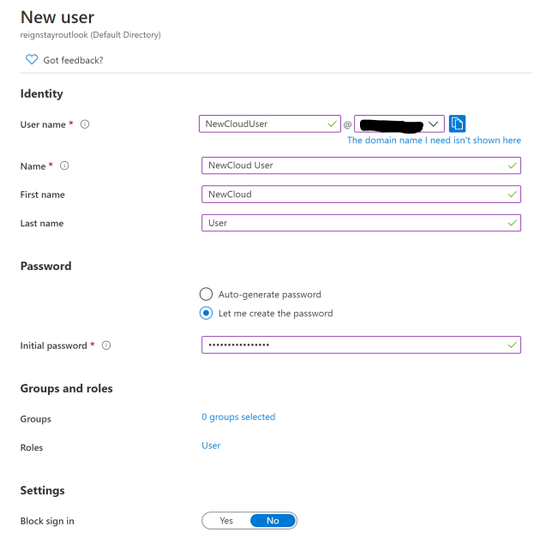
I also create a new cloud user in the custom domain.
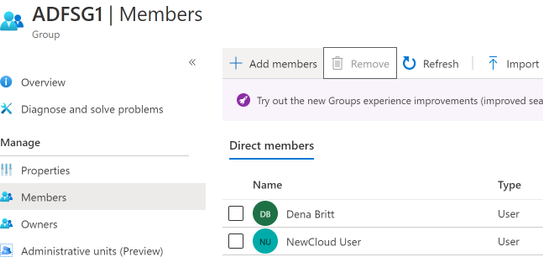
To test group modifications I added the new user and modified past sync’d test user to a past sync’d test security group. I also removed a current member that was sync’d from on-premises.
User login testing
Because we are testing all along the way, I successfully tested the new user and the newly switched test user logins to portal.office.com (any available Azure resource will do)
Roll back scenario
Even though it shouldn’t happen, there may be any number of reasons that you will need to revert back to an on-premises managed domain. For this scenario keep in mind, we did not have SQL Server installed. Even though the steps here could be repeated regardless of which setup you need, if immediate roll back is required SQL Server might make it a bit easier.
First let’s review tenant sync status

Because as you see we are still set to not synchronize, we will need to re-establish synchronization for the tenant
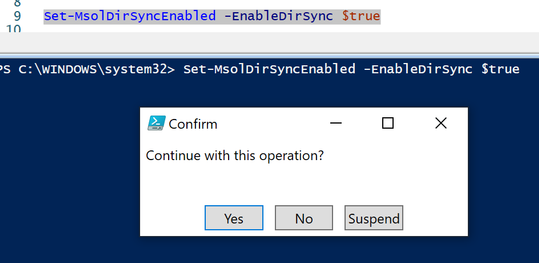
Verify that synchronization has been re-enabled

With the return of ‘True’ we know that our tenant is now ready to again synchronize objects from another source.
Reestablish sync with AADC
Once synchronization has been reestablished in the tenant, we will run the Azure AD Connect installer for the same version that was uninstalled above.
Navigate to the folder where the installer resides and run it. Depending on your policies you may need to perform a ‘run as’ with a privileged account.
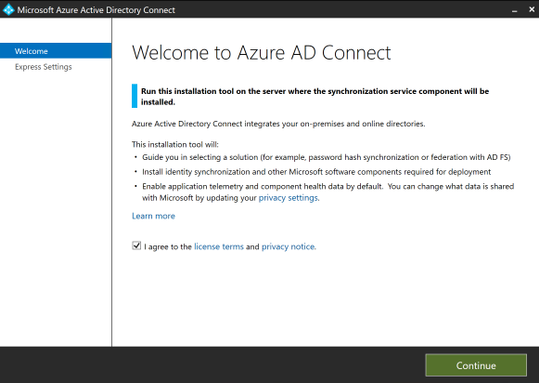
Select the required settings
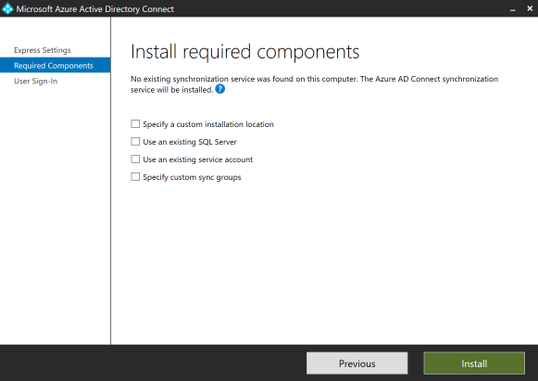
Continue through the wizard prompts
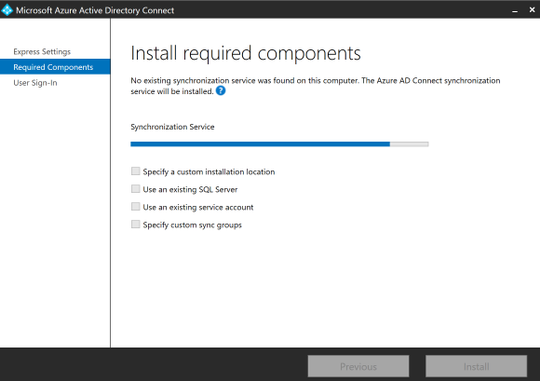
Be sure to select the same settings that you made note of before we began on our journey and select them as needed throughout the installation
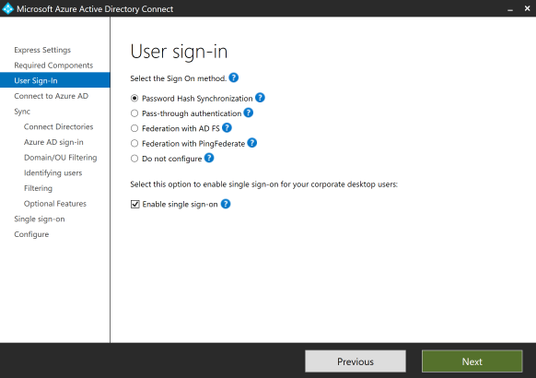
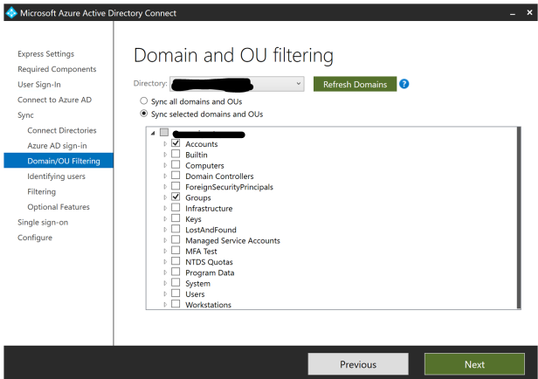
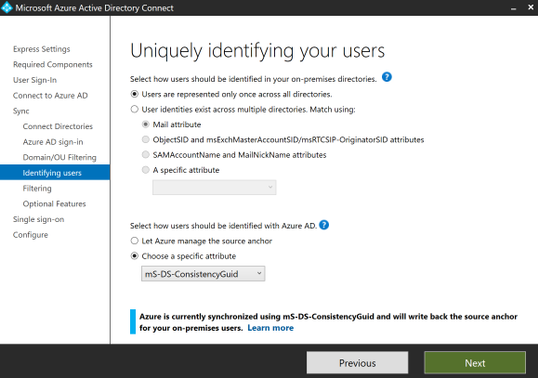
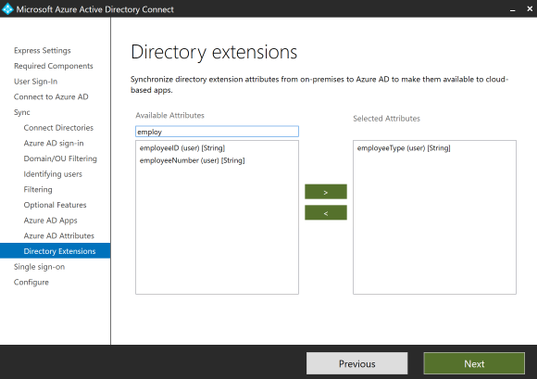
When you reach the install page select to “Enable staging mode:…” and uncheck the box to start the sync process. We want to take this process slowly to make sure that the user and group objects will join correctly.
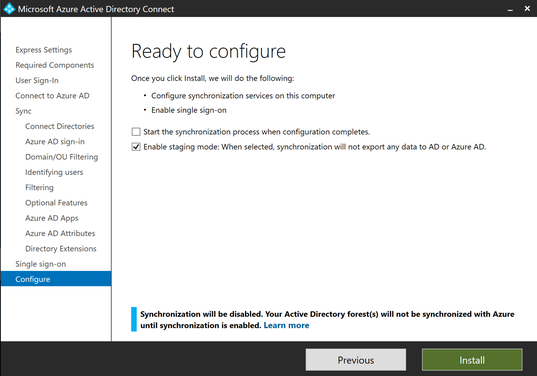
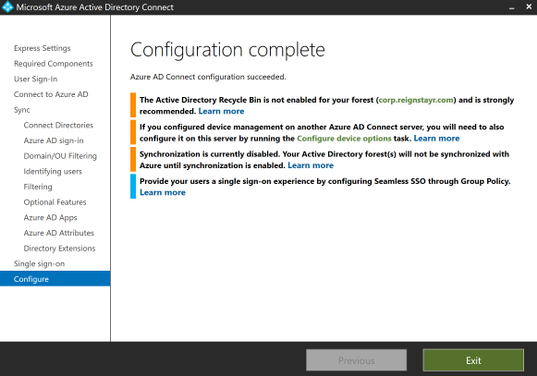
Click ‘Exit’ when the installation completes
Navigate back to the Azure AD Connect blade in the Azure portal and notice that the sync status has changed back to Enabled
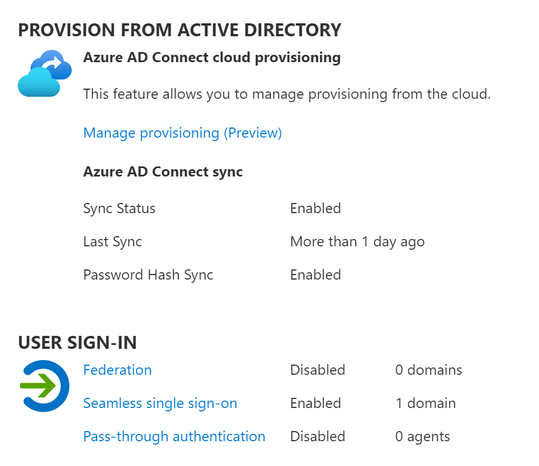
Now that the service has been reinstalled, you may need to open the Synchronization Rules Editor and modify and create custom rules as needed.
We will now make sure the Connect server will sync objects the way we want and not throw our environment into a blurry mess. Launch the Synchronization Service Manager on the Azure AD Connect server.
Click on Metaverse and run a full search. Note there are no objects returned.
Click on ‘Connectors’ and run the following tasks in this order. Note depending on the size of your environment these tasks may take some time to complete.
- ‘Active Directory Connector name’ – Run – ‘Full Import’
- ‘Azure AD Connector name’ – Run – ‘Full Import’
- ‘Active Directory Connector name’ – Run – ‘Full Synchronization’
- ‘Azure AD Connector name’ – Run – ‘Full Synchronization’
Once these four tasks have completed successfully click on Metaverse Search again and search for your test user. Click on Properties then Connectors. You will notice that the on-premises connector object has joined with the Azure AD connector object. This confirms that our user and group objects will successfully join during an Export. Please feel free to verify several users and groups before proceeding to ensure there were no unforeseen issues.
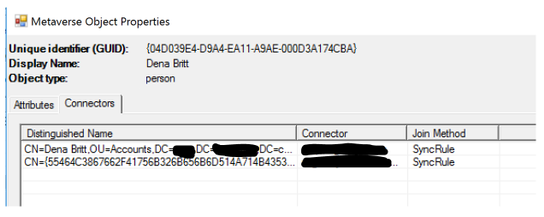
If your objects are not joining correctly you may need to review the configuration settings and sync rules to ensure they have been recreated correctly. Once this has been done, you can test individual object commits within the metaverse before running the full import and sync tasks again to reduce the amount of time troubleshooting.
Since successful object joins have been verified we will now change the Azure AD Connect server from staging mode to syncing mode. Launch the Azure AD Connect wizard and click ‘Configure’. If it fails to start a sync cycle may be in progress. You can either wait until this completes or force a stop as mentioned above.
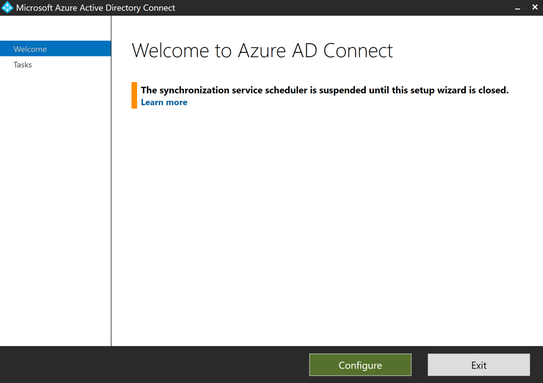
Highlight ‘Configure staging mode’ and click ‘Next’
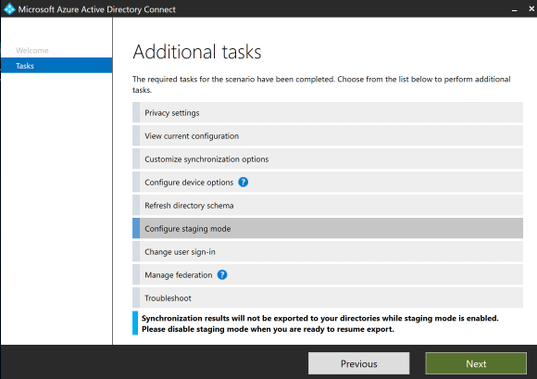
Uncheck ‘Enable staging mode’ and click on ‘Next’
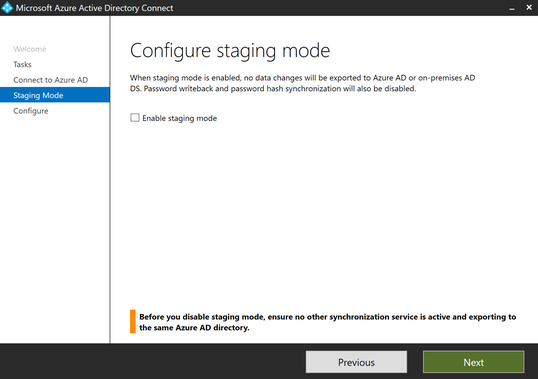
Make sure the box is checked to start the sync process upon completion. This will kick off a full sync.
Click ‘Configure’
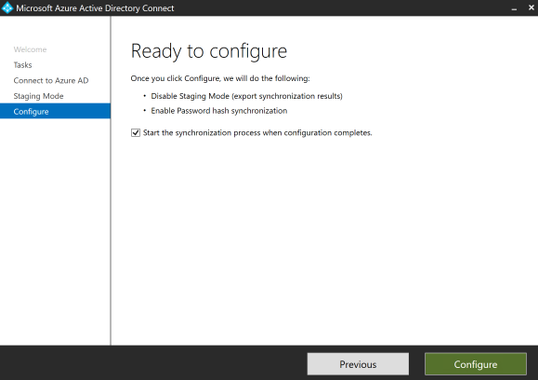
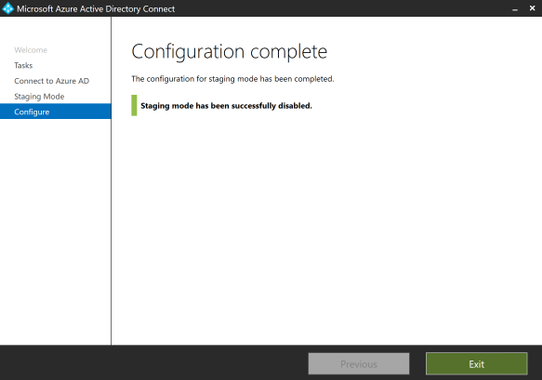
Open the Synchronization Service Manager and click on Operations. You will notice a full sync cycle will run and complete without intervention.

Go back to the Azure AD portal and view the user and group objects. Notice that they now again show source as Windows Server AD.


The changes made to the user object in the Azure portal while cloud managed have been removed as they did not exist in the on-premises Active Directory
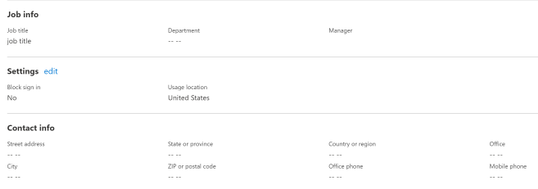
Review the group membership for the test group. This has been overwritten by the membership of the on-premises security group as expected.
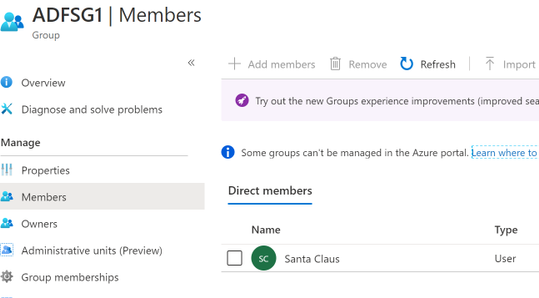
Remember, these objects are again managed by the on-premises Active Directory; therefore, any changes that had been made prior to returning to a hybrid model will be overwritten.
Summary
We have successfully been able to take a bare bones hybrid environment to cloud only and back again ensuring users could login throughout the entire process. There was never any noted impact to user resources, but it did require a planned downtime for object management. Realizing that this is an extreme model taking things very slowly and documenting in several different ways provided a method to ensure that we were able to return back to the previous state with little to no interruption to active users. There are several ways this could be tackled, some may be easier, but this one is definitely thorough.
I hope this helps you make the decision if it is a right move for you and if so feel a little better about taking the leap.
Helpful resources:
https://docs.microsoft.com/en-us/office365/enterprise/turn-off-directory-synchronization
https://docs.microsoft.com/en-us/office365/enterprise/powershell/connect-to-office-365-powershell#connect-with-the-microsoft-azure-active-directory-module-for-windows-powershell
https://github.com/Microsoft/AADConnectConfigDocumenter
https://docs.microsoft.com/en-us/azure/active-directory/hybrid/how-to-connect-install-existing-database
by Scott Muniz | Jun 27, 2020 | Uncategorized
This article is contributed. See the original author and article here.
A question we as Cloud Advocates get all the time, in person and online is:
“how to I start improving my company’s security posture in the cloud?”
Dean Bryen (@deanbryen) gives you his answer. Check it out!
Cheers!
Pierre Roman
by Scott Muniz | Jun 27, 2020 | Uncategorized
This article is contributed. See the original author and article here.
Would you like to Bring top content, most recent edits and most viewed into your doors when you open you page in the morning to see what your colleagues has added?
The answer to that is done by Microsoft using its Highlighted Content web part in SharePoint Online
Let us try this solution that will make your daily job easier in finding content.
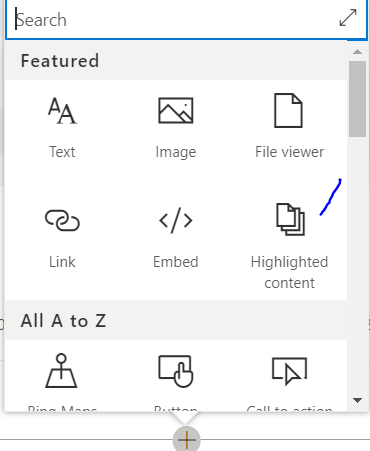
Let us add web part “Highlighted Content” by pressing the + button and selecting it as shown in the following image

Once we add it, it will look like the following image

Let us adjust it now to select where we want to get content from, press on the web part and from left you will find pen button to edit its properties click on it this will make the properties appear in the right
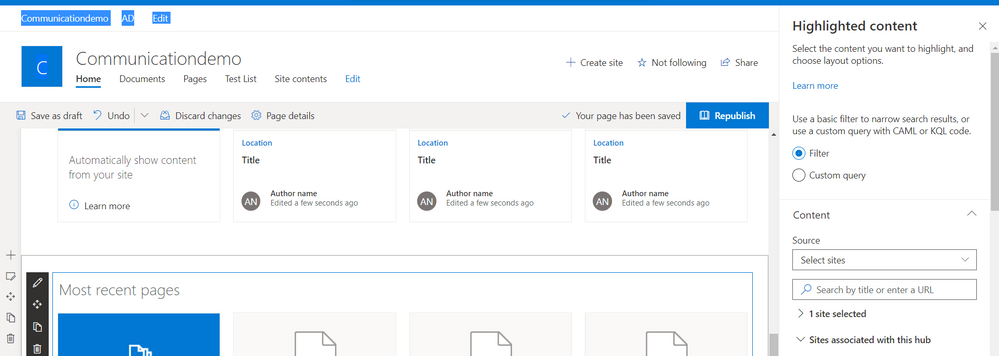
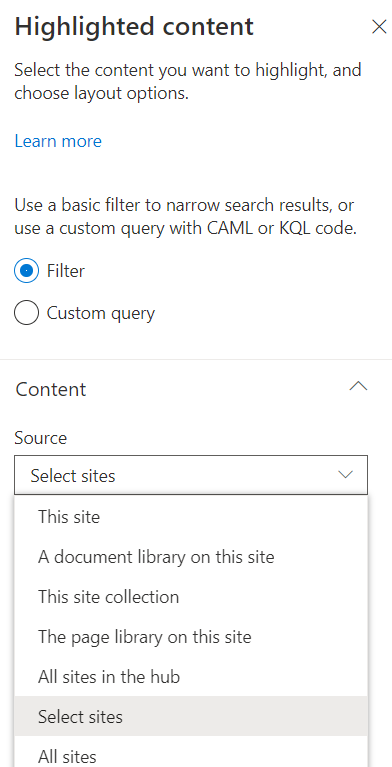
The following image shows the list of properties that we can modify, like we can make filter and specify the site to bring content from
Once we save the properties we set, the web part will start retrieving data as shown in the below image
Some notes when dealing with this web part:
1- It depends on search so if you added new document/page you will need to wait till new content is indexed then it will appear in the web part.
2- If you want to add managed property to filter using it, you will need to reindex the whole site from site settings.
For More links about this topic in TechNet Wiki:
SharePoint Online Modern Team Sites
SharePoint: How to display a list of subsites on modern site page
by Scott Muniz | Jun 27, 2020 | Technology, Tips and Tricks, Uncategorized
This article is contributed. See the original author and article here.

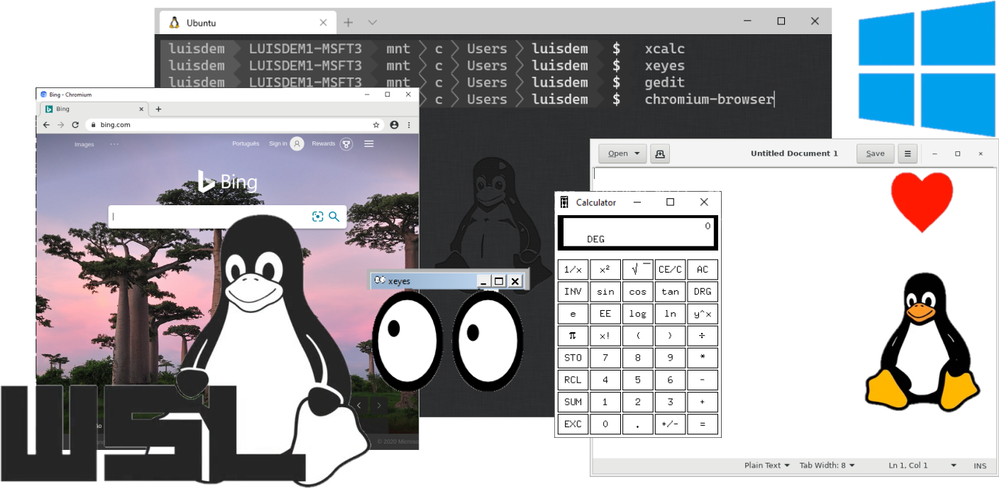
In this post I will demonstrate how to run Linux GUI (Graphical User Interface) applications on Windows Desktop platform.
For now, it is necessary to install a third-party App to run the GUI Apps, but Microsoft announced on //build 2020 that they will release soon an improvement that will not require any third-party component to run Linux GUI Apps on Windows Desktop.
Pre-requirements:
If you want to know how to install WSL on Windows 10, please check the following post:
 Using WSL2 in a Docker Linux container on Windows to run a Minecraft Java Server
Installing the X Server
The X server is a provider of graphics resources and keyboard/mouse events. I am using the VcXsrv Windows X Server that is open-source and is frequently update.
The first step is to install the third-part display manager called VcXsrv Windows X Server available at:
https://sourceforge.net/projects/vcxsrv/
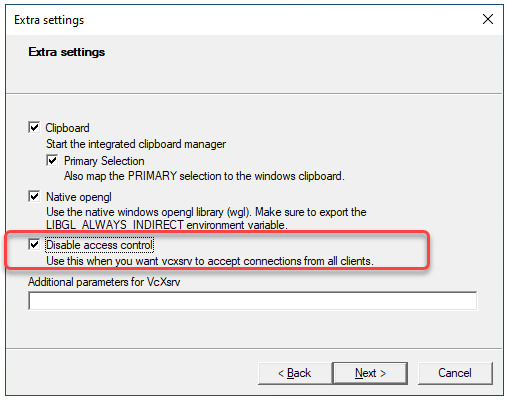
During setup is important to disable the access control to avoid the permission denied error when trying to run a GUI application:
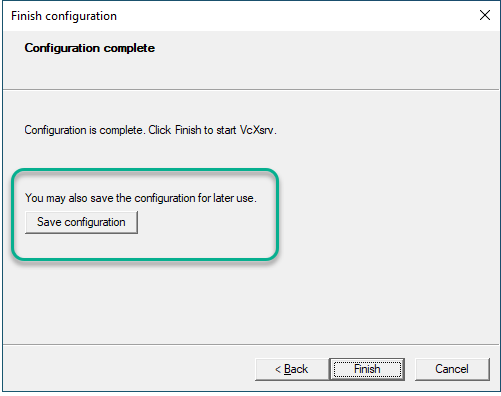
To warranty that the “Disable access control” will be always checked, save the configuration and always launch VcXsrv using the configuration file (config.xlaunch):
The next step is to set the DISPLAY environment variable on Linux to use the Windows host’s IP address as WSL2 and the Windows host are not in the same network device. It is necessary to run the following bash command to load the correct IP address on launch:
export DISPLAY="`grep nameserver /etc/resolv.conf | sed 's/nameserver //'`:0"
Running the following command, it is possible to see that the $DISPLAY environment variable now has the Windows Host’s IP set:
Echo $DISPLAY
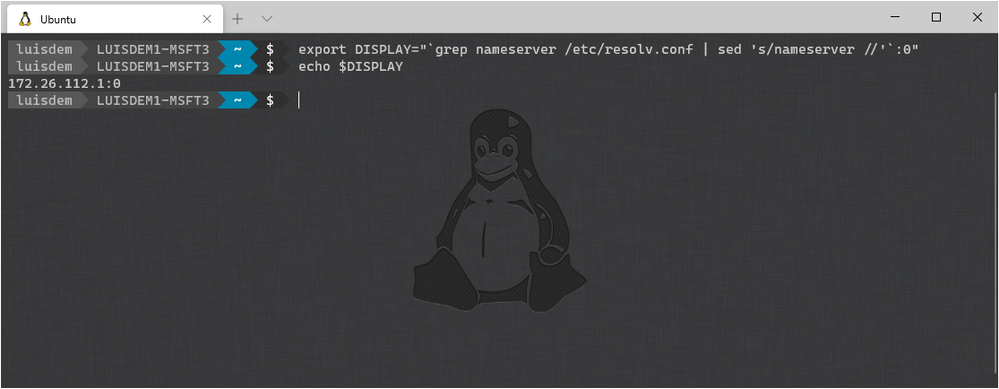
To avoid having to run that command every time that WSL is launched, you can include the command at the end of the /etc/bash.bashrc file:
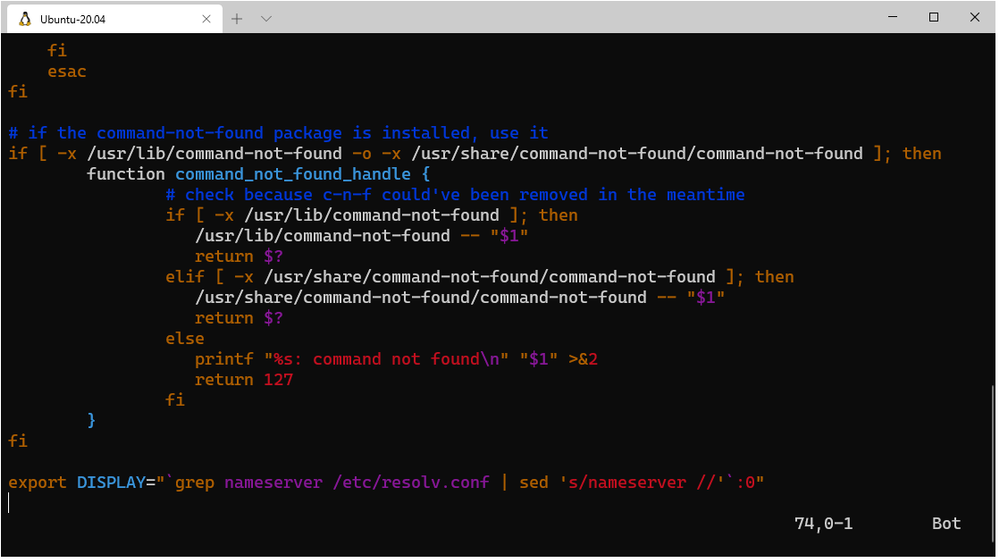
Done! Now you can run the Linux GUI Apps on Windows desktop.
Let’s try this out!
Follows some Apps that you can use to test:
Install Chromium Dev :
sudo add-apt-repository ppa:saiarcot895/chromium-dev
sudo apt-get update
sudo apt-get install chromium-browser
Install GEDIT:
sudo apt install gedit
gedit
Install x11-apps:
sudo apt install x11-apps
xeyes
xcalc
Make sure that XLaunch is running and before calling the Linux GUI Apps on Windows Desktop environment.
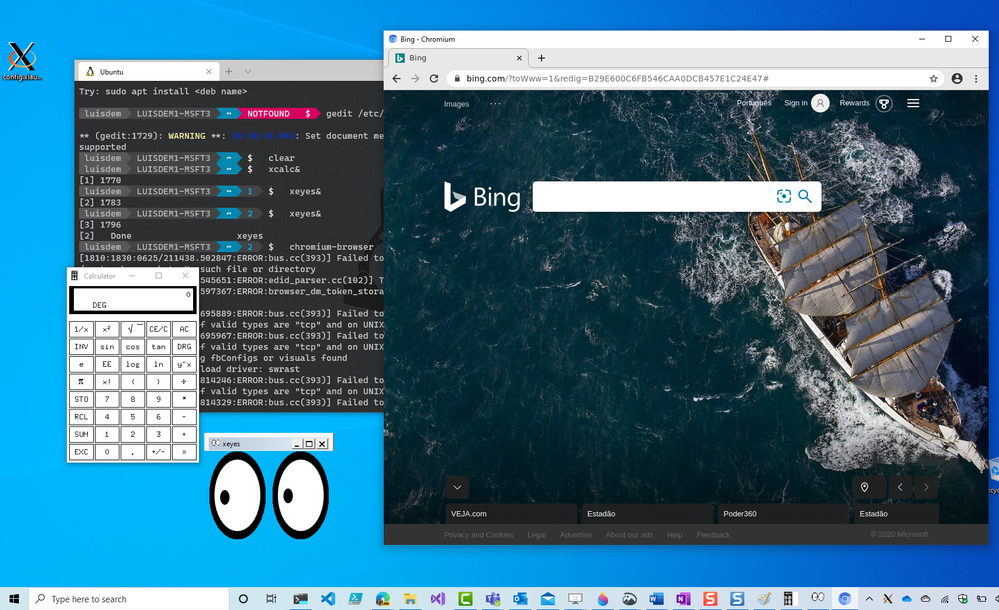

What about accessing the Linux Desktop Environment via RDP?
The first thing that you need to do is to install a Linux Desktop Environment. I will user Xfce as it is a lightweight one.
Run the following commands to install Xfce:
sudo apt install xfce4
The next step is to install the xrdp that provides a graphical login to remote machines using RDP (Microsoft Remote Desktop Protocol).
sudo apt install xrdp
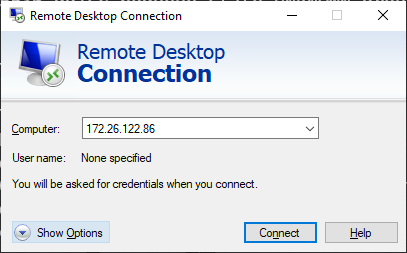
Type the following command to get the WSL IP address:
ip a
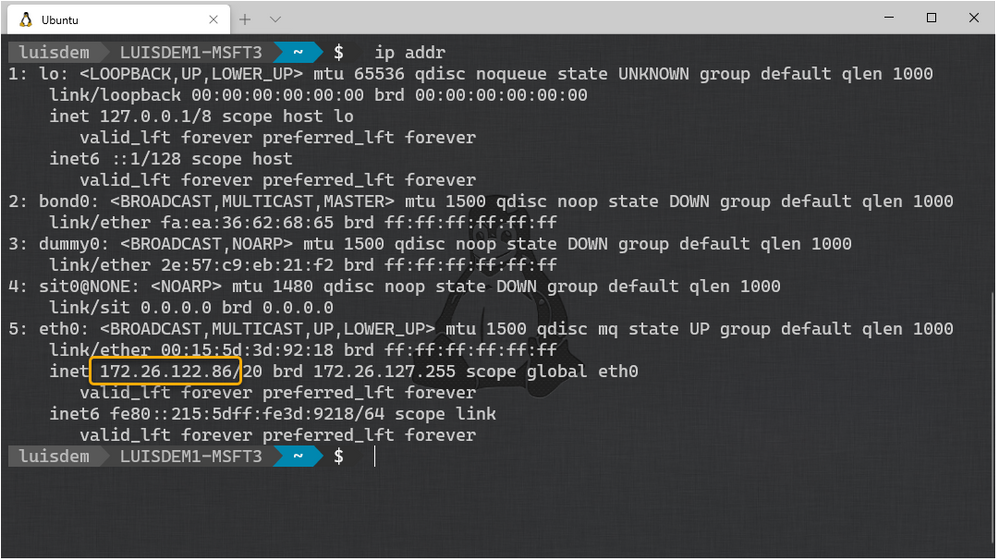
Make sure that xrdp service is running:
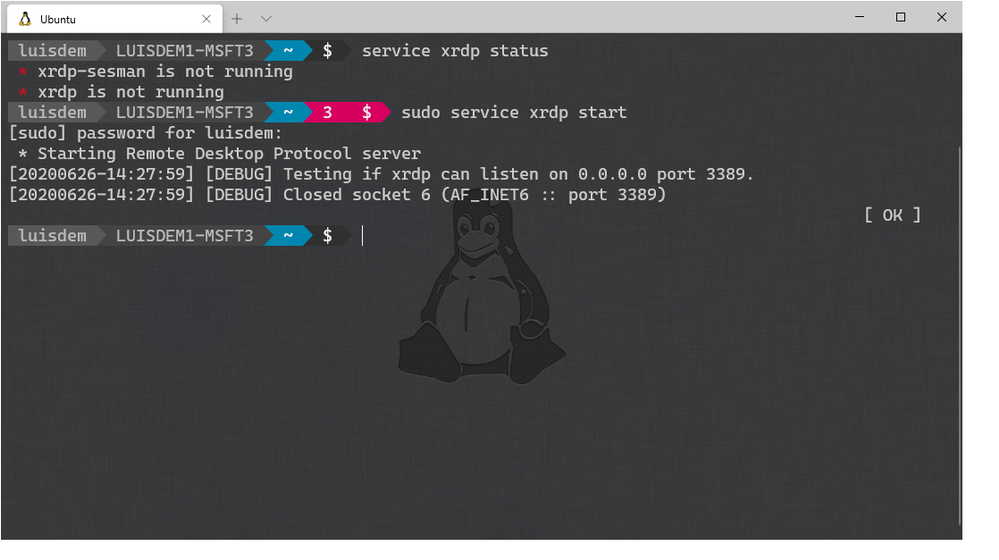
Run the Remote Desktop Client (MSTSC) and type the WSL IP address to connect to xfce4:
Done! Now you can access your favorite Linux IDE on WSL.
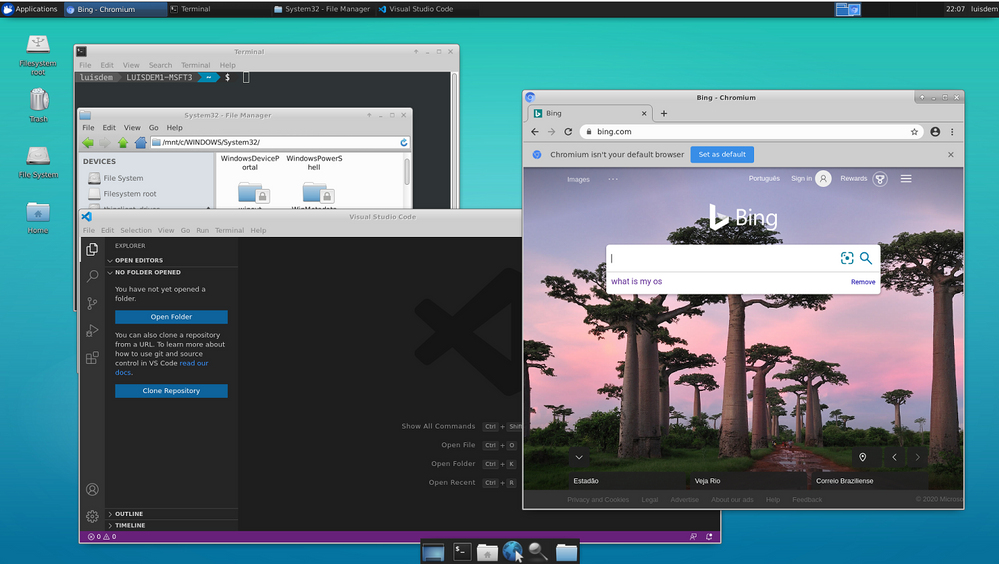
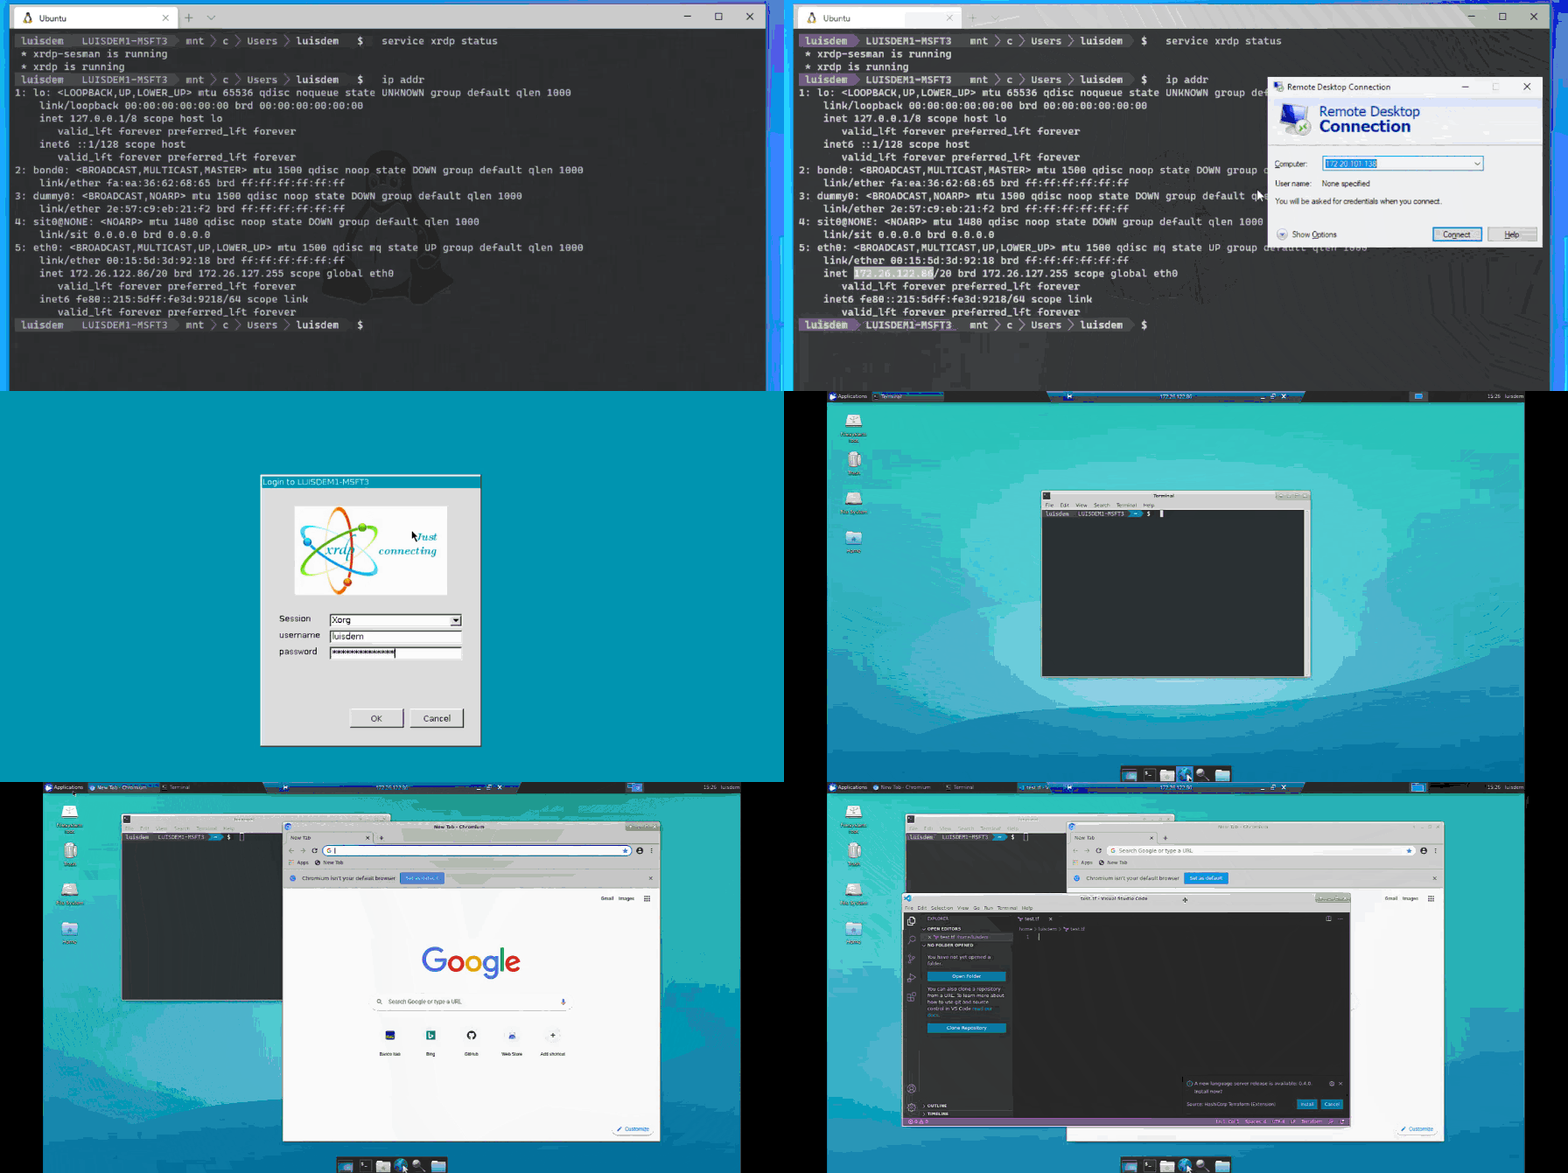
In this post we see how to run GUI Linux Apps using XServer on Windows Desktop environment and how to access the full WSL Linux desktop environment.
I hope you liked!


Recent Comments