This article is contributed. See the original author and article here.
Some customer asked me about the following topic.
“We use App Service for hosting applications and Azure Front Door as global L7 load balancer. We would like to permit only accesses from Azure Front Door at Azure App Service as simply as possible. Could you please share good solution with us?”
By default, each App Service has a public IP address and is accessible via FQDN from the globe. If you simply deploy App Service behind Azure Front Door, everyone can access App Service directly. Therefore, we have to configure permit only access from Azure Front Door at App Service. If you were me, what do you think is a good solution?
What is Azure Front Door?
If you are not familiar with Azure Front Door, please read the following document.
I would like to walk through how to configure access restriction from other than Azure Front Door to App Service. If you can access Azure environment, I recommend following my instruction. In this article, I use quick start tutorial for Azure Front Door.
We can choose several options to configure Azure Front Door – Azure Portal, CLI, PowerShell, and ARM template. In this article, I use Azure Portal to configure access restriction.
Even if we don’t create two App Service instances, we can test access restriction. You may follow the quick start tutorial dutifully, of course.
Create App Service instance
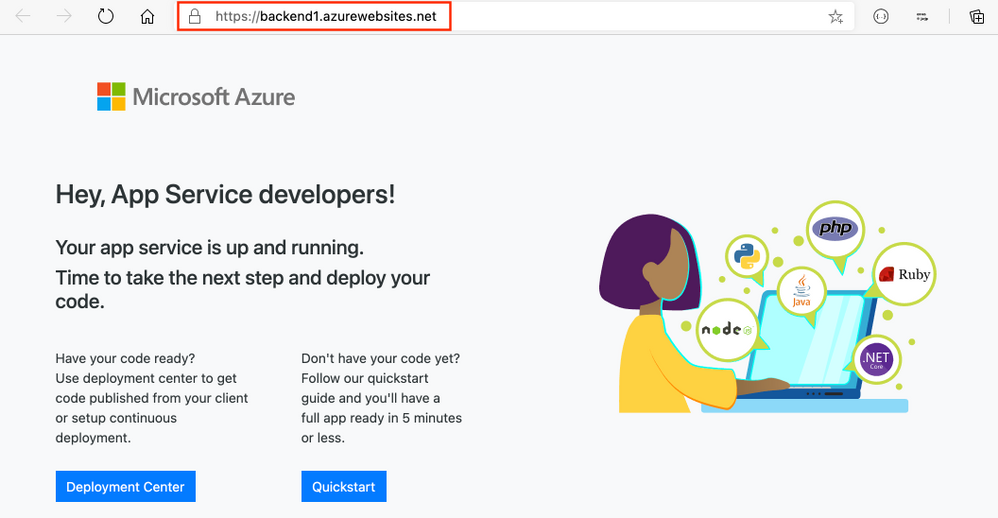
Following the tutorial, we can create simple App Service instances for backend service. Nothing special configuration is required. At this point, you should be able to access the instances via FQDN.
Configure Front Front Door
Following the tutorial, you can configure Azure Front Door. Note that we have to specify “App Service” when choosing “Backend host type”.
After specifying backend host type, we should see the following image.
When all configuration is ready, click “Create” and wait a minute. When Azure Front Door is ready, we can test if access via Azure Front Door is available.
At this point, we can still access App Service instances directly via FQDN since we have not configured access restrictions yet.
Configure access restriction for App Service instances
We open App Service instances created in the previous step in Azure Portal. And, we select “Settings” > “Networking” > “Access Restrictions” > “Configure Access Restrictions”.
Clicking “Add rule”, some screen appears from righthand where we create access restriction rule. We can specify some attributes. Name, priority, and description as we like. And then, this is the most important thing in this article, we have to choose “Service Tag (preview)” among several options of “type”.
When choosing “Service Tag (preview)”, we can choose a service tag among options. In this case, we have to pick up “AzureFrontDoor.Backend” among them.
Clicking “Add rule”, that’s it. If you create two App Service instances, you have to repeat to do these steps to the other instance.
Git it a try!
First of all, we test access via Azure Front Door. This access is permitted and we can see the following image.
How about access to App Service directly? This access is restricted and HTTP 403 returns.
Conclusion
In this article, I describe a simple way of access restrictions when using Azure Front Door and App Service. Hope this helps.
This article is contributed. See the original author and article here.
This blog focuses on how you can use the combination of Azure Automation ,Logic App ,Sendgrid and webhook Azure services to send email notification alerts when your Azure Database for MySQL server status changes.
If you are using data encryption with customer managed key in Azure Database for MySQL, if there is an issue with reading from the Azure Key vault, any permission issues or key has expired the server goes in inaccessible state. This is by design to avoid security violations. To detect these conditions and get alerted when the server goes in inaccessible state, you can run following command:
az mysql server show -g <ResourceGroupName>-n <servername>--query [fullyQualifiedDomainName,userVisibleState] -o json
The below solution uses
• Azure Automation runbook to run and check the server status with the az modules • Sendgrid to send the mail • Webhook and Logic App to make the schedule to run every 15 mins
Step 1: Make your Environment ready for Azure Automation runbook
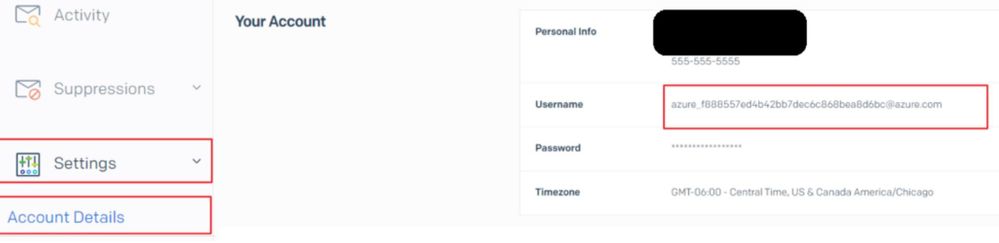
Click on Manage and get the account name for the alias you used while creating the SendGrid account
Go to Settings , Select Accounts details and make a note of the username
Step 2: Create a Runbook in Azure Automation account
From the portal check the Azure automation account you have created.
Click on Runbooks and Select Create a Runbook
Give the Name and Runbook Type (PowerShell)
Click on Create below
Once created then select the runbook “Mysql_Server_Status” and click on Edit.
Copy paste the following script and make the following changes with the data we have received. Click Save and Publish.
Import-Module Az.Accounts
Import-Module Az.Automation
import-Module Az.MySql
$connectionName = "AzureRunAsConnection"
$EmailTo = "<Alias>@domain.com"
$smtpServer = "smtp.sendgrid.net"
$smtpFrom = "No-reply@azureadmin.com"
$messageSubject = "The Azure Database for MySQL is not Available"
try
{
# Get the connection "AzureRunAsConnection "
$servicePrincipalConnection = Get-AutomationConnection -Name $connectionName
"Logging in to Azure..."
Connect-AzAccount `
-ServicePrincipal `
-TenantId $servicePrincipalConnection.TenantId `
-ApplicationId $servicePrincipalConnection.ApplicationId `
-CertificateThumbprint $servicePrincipalConnection.CertificateThumbprint
}
catch {
if (!$servicePrincipalConnection)
{
$ErrorMessage = "Connection $connectionName not found."
throw $ErrorMessage
} else{
Write-Error -Message $_.Exception
throw $_.Exception
}
}
#Get all Mysql resources status which are not in ready state
$mysqlservers = Get-AzMysqlServer | Where-Object {$_.UserVisibleState -ne "Ready"}
if ($mysqlservers.count -gt 0)
{
foreach ($mysqlserver in $mysqlservers)
{
#Write-Output ($mysqlserver.Name + " Current state is : " + $mysqlserver.UserVisibleState)
$Body = $mysqlserver.Name + " Current state is : " + $mysqlserver.UserVisibleState
$message = New-Object System.Net.Mail.MailMessage
$message.From="No-reply@azureadmin.com"
$message.to.add($EmailTo)
$message.Subject = $messageSubject
$message.Body = $Body
$message.IsBodyHTML = $false
$smtp = New-Object Net.Mail.SmtpClient($smtpServer,"587")
#Add your Sendgridusername and sendgridpassword here:
$credentials=new-object system.net.networkcredential("username_xxxxxxxxxx@azure.com","P@ssw0rd")
$smtp.credentials=$credentials.getcredential($smtpServer,587,"basic")
$smtp.Send($message)
}
}
If you are ok to do this check once in hour you can directly got to schedule for runbooks and skip Step 3 below.
Step 3: Scheduling the runbook
Since the frequency we require is lesser than one hour which is now not available we will use webhooks and logic app to do it to achieve monitoring at the minutes granularity.
On the overview please click on Add webhook
Select Create a Webhook
Give the Name and Make sure you copy the URL from the below and keep it . Expire date also you can set as per you need.
Click on Create
Now go to Logic App from portal and click on ADD
Give the details and click on Review and Create
Once you go to the Logic app created you will see Logic Apps Designer , Select Recurrence
Select the interval as 15 Frequency in Minute and click on New step
Select the HTTP webhook
Select Subscribe Method as POST and SubscribeURI copy the URI you got while creating the webhook (Step 3 , Section 3)
Once you do this the Logic app will trigger the webhook and that will in-turn trigger the script to run every 15 mins and if there is any of the MySQL servers which are not in ready state, an e-mail notification will be triggered as shown below.
This article is contributed. See the original author and article here.
The National Security Agency (NSA) has released a cybersecurity advisory on detecting abuse of authentication mechanisms. This advisory describes tactics, techniques, and procedures used by malicious cyber actors to access protected data in the cloud and provides guidance on defending against and detecting such activity.
CISA encourages users and administrators to review the NSA cybersecurity advisory and CISA Activity Alert AA20-352A and take the appropriate mitigation actions.
This article is contributed. See the original author and article here.
Microsoft Information Protection (MIP) is a built-in, intelligent, unified, and extensible solution to protect sensitive data in documents and emails across your organization. MIP provides a unified set of capabilities to know and protect your data and prevent data loss across Microsoft 365 apps (e.g., Word, PowerPoint, Excel, Outlook), services (e.g., Microsoft Teams, SharePoint, Exchange, Power BI), on-premises locations (e.g., SharePoint Server, on-premises files shares), devices, and third-party apps and services (e.g., Box and Dropbox).
We are excited to announce availability for new MIP capabilities:
General availability of Exact Data Match user interface in Microsoft 365 compliance center and configurable match
External sharing policies for Teams and SharePoint sites, in public preview
Exact Data Match user interface in Microsoft 365 compliance center
The first step to effectively protect your data and prevent data loss is to understand what sensitive data resides in your organization. Foundational to Microsoft Information Protection are its classification capabilities—from out-of-the-box sensitive information types (SITs) to Exact Data Match (EDM). Out-of-box SITs use pattern matching to find the data that needs to be protected. Credit card numbers, account numbers, and Social Security Numbers are examples of data that can be detected using patterns. MIP offers 150+ out-of-the-box sensitive information types mapped to various regulations worldwide. EDM is a different approach. It is a classification method that enables you to create custom sensitive information types that use exact data values. Instead of matching on generic patterns, EDM finds exact matches of data to protect the most sensitive data in your organization. You start by configuring the EDM custom SIT and uploading a CSV table of the specific data to be protected, which might include employee, patient, or other customer-specific information. You can then use the EDM custom SIT with policies, such as Data Loss Prevention (DLP), to protect your sensitive data. EDM nearly eliminates false positives, as the service compares the data being copied or shared with the data uploaded for protection.
We continue to invest in and enhance our EDM service, increasing its service scale by a factor of 10 to support data files containing up to 100 M rows, while decreasing by 50% the time it takes for your data to be uploaded and indexed in our EDM cloud service. To better protect sensitive data uploaded into our EDM service, we added salting to the hashing process, which adds additional protection for the data while in transit and within the cloud repository. You can learn more about these EDM enhancements and details on how to implement in this three-part blog series.
Today we are announcing general availability of a user interface in the Microsoft 365 compliance center to configure and manage EDM in the portal, in addition to the option of using PowerShell. This allows customers who are unable to use PowerShell or prefer to use the UI to manage EDM. Learn more here.
Figure 1: Details of an Exact Data Match schema
We are also announcing general availability of configurable match (aka normalization). This feature will add additional flexibility in defining the matches, allowing you to protect your confidential and sensitive data more broadly. For example, you can elect to ignore case so customer email address will match whether it is capitalized or not. Similarly, you can choose to ignore punctuation such as spaces or dashes in the data such as for social security number. Learn more here.
External sharing policies for Teams and SharePoint sites
Core to Microsoft Information Protection are sensitivity labels. You can apply your sensitivity labels to not only protect document and emails but also to protect entire Teams and sites. In spring, we enabled you to apply a sensitivity label to a Team or site and associate that label with policies related to privacy and device access. This allows for holistically securing sensitive content whether it is in a file or in a chat by managing access to a specific team or site. Along with manual and auto-labeling of documents on SharePoint and Teams, this capability helps you scale your data protection program to manage the proliferation of data and the challenge of secure collaboration while working remotely.
We are pleased to announce that you can now also associate external sharing policies with labels to achieve secure external collaboration. This capability is in public preview. Administrators can tailor the external sharing settings according to the sensitivity of the data and business needs. For example, for ‘Confidential’ label you may choose to block external sharing whereas for ‘General’ label you may allow it. Users then simply select the appropriate sensitivity label while creating a SharePoint site or Team and the appropriate external sharing policy for SharePoint content is automatically applied. It is common for projects at an organization to involve collaboration across employees, vendors, and partners. This capability further helps ensure only authorized users can get access to sensitive data in Teams and SharePoint sites.
Figure 2: External sharing policies available alongside policy for unmanaged device access
Customer Key support for Teams
Microsoft 365 provides customer data protection at multiple layers, starting with volume-level encryption enabled through BitLocker, and then there is protection at the application layer. We offer Customer Key, so you can control a layer of encryption for your data in Microsoft’s data centers, with your own keys. This also enables you to meet requirements of compliance regulations for controlling your own keys.
Customer Key was already available for SharePoint, OneDrive, and Exchange. Today, we are pleased to announce that Customer Key is available in Public Preview for Microsoft Teams. You can now assign a single data encryption policy at the tenant level to encrypt your data-at-rest in Teams and Exchange. Click here to learn more.
Sensitivity labels in Power BI desktop
In June we announced general availability of MIP sensitivity labels in Power BI service, helping organizations classify and protect sensitive data even as it is exported from Power BI to Excel, PowerPoint and PDF files, all this without compromising user productivity or collaboration.
We’re now expanding MIP sensitivity labels support to Power BI desktop application (PBIX), in public preview, to enable content creators to classify and protect sensitive PBIX files while authoring datasets and reports in Power BI desktop. The label applied on PBIX files persist when uploaded to Power BI service. Learn more here.
Figure 3: Sensitive built-in label experience in Power BI Desktop
We are also announcing the availability of a new API that enables administrators to get information on sensitivity labels applied to content in Power BI service. With this information, Power BI and Compliance admins can answer questions like which workspaces in Power BI service have reports with a specific label. Learn more here.
Data is the currency of today’s economy. Data is being created faster than ever in more locations than organizations can track. To secure your data and meet compliance requirements like the General Data Protection Requirement (GDPR) – you need to know what data you have, where it resides, and have capabilities to protect it. The above new capabilities are part of the built-in, intelligent, unified, and extensible solution that Microsoft Information Protection offers to enable both administrators and users to protect organization data while staying productive.
Getting Started
Here’s information on licensing and on how to get started with the capabilities announced today:
You can see here required licensing for the capabilities listed above. If you are new to Microsoft 365, learn how to try or buy a subscription
To learn more about Microsoft Information Protection, start with online documentation here. Check out our compilation of past product announcements for Microsoft 365 Compliance’s Information Protection and Governance solution area. To learn more about Microsoft 365 Compliance and to access technical training, visit the Virtual Hub today.
This article is contributed. See the original author and article here.
We are pleased to announce the final release of the for Windows 10 and Windows Server, version 20H2 (a.k.a. October 2020 Update) security baseline package!
This Windows 10 feature update brings very few new policy settings, which we list in the accompanying documentation. At this point, no new 20H2 policy settings meet the criteria for inclusion in the security baseline, but there are a few policies we are going to be making changes to, which we highlight below along with our recommendations.
Tip: If you read the Draft release, we will save you another read. There are no changes since the draft to the actual settings. There were two small changes to the package though; the Baseline-LocalInstall.ps1 script has a change to error handling (thanks to a community member’s suggestion) and second, we neglected to include the custom ADMX/L files in the GP Reports so they showed up as additional registry keys which is now fixed also.
Block at first sight
We started the journey for cloud protection several years ago. Based on our analysis of the security value versus the cost of implementation, we feel it’s time to add Microsoft Defender Antivirus’ Block At First Sight (BAFS) feature to the security baseline. BAFS was first introduced in Windows 10, version 1607 and allows new malware to be detected and blocked within seconds by leveraging various machine learning techniques and the power of our cloud.
BAFS currently requires 6 settings to be configured. Our baseline already sets 2 of them, Join Microsoft MAPS and Send file sample when further analysis is required. We are now recommending the addition of the following settings to enable BAFS:
Computer ConfigurationAdministrative TemplatesWindows ComponentsMicrosoft Defender AntivirusMAPSConfigure the ‘Block at first sight’ feature set to Enabled
Computer ConfigurationAdministrative TemplatesWindows ComponentsMicrosoft Defender AntivirusReal-time ProtectionScan all downloaded files and attachments set to Enabled
Computer ConfigurationAdministrative TemplatesWindows ComponentsMicrosoft Defender AntivirusReal-time ProtectionTurn off real-time protection set to Disabled
Computer ConfigurationAdministrative TemplatesWindows ComponentsMicrosoft Defender AntivirusMPEngineSelect cloud protection level set to High blocking level
These new settings have been added to the MSFT Windows 10 20H2 and Server 20H2 – Defender Antivirus group policy.
We routinely evaluate our Attack Surface Reduction configuration, and based on telemetry and customer feedback we are now recommending configuring two additional Attack Surface Reduction controls: Computer ConfigurationAdministrative TemplatesWindows ComponentsMicrosoft Defender AntivirusMicrosoft Defender Exploit GuardAttack Surface ReductionConfigure Attack Surface Reduction rules: Use advanced protection against ransomware and Block persistence through WMI event subscription.
Introduced in Windows 10, version 1709 the Use advanced protection against ransomwarerule will scan any executable files and determine, using advanced cloud analytics, if the file looks malicious . If so, it will be blocked unless that file is added to an exclusion list. This rule does have a cloud dependency, so you must have Join Microsoft MAPS also configured (which is already part of the security baseline).
Block persistence through WMI event subscription is a rule that was released in Windows 10, version 1903. This rule attempts to ensure WMI persistence is not achieved – a common technique adversaries use to evade detection. Unlike many of the other ASR rules, this rule does not allow any sort of exclusions since it is solely based on the WMI repository.
A friendly reminder that the security baselines set all ASR rules to block mode. We recommend first configuring them to audit mode, then testing to ensure you understand the impacts these rules will have in your environment, and then configuring them to block mode. Microsoft Defender for Endpoints (formally Microsoft Defender Advanced Threat Protection, MDATP) will greatly enhance the experience of testing, deployment, and operation of ASR rules. We would encourage you to look at evaluating, monitoring and customizing links to better prepare your environment.
These new settings have been added to the MSFT Windows 10 20H2 and Server 20H2 – Defender Antivirus group policy.
UEFI MAT
You might recall in the draft release of our security baseline for Windows 10, version 1809 we enabled UEFI Memory Attributes Tables, but based on your feedback we removed that recommendation from the final version. After further testing and discussions, we are recommending that you enable Computer ConfigurationAdministrative TemplatesSystemDevice GuardTurn on Virtualization Based SecurityRequire UEFI Memory Attributes Table.
Microsoft Edge
Starting with Windows 10, version 20H2 the new Microsoft Edge (based on Chromium) is now installed as part of the operating system. Please ensure you are applying the security baseline for Microsoft Edge to your Windows 10, version 20H2 machines. We have gotten questions about including it on the Windows security baseline, but since Microsoft Edge is a cross platform product and has a different release cadence, we are going to keep it a separate security baseline.
As always, please let us know your thoughts by commenting on this post.


Recent Comments