by Contributed | Apr 22, 2021 | Technology
This article is contributed. See the original author and article here.
ConfigMgr admins love extending hardware inventory and collecting data from Windows devices.
Did you know Intune can do the same?!
The answer is Intune PowerShell scripts! Also known as SideCar… IME… Intune Management Extensions…
Well, IME is just another channel that runs parallel to MDM that sort of acts like the ConfigMgr client. We deliver different features over this channel: PowerShell scripts, Win32 apps, Proactive Remediation scripts, Win32 app log collection…
Can you give us an example?
Maybe you are interested to know more about Win32_BIOS.
Run the following PowerShell one-liner on a device
Get-WmiObject -Class Win32_BIOS |
select CurrentLanguage,
Description,
EmbeddedControllerMajorVersion,
EmbeddedControllerMinorVersion,
Manufacturer,
ReleaseDate,
SerialNumber | ConvertTo-Json -Compress
Script outputs the following:

Beautified:
{
"CurrentLanguage": "en-US",
"Description": "N2EET43W (1.25 )",
"EmbeddedControllerMajorVersion": 1,
"EmbeddedControllerMinorVersion": 13,
"Manufacturer": "LENOVO",
"ReleaseDate": "20191028000000.000000+000",
"SerialNumber": "12345678"
}
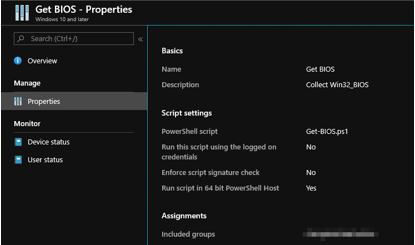
Let’s create an Intune PowerShell script and deploy it to some users/devices to demonstrate Win32_BIOS data as an example.

Tip: <scriptId> is stored in the URL

You can access the data via the following Graph endpoint in graph explorer
https://graph.microsoft.com/beta/deviceManagement/deviceManagementScripts/<scriptID>/deviceRunStates?$expand=managedDevice
It turns out that we store the above-mentioned script output in a property on the service side. If you are familiar with Graph Explorer, then you can take a look at the results
In the property “resultMessage”:

How do I see the data from all devices?
Prerequisites:
Install-Module -Name Microsoft.Graph.Intune
You need one more script to retrieve your results from Graph…
Update-MSGraphEnvironment -SchemaVersion 'beta'
Connect-MSGraph

$result = Invoke-MSGraphRequest -HttpMethod GET -Url 'deviceManagement/deviceManagementScripts/b113448a-528a-4beb-b7d5-381a117d5184/deviceRunStates?$expand=managedDevice' | Get-MSGraphAllPages
$success = $result| Where-Object -Property errorCode -EQ 0
$resultMessage = $success.resultMessage
$objResultMessage = $resultMessage | ConvertFrom-Json
$objResultMessage | Out-GridView
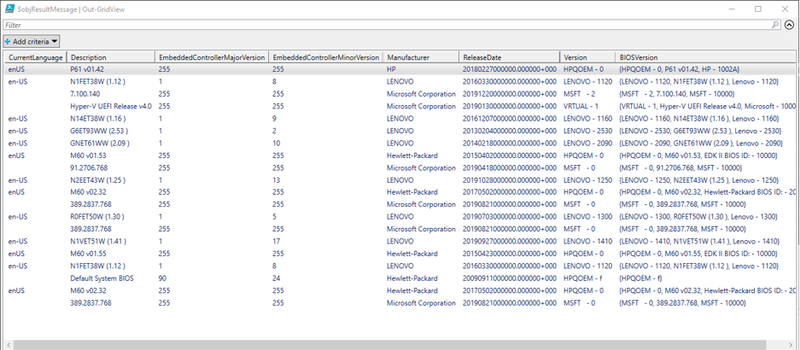
You can store the data in Log Analytics, SQL etc and visualize the way you want.
Enjoy!
by Contributed | Apr 22, 2021 | Technology
This article is contributed. See the original author and article here.
Jupyter Notebooks bring a wonderful capability to hand someone a single file that contains both code, and instructions on how to run that code. This is great and can be used in many different ways, one of which is to help new team members get up to speed. But what happens when you need to do the same thing as one of your existing Notebooks, but now you need to do it at scale? What if you could take your existing Notebook and add parameters for things like Server name & Database? In this episode with Aaron Nelson, take a look at how new features in Azure Data Studio can help you take your Notebooks to the next level of re-usability.
Watch on Data Exposed
Resources:
View/share our latest episodes on Channel 9 and YouTube!
by Contributed | Apr 22, 2021 | Technology
This article is contributed. See the original author and article here.
Hopefully, you have read my previous blog posts about Azure Purview access management Part 1 and Part 2 to find about Azure Purview control plane and data plane roles and tasks. In this post, I will cover the following topic:
- Overview of dashboards and roles required to extend your M365 Sensitivity Labels to Azure Purview.
By extending M365 Sensitivity Labels to Azure Purview you can automatically assign labels to files and database columns in Azure Purview.
In order to bring Sensitivity Labels from M365 to Azure Purview, you may need to work with other teams in your organization. The following table summarizes tasks, required to extend the labels to Azure Purview including dashboards and roles required to perform each step:
Task
|
What portal to use
|
Who can perform this task
|
Verify if you have at least one M365 E5 License in your Azure AD tenant
|
Azure Portal (https://portal.azure.com/) OR
M365 Admin Center (https://admin.microsoft.com/AdminPortal/)
|
Any Azure AD role (e.g. Global Reader)
|
Consent “Extend labeling to assets in Azure Purview”
|
Microsoft 365 Security and Compliance Center (http://compliance.microsoft.com/)
|
Azure AD Roles:
Compliance Administrator
OR
Global Administrator
|
Create and update Sensitivity Labels in M365
|
Microsoft 365 Security and Compliance Center
|
Azure AD Roles:
Azure Information Protection Administrator
OR
Global Administrator
|
Register Data Sources in Azure Purview
|
Azure Purview Studio
(https://web.purview.azure.com/)
|
Azure Purview Roles (data plane:(
Purview Data Source Administrator + Purview Data Curator
AND
Azure Roles (control plane)
Reader (on data sources)
|
Scan Data Sources in Azure Purview
|
Azure Purview Studio
|
Azure Purview Roles (data plane):
Purview Data Source Administrator + Purview Data Curator
OR
Purview Data Source Administrator + Purview Data Reader
|
Search Catalog and filter assets based on Sensitivity Labels
|
Azure Purview Studio
|
Azure Purview Roles (data plane):
Purview Data Reader
OR
Purview Data Curator
|
View Sensitivity Labels Insights reports
|
Azure Purview Studio
|
Purview Data Reader
OR
Purview Data Curator
|
Verify if you have at least one M365 E5 License in your Azure AD tenant
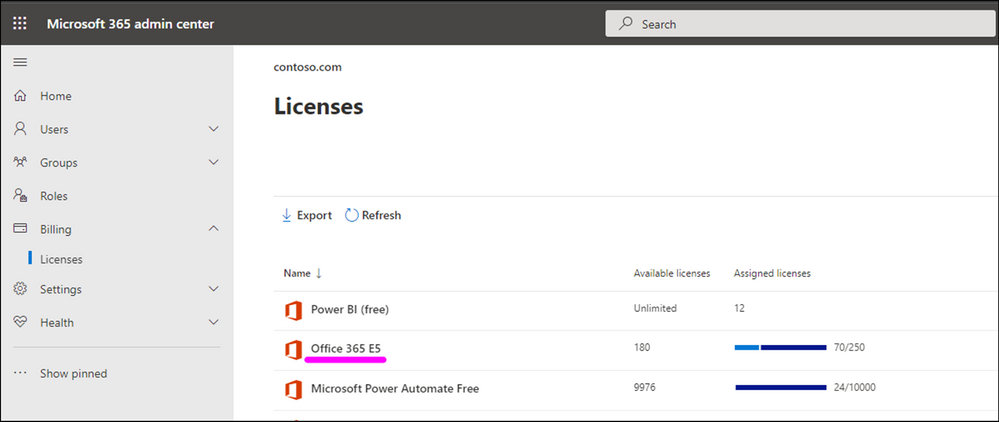
Use your M365 Admin center to check if you already have M365 E5 Licenses in your tenant:

If you do not have this license in place, please work with your finance team to obtain the required licenses. Microsoft 365 E5 | Microsoft 365 Enterprise.
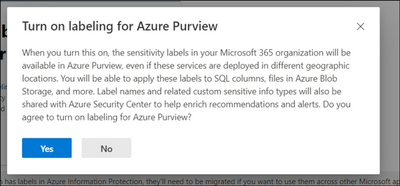
Consent “Extend labeling to assets in Azure Purview”.
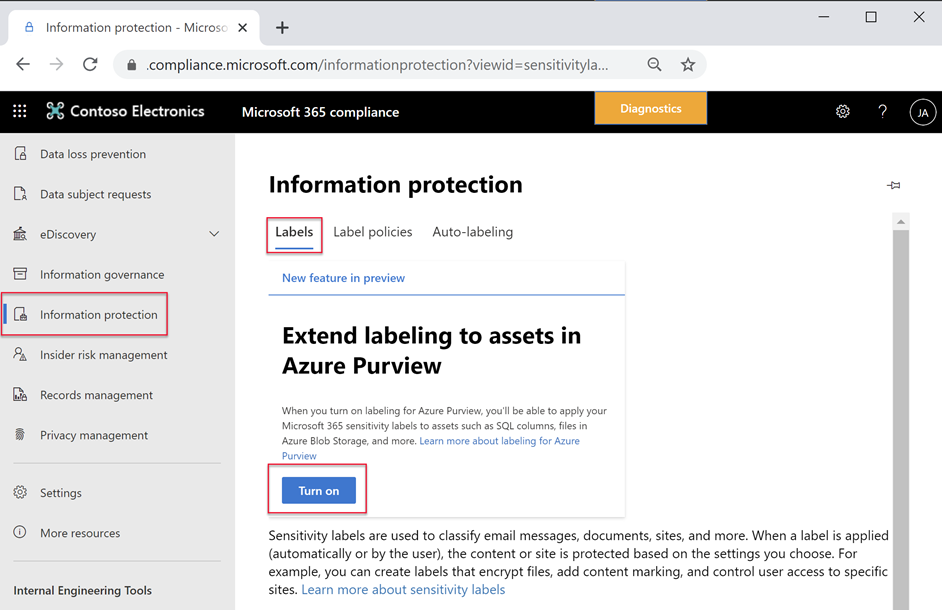
By default, Sensitivity Labels are only available for assets in M365. With this one-time operation at your Azure AD tenant level, you will allow M365 Sensitivity Labels to be extended to assets in Azure Purview. Use Microsoft 365 Security and Compliance Center to consent.
Create or update M365 Auto-labeling Rules
It is important to identify which team in your organization is responsible for defining Sensitivity Labels in Microsoft 365.
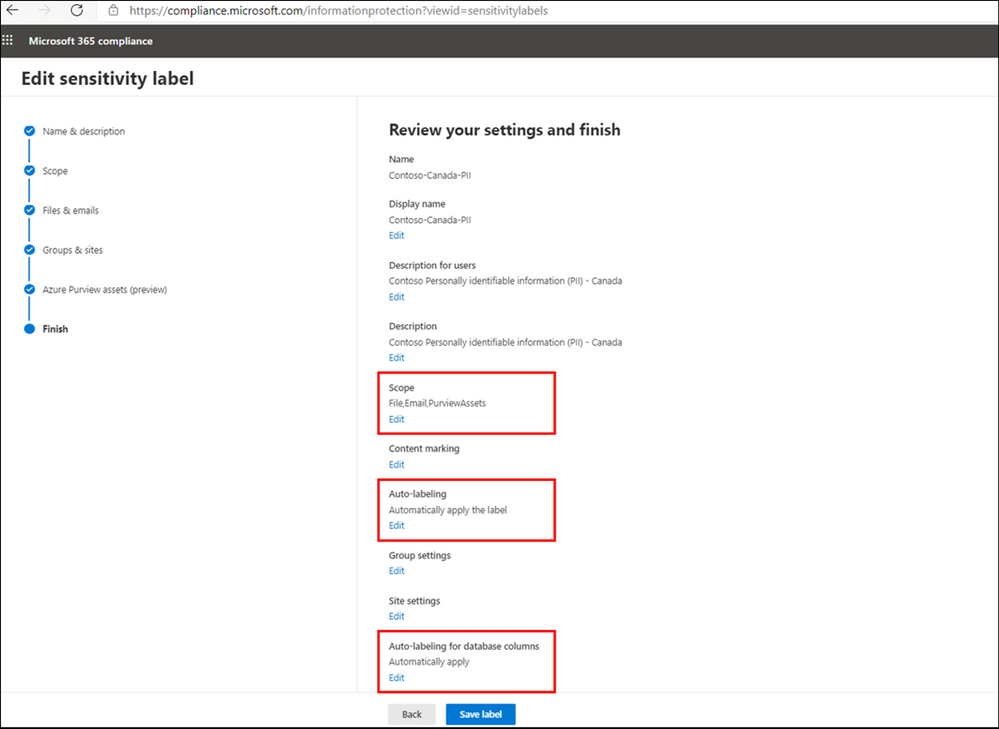
To extend a label to Azure Purview, you can create a new M365 Sensitivity Label or update an existing one in Microsoft 365 Security and Compliance Center, by configuring the following settings:
- From Define the scope for this label enable Azure Purview Assets.
- Add Auto-labeling rule
- From Auto-labeling for database columns enable Auto-labeling for database columns.
Information Protection Administrator or Global Administrator roles can be used to create or update Sensitivity Labels.
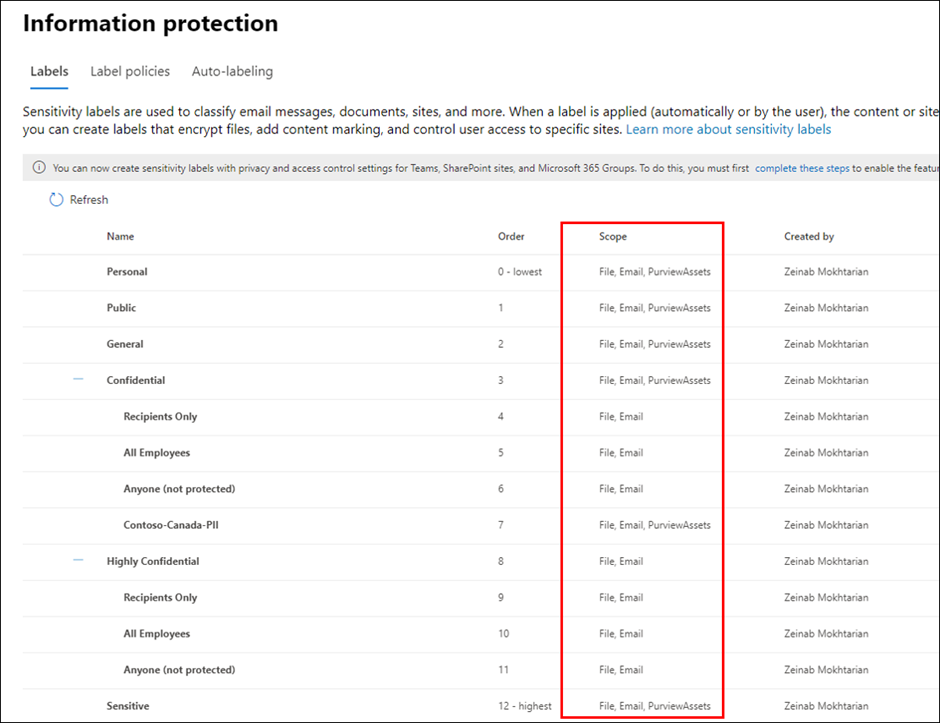
If you are looking to expand visibility of your M365 Sensitivity Labels to other teams, you can provide them with Read-only access to view of M365 Sensitivity Labels in your tenant, you can assign the user with Security Reader role in Azure AD or more specifically assign them with Sensitivity Label Reader in Microsoft 365 Security and Compliance Center.
Register and Scan data sources in Azure Purview
Use Azure Purview Studio to register data sources such as Azure SQL Servers or Blob Storage. Once you scan your data sources, Sensitivity Labels are automatically assigned based on auto-labeling rules and then you will be search, browse and filter assets based on Sensitivity Labels or view Insights Reports. View my past blog post to read more about setting up and exploring assets by Sensitivity Labels in Azure Purview.
Purview Data Curator + Data Source Administrator or Purview Data Reader + Data Source Administrator roles can be used to scan data in Azure Purview. To search assets and view reports, you can use at least Purview Data Reader role.
Summary and Call to Action
Through close integration with Microsoft Information Protection offered in Microsoft 365 Azure Purview enables direct ways to extend visibility into your data estate, and classify and label your data.
We would love you hear your feedback and know how Azure Purview helped tracking your sensitive data estate using automatic labeling.
- Create an Azure Purview account now and extend your M365 Sensitivity Labels across your files and database columns in Azure Purview.
- Use Sensitivity Labels Insights to get a bird’s eye view of your data estate by the sensitivity labels.
- Learn more about Azure Purview Autolabeling and Sensitivity Label Insights.
- Provide your feedback.

by Contributed | Apr 22, 2021 | Technology
This article is contributed. See the original author and article here.
Microsoft Forms aims to help you make better decisions with data. As we improve Forms’ intelligence service, we support you in not just creating surveys and polls more easily, but also in extracting key insights from data in an understandable way. Read on to learn about three of these improvements: Estimated Time, the Insights button, and Word Clouds.
Automatically Add Estimated Response Time (Design Intelligence)
You may have noticed that while creating your surveys, Forms now provides an estimated response time for longer surveys. Our intelligence service can now predict the approximate time it will take for someone to complete the form, depending on the types and number of questions on the form. You can add this estimated response time (as seen below) in the subtitle of the form, which can help increase the form’s response rates.
 Add Estimated Time to Encourage Response Completion
Engage in a New Experience for Forms Data Insights
In the past, after collecting a few dozen responses in your survey, you may have noticed the “Ideas” button appear at the top of the Responses tab of your Forms design page. By clicking on “Ideas,” you would have seen intelligence-based data insights on your responses.
From now on, you might instead see an “Insights” button under a particular question. If the Forms service can provide insights on the responses to that question—which is dependent on the number of responses and the data itself—you will see this “Insights” button. With this change, you can more clearly interpret the insights Forms provides for a specific question.
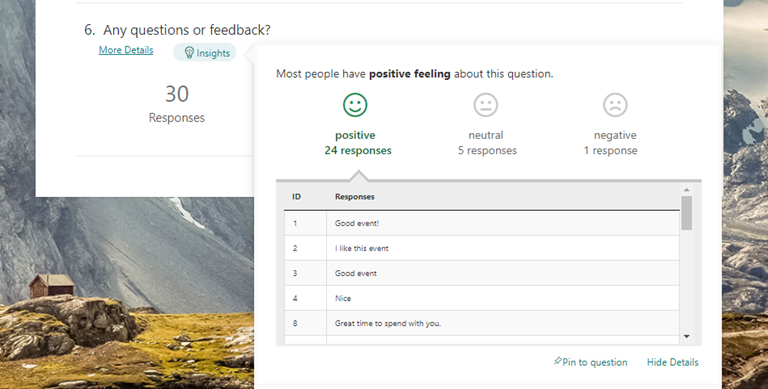 Click the Insights button to uncover analysis of your responses
As some of you are already familiar, these insights include sentiment analysis on open-response questions, score distribution for ratings questions, and association rule analysis, which notices patterns in responses across multiple choice questions. These insights are presented in easy-to-read data visualizations, which you can pin for quick future reference.
Visualize Open-Text Responses with Word Clouds (Insights)
We are excited to introduce a new intelligence-based data insight type: word clouds for open-text questions in Forms. The key phrases from the response to that question will be extracted and be visualized in a word cloud, offering you a quick view on the top text phrases among the responses.
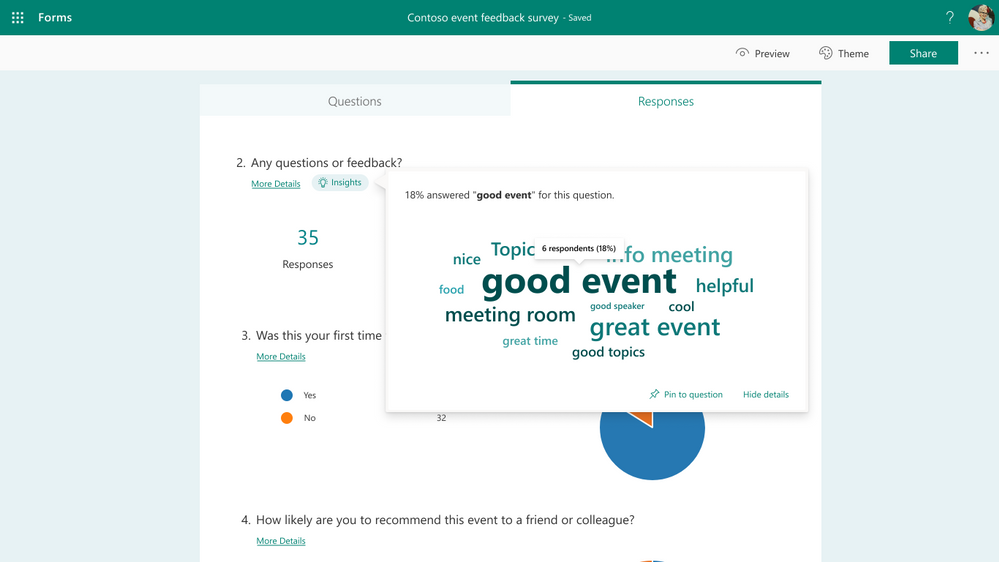 View open-text responses in word clouds
As seen above, when you click any key phrase in the word cloud, you can find statistics on how many respondents and what percentage of respondents mentioned this phrase in their response.
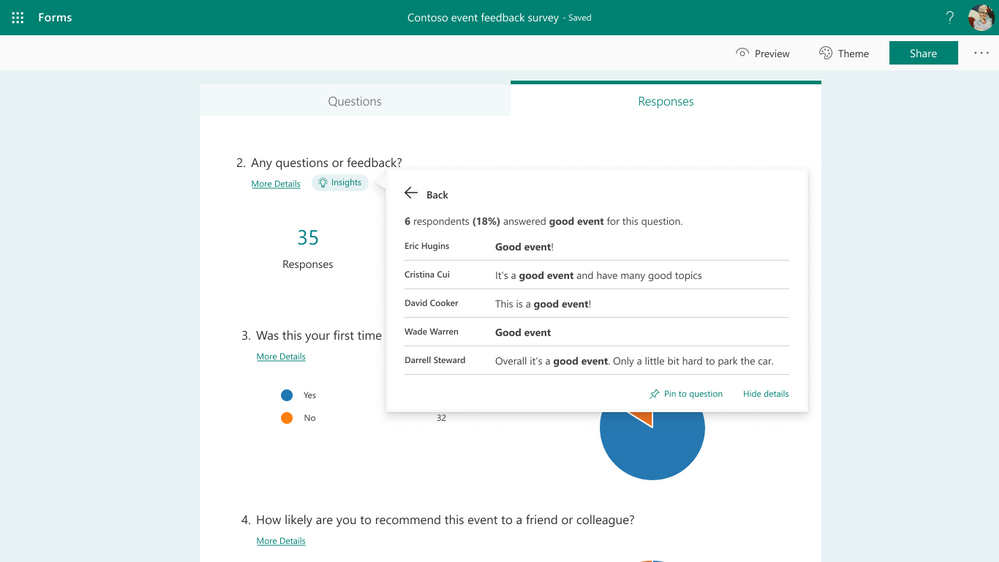 Click the word cloud to see exact responses
Additional FAQ:
When will this become available?
We will begin roll out of word clouds to open-text questions in regular forms at the end of April. Meanwhile, as Open-Text Polls for Microsoft Teams meetings start rollout at the end of May or early June, word clouds for these polls will become available as well.
Which languages are supported?
Word clouds will support English and Chinese text in our first stage of this work. We will expand to additional languages in the near future—please stay tuned.
Will I always get a word cloud for my open-text questions?
No, not always—this is because the Forms service may not have found any meaningful results to show, especially if you have only received a small number of total responses. You can come back to check for a word cloud after collecting more responses.
Next Steps
We hope you explore these latest updates as they become available to you. If you have additional questions on Forms surveys, quizzes, or polls, please visit our Support page. You can also join discussions in the Microsoft Forms Tech Community and follow the Forms Blog to stay updated in the future. Thank you.
by Contributed | Apr 22, 2021 | Technology
This article is contributed. See the original author and article here.
Track what matters most from the comforts of a larger touch screen device. We’re pleased to share Microsoft Lists for iOS now supports iPad. AKA, no more lists at 2x. You’ll get a beautiful native experience to track, manage and share your information. We, too, have enabled Conditional Access to Lists for iOS, and updated an important fix when a list is deleted from your iPhone or iPad.
Get Microsoft Lists for iOS today.
Let’s dive into all the updates below.
Microsoft Lists for iOS: iPad support [Roadmap ID: 70748]
Microsoft is expanding device support on iOS to now include iPad. Microsoft Lists for iOS looks great on iPhone and iPad, scaling the user-friendly user interface to give you the best access to create, edit, and share your information from your iOS device.
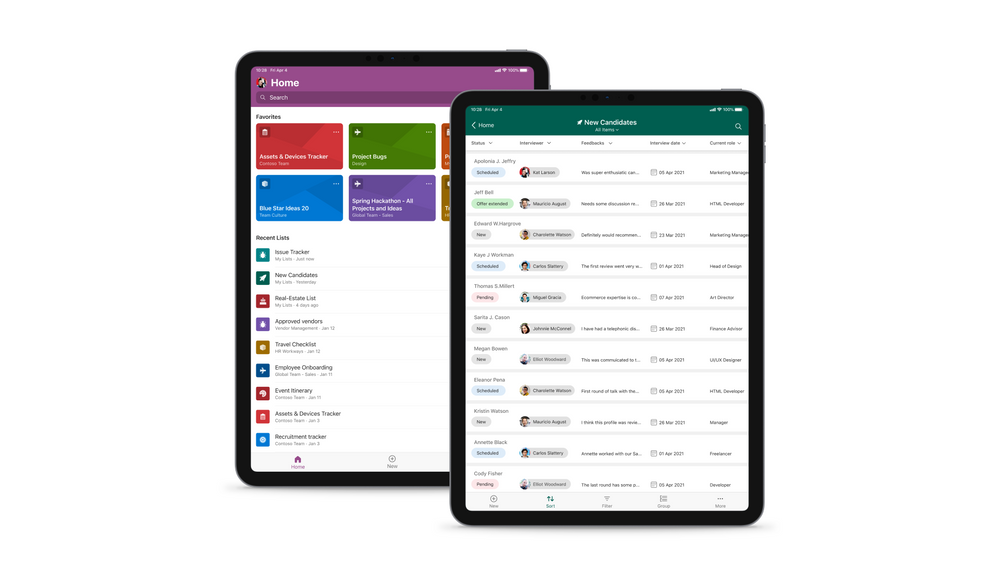
 Microsoft Lists for iOS on an iPad, showing the main home screen with Search, and Favorites and Recent lists (left), and working on an individual ‘New Candidates’ list (right).
With the extra screen real estate, you can easily search for lists, list items, and tap directly into your favorite and recent lists – directly from the home screen. Lists looks great in both portrait and landscape modes. And it mirrors the Lists Web experience, blended within the common design of iOS.
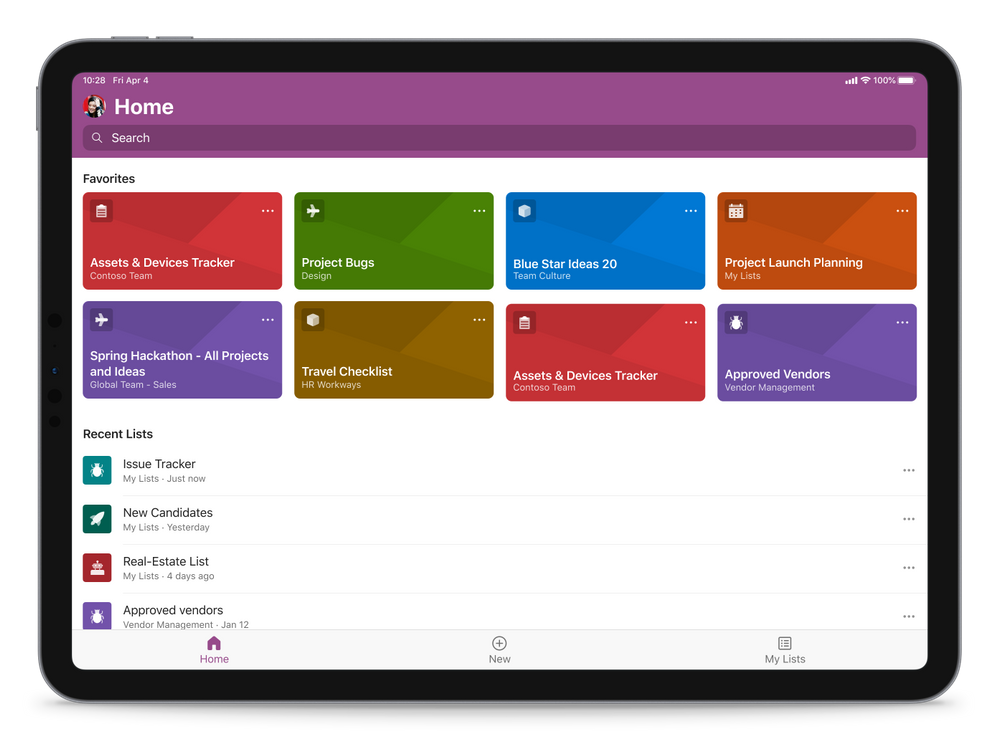 Microsoft Lists for iOS on an iPad, showing the main home screen with Search, and Favorites and Recent lists (in landscape mode)
Once in a list, you’ll swipe up and down, left to right to navigate your list. You’re able to tap into a specific list item to see it’s full view form. And you can refine the view of information using filter, group by, and tapping into individual fields to make changes to drop-down menus or enter text.
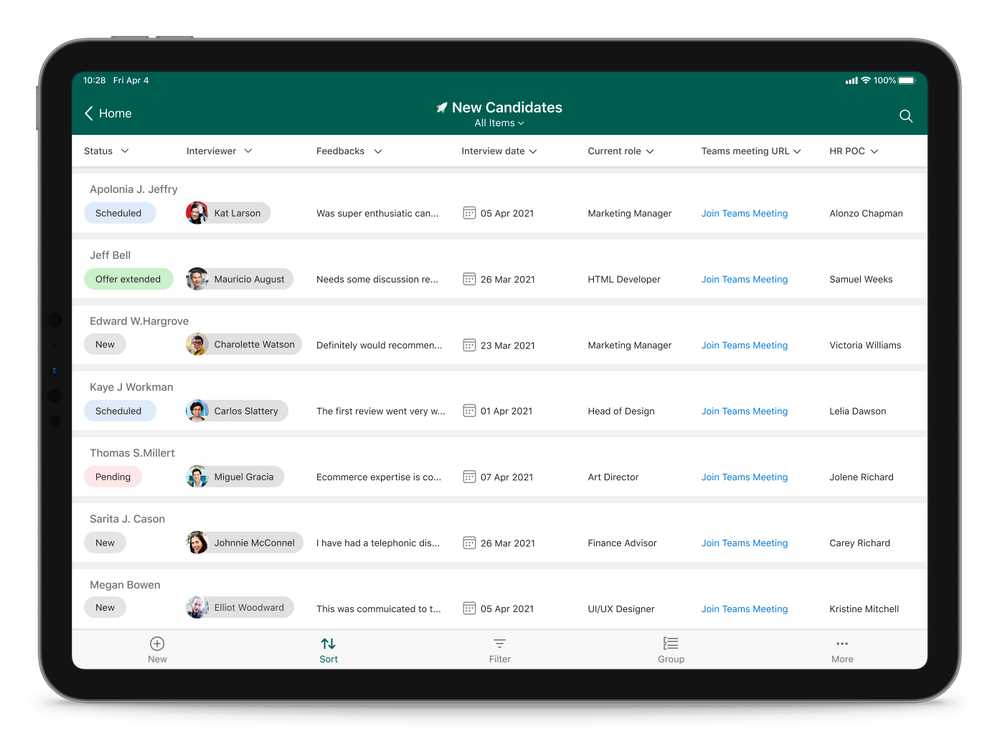 Microsoft Lists for iOS on an iPad, working on an individual ‘New Candidates’ list (in landscape mode)
Admins: Manage Microsoft Lists for iOS using InTune app protection policies (APP)
The Microsoft Lists iOS app is now configurable as a public app in Intune app protection policy (APP) through the Microsoft Endpoint Manager admin center. This allows app to be targeted to ensure that the data accessed is protected by app protection policies.
The app now also supports conditional access deployment through Azure admin portal. Please note that ‘Require app protection policy’ is supported which provides higher level of assurance. Lists app doesn’t currently support ‘Require approved client app’ grant access.
Learn more how to enable InTune app protection policies (APP) for Lists for iOS, which includes how to create and assign app protection policies (via docs.microsoft.com).
Bug fix update for lists deleted from an iPhone or iPad
Lists deleted from Lists for iOS can now be restored from the corresponding site recycle bin. We appreciate everyone who brought this to our attention, and for your patience while our development team addressed the issue.
Additional resources
To learn more about Lists throughout the year, please visit our updated Microsoft Lists resource center for blogs, demos, videos, podcasts, and more.
Get more done with Microsoft Lists on the go.
Thanks, Mark Kashman – senior product manager – Microsoft 365


Recent Comments