Power Apps: source code edit for Canvas  Apps in Visual Studio Code

Power Apps: source code edit for Canvas Apps in Visual Studio Code

This article is contributed. See the original author and article here.

Why?

In April, I showed how to unpack and repack Power Apps .msapp files of Canvas Apps in the blog post Power Apps Source Code file editing for Canvas Apps (microsoft.com) Using this functionality, we can view and edit the source code of Canvas Apps. In a recent announcement (Canvas source code tool integrated with Power Platform CLI | Microsoft Power Apps), Microsoft announced that the same functionalities are now available within the Power Platform VS Code Extension of Visual Studio Code!

PowerApps_VisualStudio_PowerPlatform_Extension

This means that after installing this extension, we can do the same unpacking and packing without leaving Visual Studio Code.

What?

This posts will show how easy it is to use Visual Studio Code so we can unpack and (re)pack .msapp files of Canvas Apps:

PowerApps_VisualStudio_PowerPlatform_Extension_msapp_compare

How?

1) First install the Power Platform VS Code Extension in your Visual Studio Code Client using the Visual Studio Marketplace (Power Platform VS Code Extension – Visual Studio Marketplace).

PowerApps_VisualStudio_PowerPlatform_Extension_Installed

2) After installing the extension a computer restart may be required. We can from this moment on, run commands from within Visual Studio using the built-in Terminal.
In my example I saved the text file with commands as a Power Shell file (.ps1). In this type of files, short cuts like F8 can be used to run selected commands:

PowerApps_VisualStudio_PowerPlatform_Extension_run_command

Notice the improved commands where referencing (input and output) files is much easier now!

PowerApps_VisualStudio_PowerPlatform_Extension_run_command_result

In the Marketplace screenshot above, you can see that the extension is in Preview at the moment.
Please be aware of this and read the announcement link above on how to report issues.


Originally published at Power Apps: source code edit for Canvas Apps in Visual Studio Code » Knowhere365

NSA-CISA-NCSC-FBI Joint Cybersecurity Advisory on Russian GRU Brute Force Campaign

This article is contributed. See the original author and article here.

The National Security Agency (NSA), Cybersecurity and Infrastructure Security Agency (CISA), Federal Bureau of Investigation (FBI), and the UK’s National Cyber Security Centre (NCSC) have released Joint Cybersecurity Advisory (CSA): Russian GRU Conducting Global Brute Force Campaign to Compromise Enterprise and Cloud Environments.

The CSA provides details on the campaign, which is being conducted by the Russian General Staff Main Intelligence Directorate (GRU) 85th Main Special Service Center (GTsSS). The campaign uses a Kubernetes® cluster in brute force access attempts against the enterprise and cloud environments of government and private sector targets worldwide. After obtaining credentials via brute force, the GTsSS uses a variety of known vulnerabilities for further network access via remote code execution and lateral movement.

CISA strongly encourages users and administrators to review the Joint CSA for GTSS tactics, techniques, and procedures, as well as mitigation strategies.

SharePoint Online Multiple Files (Folder) Copy with Http Connector

SharePoint Online Multiple Files (Folder) Copy with Http Connector

This article is contributed. See the original author and article here.

ADF does not directly support copying a folder/multiple files from SharePoint Online, but there are workarounds to achieve this. Two additional steps needed here as compared to single file copy are:


  1. Get the list of files:


    • User can maintain the file names in a text file manually, OR

    • Use Web Activity to call SharePoint Rest API to get the list of files.


  2. ForEach Activity to loop the list of relative file names and pass the file name to Copy Activity (Base URL changes a bit as compared to single file copy)


Below is how the pipeline flow would look like:


Web1 – Get the access token from SPO


Web2 – Get the list of files from SPO folder


ForEach1 – Loop the list of file names


Copy1 – Copy data with HTTP connector as source


RoshnaNazir_0-1624533576973.png


RoshnaNazir_1-1624533576976.png


Step1:


Grab Access token from SPO


Copy file from SharePoint Online leverages AAD/service principal authentication and SharePoint API to retrieve files.


  1. Register SharePoint Application and Grant permission – https://docs.microsoft.com/en-us/azure/storage/common/storage-auth-aad-app?tabs=dotnet#register-your-application-with-an-azure-ad-tenant


         a) Register AAD Application


      1. On Azure Portal, go to AAD app registration page: https://portal.azure.com/#blade/Microsoft_AAD_IAM/ActiveDirectoryMenuBlade/RegisteredApps 

      2. New Registration à Enter your App name

      3. Go to “Certificates & secrets”, create new client secret, you can set the expire to 1Y/2Y/Never


RoshnaNazir_2-1624533576980.png


       b) Grant SharePoint site permission to your registered App (need site owner permission on SharePoint)


RoshnaNazir_3-1624533576986.png


Full details on how to register app and also granting permissions is mentioned in prerequisites here – https://docs.microsoft.com/en-us/azure/data-factory/connector-sharepoint-online-list#prerequisites


     c) Create an ADF Pipeline. Start with creating a Web Activity to get the access token


Headers:


  • Content-Type: application/x-www-form-urlencoded

  • Body: grant_type=client_credentials&client_id=[Client-ID]@[Tenant-ID]&client_secret=[Client-Secret]&resource=00000003-0000-0ff1-ce00-000000000000/[Tenant-Name].sharepoint.com@[Tenant-ID


Debug run to check if the activity succeeds and also check the activity output to see if it returns the access token in the payload. You can also verify the same using Postman client to check if the token is valid.


RoshnaNazir_4-1624533576989.png


Step 2:


Get the list of Files


  1. Create another Web Activity to get the list of files


Headers:


  • Authorization: @{concat(‘Bearer ‘, activity(‘WebActivity1Name’).output.access_token)}

  • Accept: application/json


 Debug run to see if the activity succeeds, and check it shows the list of files under the folder in the output.


RoshnaNazir_5-1624533576991.png


Step 3:


Loop the list of relative file names


  1. Create a ForEach Activity with inner Copy activity


  • Items: @activity(‘WebActivity2Name’).output.value


RoshnaNazir_6-1624533576992.png


RoshnaNazir_7-1624533576993.png


RoshnaNazir_8-1624533576994.png


Step 4:


Create Copy activity


  1. New dataset -> HTTP -> Binary type:


    a) HTTP linked service


    b) Configure copy activity HTTP source


         Dataset properties:


  • Name: RelativeURL (Any name)

  • Value: @{item().ServerRelativeUrl}

  • Request method: GET

  • Additional header: “Authorization: Bearer <accessToken>” (accessToken is generated in Step1)


Tip: You can test with a static access token gotten from the previous Web activity output first. You can also use expression (add dynamic content): @{concat(‘Authorization: Bearer ‘,activity(‘WebActivityName’).output.access_token)}


RoshnaNazir_9-1624533576996.png


     c) Configure Linked Service properties


  • Name: FileName (Any Name)

  • Value: @dataset().RelativeURL


RoshnaNazir_10-1624533576998.png


RoshnaNazir_11-1624533577002.png


2. Create Copy sink as below


RoshnaNazir_12-1624533577003.png


 Successful pipeline run as follows:              


RoshnaNazir_13-1624533577007.png


Thanks to @Jijo Puthooran for helping me in authoring this blog.

What's new: ASIM Authentication, Process, Registry and enhanced Network schemas

What's new: ASIM Authentication, Process, Registry and enhanced Network schemas

This article is contributed. See the original author and article here.


Hello everyone,


Continuing our normalization journey, we added to the networking and DNS schemas the Authentication, Process Events, and Registry Events schemas and delivered normalized content based on the two. We also added ARM template deployment and support for Microsoft Defender for Endpoints to the Network Schema.


Special thanks to @Yuval Naor , @Yaron Fruchtmann , and @Batami Gold , who made all this possible.


Why should you care?


  • Cross source detection: Normalized Authentication analytic rules work across sources, on-prem and cloud, now detecting attacks such as brute force or impossible travel across systems including Okta, AWS, and Azure.

  • Source agnostic rules: process event analytics support any source that a customer may use to bring in the data, including Defender for Endpoint, Windows Events, and Sysmon. We are ready to add Sysmon for Linux and WEF once released!

  • EDR support: Process, Registry, Network, and Authentication consist the core of EDR event telemetry.

  • Ease of use: The Network Schema introduced last year is now easier to use with a single-click ARM template deployment.


Deploy the AuthenticationProcess Events, Registry Events, or Network Session parser packs in a single click using ARM templates. 


Join us to learn more about the Azure Sentinel information model in two webinars:


  • The Information Model: Understanding Normalization in Azure Sentinel

  • Deep Dive into Azure Sentinel Normalizing Parsers and Normalized Content


Why normalization, and what is the Azure Sentinel Information Model?


Working with various data types and tables together presents a challenge. You must become familiar with many different data types and schemas, write and use a unique set of analytics rules, workbooks, and hunting queries for each, even for those that share commonalities (for example, DNS servers). Correlation between the different data types necessary for investigation and hunting is also tricky.


The Azure Sentinel Information Model (ASIM) provides a seamless experience for handling various sources in uniform, normalized views. ASIM aligns with the Open-Source Security Events Metadata (OSSEM) common information model, promoting vendor agnostic, industry-wide normalization. ASIM:


  • Allows source agnostic content and solutions

  • Simplifies analyst use of the data in sentinel workspaces


The current implementation is based on query time normalization using KQL functions. And includes the following:


  • Normalized schemas cover standard sets of predictable event types that are easy to work with and build unified capabilities. The schema defines which fields should represent an event, a normalized column naming convention, and a standard format for the field values.

  • Parsers map existing data to the normalized schemas. Parsers are implemented using KQL functions.

  • Content for each normalized schema includes analytics rules, workbooks, hunting queries, and additional content. This content works on any normalized data without the need to create source-specific content.


Ofer_Shezaf_0-1625063752942.png


Ofer Shezaf


Principal Product Manager, Azure Sentinel


CLI for Microsoft 365 v3.11

CLI for Microsoft 365 v3.11

This article is contributed. See the original author and article here.

CLI for Microsoft 365 v3.11CLI for Microsoft 365 v3.11


Manage Microsoft 365 and SharePoint Framework projects on any platform


CLI for Microsoft 365 is a cross-platform CLI that allows you to manage various configuration settings of Microsoft 365 and SharePoint Framework projects no matter which operating system or shell you use.


While building solutions for Microsoft 365 expands beyond the Windows operating system, managing many of the platform settings is possible only through PowerShell on Windows. As more and more users work on non-Windows machines, it’s inconvenient for them to have to use a Windows virtual machine to configure their tenants. With the CLI for Microsoft 365, you can configure your tenant no matter which operating system you use. Additionally, using CLI for Microsoft 365, you can manage your SharePoint Framework projects.


New version of CLI for Microsoft 365 – v3.11


Following our monthly release cadence, we’ve released a new version of the CLI for Microsoft 365 with some new capabilities. Here are a few of the most noteworthy additions.


Changes


We’ve continued improving the CLI, building upon the changes we’ve introduced in the previous version.


Upgrading commands to use Microsoft Graph v1.0 endpoints


When new capabilities are added to the Microsoft Graph they are usually added to the beta endpoint, this is to give developers early access to new capabilities however this is based on an assumption that these endpoints are subject to change until they reach general availability where they are added to the v1.0 endpoint.


Sometimes when we add new commands to the CLI for Microsoft 365 we make use of beta endpoints to add new capabilities to the CLI, for example, we recently added several Microsoft To Do commands that used the beta endpoints when they were initially released.

Over time however these endpoints have matured, reaching general availability and are now available in the v1.0 endpoint, therefore we have updated our code to reflect this.


We have updated the following commands in this version of the CLI to use v1.0 endpoints.


  • todo list add

  • todo list list

  • todo list remove

  • todo list set

  • teams user app remove

  • teams user app add

  • teams team set

  • teams message reply list


Retrieve details of a Power App by its name


Previously we only supported retrieving details of a Power App from an environment using its ID, however in this release we have enhanced the command to enable you to return a Power App by its name making it much more user friendly.


To retrieve details of a Power App by its name, execute:

m365 pa app get --displayName App


Update description of a SharePoint Online site


Previously we supported the ability to update properties on SharePoint Online site, however one property that was not supported was the description property. In this release, we have enhanced commands to provide support for updating this on both modern and classic sites.


To update the description on a modern SharePoint Online site, execute:

m365 spo site set --url https://contoso.sharepoint.com/sites/ModernSite --description "something"


To update the description on a classic SharePoint Online site, execute:

m365 spo site classic set --url https://contoso.sharepoint.com/sites/ClassicSite --description "something"


SPFx v1.12.1 support added to spfx doctor


The spfx doctor command has been updated to support the latest version of SharePoint Framework.


The command helps you verify that all prerequisites for building solutions using a particular version of the SharePoint Framework are met in your development environment. It starts by detecting the version of SharePoint Framework that you want to use.


First, it looks at the current project. If you didn’t run the command in the context of a SharePoint Framework project, the command will try to determine the SharePoint Framework version based on the SharePoint Framework Yeoman generator that you have installed either in the current directory or globally.


Based on the determined version of the SharePoint Framework, the command will look at other dependencies such as Node.js, npm, Yeoman, Gulp, React and TypeScript to verify if their meet the requirements of that particular version of the SharePoint Framework.


If you miss any required tools or use a version that doesn’t meet the SharePoint Framework requirements, the command will give you a list of recommendation how to address these issues.


To verify if your environment meets the requirements to work with the SharePoint Framework, execute:

m365 spfx doctor


New Commands


Remove role from Azure AD application


In the previous CLI release we added a command that enabled to you define custom roles on Azure AD applications that you can use to assign permissions to users or apps. In this release we have added the ability to remove a custom role.


To remove a role published by an Azure AD application registration by its name, execute:


m365 aad app role delete --appName "My app" --claim "Product.Get"


Update Azure AD application registration


We have added a new command that gives you the ability to update an Azure AD application registration.


In this first iteration of the command, we only support the ability to update the application URI property value.  


To update the application URI of an Azure AD application registration specified by its name, execute:

m365 aad app set --name "My app" --uri https://contoso.com/e75be2e1-0204-4f95-857d-51a37cf40be8


Clear Microsoft 365 Groups from the tenant recycle bin


When Microsoft 365 Groups are deleted in a Microsoft 365 tenant, they are soft deleted and are moved to the tenant recycle bin which they will remain for 30 days at which point they will be automatically hard deleted, however whilst the group remains in the recycle bin it is not possible to create new groups with the same name.


Whilst an administrator can manually hard-delete groups from the recycle bin via the Microsoft 365 Admin Portal however this can be inconvenient if you wish to bulk hard-delete these groups. We have added a command that removes all of the groups in the recycle bin in a single command to make this easier.


To remove all deleted Microsoft 365 Groups in the tenant, execute:

m365 aad o365group recyclebinitem clear


Reset CLI configuration option to its default value


We recently introduced commands that enables you to personalise the behaviour of the CLI to your own preferences using the cli config commands. In this release we have added the ability for you to reset these options back to their default values.


To reset the showHelpOnFailure to its default value, execute:

m365 cli config reset --key showHelpOnFailure


Alternatively, to reset all configuration options to their default values, execute:

m365 cli config reset


Microsoft 365 Activation Report Commands


We have added commands that enables administrators get an understanding of how many users have activated Microsoft 365 on desktops and devices as well as who has made those activations.


To get the count of Microsoft 365 activations on desktops and devices, execute:

m365 tenant report office365activationcounts


To get the count of users that are enabled and those that have activated the Office subscription on desktop or devices or shared computers, execute:

m365 tenant report office365activationsusercounts


To get details about users who have activated Microsoft 365, execute:

m365 tenant report office365activationsuserdetail


Generate SharePoint Framework solution from a HTML file


SharePoint Framework is the extensibility model of choice in Microsoft 365, whether that is extending SharePoint Online or Microsoft Teams, it is the go-to framework for in house development.


We have introduced a command that simplifies the creation of a SharePoint Framework solution package that generates a SharePoint Framework web part that uses a local HTML file as the contents of the web part.


To generate a web part that shows the weather for Amsterdam, load web part contents from a local file, allow the web part to be deployed to all sites and expose the web part in Teams as a personal tab, execute:


m365 spfx package generate –webPartTitle “Amsterdam weather” –webPartDescription “Shows weather in Amsterdam” –packageName amsterdam-weather –html @amsterdam-weather.html –allowTenantWideDeployment –enableForTeams all


New script samples


CLI for Microsoft 365 is a great tool both for quick adjustments to the configuration of your Microsoft 365 tenant as well as automating more complex tasks. Because CLI for Microsoft 365 is cross-platform you can use it on any OS and in any shell. To help you get started using the CLI for Microsoft 365 for automation scenarios, we started gathering some sample scripts.


If you have any scripts that you use frequently, please share them with us so that we can learn more about the common automation scenarios.


Resubmit all failed Power Automate Flow runs for a specific flow in an environment


Have you ever been forced to resubmit lot of failed Power Automate flow runs manually?


This script will resubmit all failed flow runs of a Power Automate flow created in an environment. 


Cancel all running Power Automate Flow runs for a Flow in an environment

Do you want to automate the cancellation of running Power Automate Flow runs?


This script will cancel all running flow runs of a Power Automate flow created in an environment.


Remove SharePoint API permissions

When building SharePoint Framework solutions connected to APIs secured with Azure Active Directory, you might need to clear the list of granted API permissions.


This script helps you to quickly remove SharePoint API permissions.


Remove pending SharePoint API permission requests


When building SharePoint Framework solutions connected to APIs secured with Azure Active Directory, you’ll easily end up with many pending permission requests.


This script helps you to quickly remove pending SharePoint API permission requests.


Contributors


This release wouldn’t be possible without the help of (in alphabetical order)


Thank you all for the time you chose to spend on the CLI for Microsoft 365 and your help to advance it!


Work in progress


Here are some things that we’re currently working on.


More commands, what else


Microsoft 365 is evolving and new capabilities are being released every day. With CLI for Microsoft 365, we aim to help you manage your tenant on any platform in a consistent way, no matter which part of Microsoft 365 you interact with. While we keep adding new commands to CLI for Microsoft 365 each release, we still barely scratched the surface with what’s possible in Microsoft 365. In the upcoming versions of the CLI for Microsoft, you can expect us to add more commands across the different workloads in Microsoft 365.


Updating Azure AD apps


Recently, we introduced a command to easily create Azure AD app registrations. Because they’re backbone of every app you’d build on Microsoft 365, we think you should be able to create them as easily as possible. So with CLI for Microsoft 365, you can create a fully configured Azure AD app for the most common scenarios with just one line of code.


We’re currently working on adding support for updating Azure AD app registration which will be helpful for example when building apps for Microsoft Teams. Stay tuned!


Script examples


In every release of the CLI for Microsoft 365, we introduce new commands for managing Microsoft 365. With over 350 commands across the different Microsoft 365 services, the CLI for Microsoft 365 has become a powerful tool, not just for managing your tenant but also for automating your daily work.


We’d love to show you how you can use the CLI for Microsoft 365 to build automation scripts in PowerShell Core and Bash. If you have any scripts using SPO or PnP PowerShell that you use frequently, please share them with us so that we can learn more about the common automation scenarios.


‘ensure’ commands


Recently, we shipped our first ensure command – an easy way to help you that a site with specific settings exists. If it doesn’t, CLI creates it for you, if it does, CLI ensures it has the right properties. All in one line of code. We’d love to hear from you how you like it and if it’s something you’d like us to implement for other commands as well.


Try it today


Get the latest release of the CLI for Microsoft 365 from npm by executing:


npm i -g @pnp/cli-microsoft365


Alternatively, you can get the latest release from Docker by executing:


docker run --rm -it m365pnp/cli-microsoft365:latest


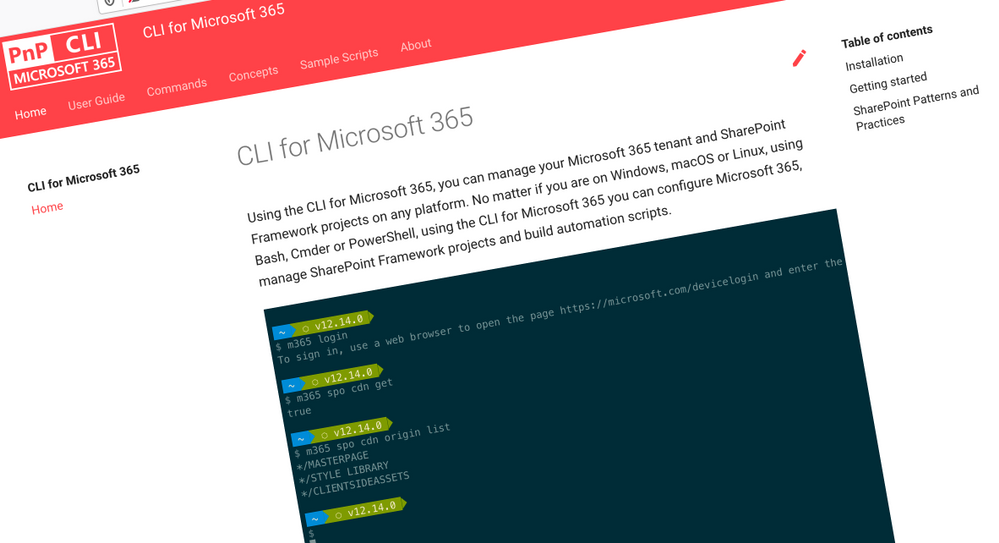
If you need more help getting started or want more details about the commands, the architecture or the project, go to aka.ms/cli-m365.


If you see any room for improvement, please, don’t hesitate to reach out to us either on GitHub or twitter.