This article is contributed. See the original author and article here.
Windows Terminal is great, I use it for all my command line work. It automatically detects new shells that are installed on your system, like the shell for Ubuntu or PowerShell Core 7. Unfortunately, it doesn’t detect the Developer Command Prompt and Developer PowerShell for Visual Studio. Luckily, you can add them yourself!
The steps are rather simple:
- Open Windows Terminal
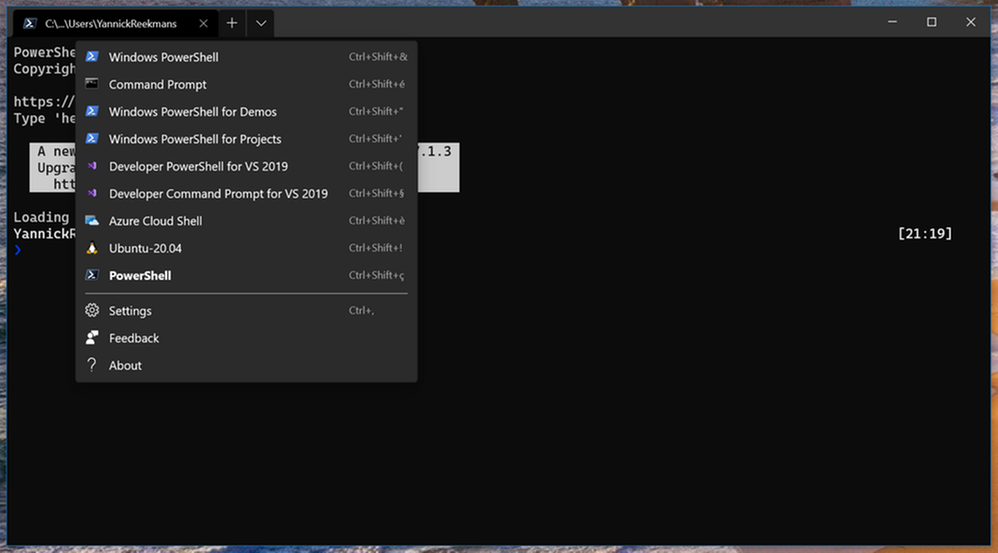
- Open the Settings through the UI (see screenshot) or with Ctrl+,
- In the
settings.jsonfile that opens in your favorite code editor, locate thelistsarray inside theprofilesobject

Inside that lists array, you can add your additional profiles. In this case, for the Visual Studio command prompts, just use the following snippet:
            {
                "name": "Developer PowerShell for VS 2019",
                "commandline": "powershell.exe -noe -c "&{$vsPath = &(Join-Path ${env:ProgramFiles(x86)} 'Microsoft Visual StudioInstallervswhere.exe') -property installationpath; Import-Module (Join-Path $vsPath 'Common7ToolsMicrosoft.VisualStudio.DevShell.dll'); Enter-VsDevShell -VsInstallPath $vsPath -SkipAutomaticLocation}"",
                "icon": "%ProgramFiles(x86)%Microsoft Visual Studio2019EnterpriseCommon7IDEAssetsVisualStudio.70x70.contrast-standard_scale-180.png"
            },
            {
                "name": "Developer Command Prompt for VS 2019",
                "commandline": "%comspec%  /k "%ProgramFiles(x86)%Microsoft Visual Studio2019EnterpriseCommon7ToolsVsDevCmd.bat"",
                "icon": "%ProgramFiles(x86)%Microsoft Visual Studio2019EnterpriseCommon7IDEAssetsVisualStudio.70x70.contrast-standard_scale-180.png"
            },
Save the settings.json file, and now the new options show when opening a new tab:

Time to do your Visual Studio command line work in the fancy new Windows Terminal!
Brought to you by Dr. Ware, Microsoft Office 365 Silver Partner, Charleston SC.

Recent Comments