by Contributed | Aug 19, 2024 | Technology
This article is contributed. See the original author and article here.
Are you ready to connect with OneDrive product makers this month? We’re gearing up for the next call. And a small FYI, we are approaching production a little different: The call broadcasts from the Microsoft Tech Community, within the OneDrive community hub. Same value. Same engagement. New and exciting home.
Join the OneDrive product team live each month on our monthly OneDrive Community Call (previously ‘Office Hours’) to hear what’s top of mind, get insights into roadmap updates, and dig into a special topic. Each call includes live Q&A where you’ll have a chance to ask the OneDrive product team any question about OneDrive – The home of your files.
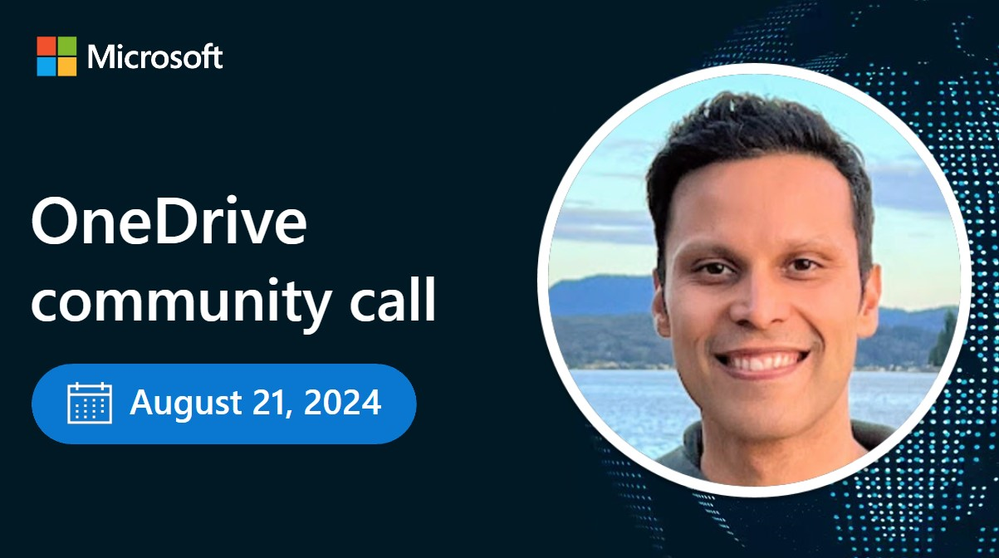
 Use this link to register and join live: https://aka.ms/OneDriveCommunityCall. Each call is recorded and made available on demand shortly after. Our next call is Wednesday, August 21st, 2024, 8:00am – 9:00am PDT. This month’s special topic: “Copilot in OneDrive” with @Arjun Tomar, Senior Product Manager on the OneDrive team at Microsoft. “Add to calendar” (.ics file) and share the event page with anyone far and wide.
 OneDrive Community Call – August 21, 2024, 8am PDT. Special guest, Arjun Tomar, to share more about our special topic this month: “Copilot in OneDrive.”
Our goal is to simplify the way you create and access the files you need, get the information you are looking for, and manage your tasks efficiently. We can’t wait to share, listen, and engage – monthly! Anyone can join this one-hour webinar to ask us questions, share feedback, and learn more about the features we’re releasing soon and our roadmap.
Note: Our monthly public calls are not an official support tool. To open support tickets, go to see Get support for Microsoft 365; distinct support for educators and education customers is available, too.
Stay up to date on Microsoft OneDrive adoption on adoption.microsoft.com. Join our community to catch all news and insights from the OneDrive community blog. And follow us on Twitter: @OneDrive. Thank you for your interest in making your voice heard and taking your knowledge and depth of OneDrive to the next level.
You can ask questions and provide feedback in the event Comments below and we will do our best to address what we can during the call.
 Register and join live: https://aka.ms/OneDriveCommunityCall
See you there, Irfan Shahdad (Principal Product Manager – OneDrive, Microsoft)

by Contributed | Aug 19, 2024 | Dynamics 365, Microsoft 365, Technology
This article is contributed. See the original author and article here.
Enterprise Resource Planning (ERP) is about knowing today the best way to approach tomorrow. It’s about collecting accurate snapshots of various business functions at any point in time, so leaders can make clear, careful decisions that poise the organization to thrive in the future.
ERP sprang from systems designed to help manufacturers track inventory and raw material procurement. As businesses have become more complex and computing more ubiquitous, ERP platforms have grown into aggregated tech stacks or suites with vertical extensions that track data from supply chain, logistics, asset management, HR, finance, and virtually every aspect of the business. But adding all those facets—and their attendant data streams—to the picture can clutter the frame, hampering the agility of an ERP platform.
Generative AI helps restore clarity. One of the animating features of AI lies in its ability to process data that lives outside the ERP—all the data an organization can access, in fact—to output efficient, error-free information and insights. AI-enabled ERP systems increase business intelligence by aggregating comprehensive data sets, even data stored in multiple clouds, in seconds, then delivering information from them securely, wherever and whenever they may be needed.
Today we’ll examine a few of the many ways AI elevates ERP functionality.
Transform your business
Perform better with AI-powered ERP.
AI tailored to modern business needs
ERPs began as ways to plan material flow to ensure smooth manufacturing runs. Today’s supply chains remain as vulnerable as ever to price fluctuations, political turmoil, or natural disasters. In many firms, buyers and procurement teams must handle fluctuations and change response in large volumes of purchase orders involving quantities and delivery dates. They frequently have to examine these orders individually and assess risk to plans and downstream processes.
Now, ERPs can use AI to quickly assess and rank high- and low-impact changes, allowing teams to rapidly take action to address risk. AI-enabled ERPs like Microsoft Dynamics 365 allow users to handle purchase order changes at scale and quickly communicate with internal and external stakeholders.
Using natural language, an AI-assistant can bring relevant information into communications apps, keeping all parties apprised of, say, unexpected interruptions in supply due to extreme climate events or local market economics—and able to collaborate to find a rapid solution.
Planners can proactively stress-test supply chains by simply prompting the AI Assistant with “what-if?” scenarios. Risk managers might ask, “If shipping traffic in the Persian Gulf is interrupted, what are our next fastest supply routes for [material] from [country]?” Empowered with AI’s ability to reason over large volumes of data, make connections, and then deliver recommendations in clear natural language, the right ERP system could help provide alternatives for planners to anticipate looming issues and downgrade risk.
Learn more about Copilot for Microsoft Dynamics 365 Supply Chain Management.
AI enables better project management
Supply chain may be where ERPs were born, but we’ve come a long way. ERPs now contribute to the run of business across the organization—and AI can make each of these more powerful.
Whether you call them project managers or not, every organization has people whose job it is to manage projects. The chief obstacles for project managers typically involve completing projects on time and on budget. An AI-enabled ERP can cut the time project managers spend compiling status reports, planning tasks, and running risk assessments.
Take Microsoft Copilot for Dynamics 365 Project Operations, for instance. With Copilot, creating new project plans—a task that used to take managers hours to research and write—now takes minutes. Managers can type in a simple description of the project, details of the timeline, budget, and staff availability. Then, Copilot generates a plan. Managers can fine-tune as necessary and launch the project. Along the way, Copilot automatically produces real-time status reports in minutes, identifies risks, and suggests mitigation plans—all of which is updated and adjusted on a continuous basis as the project progresses and new data becomes available.
Learn more about Copilot for Dynamics 365 for Project Operations.
Follow the money: AI streamlines financial processes
Timely payments, healthy cash flow, accurate credit information, successful collections—all of these functions are important for competitive vigor. All are part of a robust ERP, and all can be optimized by AI.
At the top of the organization, real-time, comprehensive snapshots of the company’s financial positions enable leadership agility. But at an ongoing, operational level, AI can improve financial assessments for every department as well. By accessing data streams from across the organization—supply chain, HR, sales, accounts payable, service—AI provides financial planners with the ability to make decisions about budgets, operations planning, cash flow forecasting, or workforce provisioning based on more accurate forecasts and outcomes.
AI can help planners collaboratively align budgets with business strategy and engage predictive analytics to sharpen forecasts. Anywhere within an ERP enhanced visibility is an advantage, AI provides it—and more visibility enables greater agility. AI can, for instance, mine processes to help optimize operations and find anomalies the human eye might fail to catch.
An AI-enabled ERP system also elevates the business by closing talent gaps across the organization.
Learn more about Microsoft Dynamics 365 ERP.
The future of smarter: Finding new workflows with generative AI
These are just a few of the ways AI eases current workflows. The untapped strength of AI in an ERP lies in companies finding new workflows enabled by AI that add value—like predictive maintenance algorithms for machines on a factory floor, or recommendation engines to find new suppliers or partners, or modules that aid in new product design enhanced by customer feedback.
The future rarely looks simpler than the past. When faced with increasing complexity, a common human adaptation is to compartmentalize, pack information into silos that we can shuffle around in our minds. In a business context, ERP platforms were conceived to integrate those silos with software, so people can manage the individual streams of information the way a conductor brings the pieces of a symphony together, each instrument at the right pitch and volume, in the right time.
Generative AI helps us to do just that, collecting all the potential inputs and presenting them in a relationship to each other. This frees planners to focus on the big picture and how it all comes together, so we can decide which elements to adjust and where it all goes next.
Learn more about Microsoft Copilot in Dynamics 365.
Using generative AI responsibly is critical to the continued acceptance of the technology and the maximizing of its potential. Microsoft has recently released its Responsible AI Transparency Report for 2024. This report details the criteria for how we build applications responsibly, decide when to release generative applications, support our customer in building responsibly, and learn, grow, and evolve our generative AI offerings.
The post Generative AI in ERP means more accurate planning across the organization appeared first on Microsoft Dynamics 365 Blog.
Brought to you by Dr. Ware, Microsoft Office 365 Silver Partner, Charleston SC.
by Contributed | Aug 18, 2024 | Technology
This article is contributed. See the original author and article here.
Recently, we faced a requirement to upgrade large number of Azure SQL databases from general-purpose to business-critical.
As you’re aware, this scaling-up operation can be executed via PowerShell, CLI, or the Azure portal and follow the guidance mentioned here – Failover groups overview & best practices – Azure SQL Managed Instance | Microsoft Learn
Given the need to perform this task across a large number of databases, individually running commands for each server is not practical. Hence, I have created a PowerShell script to facilitate such extensive migrations.
# Scenarios tested:
# 1) Jobs will be executed in parallel.
# 2) The script will upgrade secondary databases first, then the primary.
# 3) Upgrade the database based on the primary listed in the database info list.
# 4) Script will perform the check prior to the migration in case of the role has changed from primary to secondary of the database mentioned in the database info list.
# 5) Upgrade individual databases in case of no primary/secondary found for a given database.
# 6) Upgrade the database if secondary is upgraded but primary has not been upgraded. Running the script again will skip the secondary and upgrade the primary database.
# In other words, SLO mismatch will be handled based on the SKU defined in the database info list.
# 7) Track the database progress and display the progress in the console.
Important consideration:
# This script performs an upgrade of Azure SQL databases to a specified SKU.
# The script also handles geo-replicated databases by upgrading the secondary first, then the primary, and finally any other databases without replication links.
# The script logs the progress and outcome of each database upgrade to the console and a log file.
# Disclaimer: This script is provided as-is, without any warranty or support. Use it at your own risk.
# Before running this script, make sure to test it in a non-production environment and review the impact of the upgrade on your databases and applications.
# The script may take a long time to complete, depending on the number and size of the databases to be upgraded.
# The script may incur additional charges for the upgraded databases, depending on the target SKU and the duration of the upgrade process.
# The script requires the Az PowerShell module and the appropriate permissions to access and modify the Azure SQL databases.
# Define the list of database information
$DatabaseInfoList = @(
  #@{ DatabaseName = '{DatabaseName}'; PartnerResourceGroupName = '{PartnerResourcegroupName}'; ServerName = '{ServerName}'  ; ResourceGroupName = '{ResourceGroupName}'; RequestedServiceObjectiveName =  '{SLODetails}'; subscriptionID = '{SubscriptionID}' }
   )

# Define the script block that performs the update
$ScriptBlock = {
    param (
        $DatabaseInfo
    )

    Set-AzContext -subscriptionId $DatabaseInfo.subscriptionID

        ###store output in txt file
        $OutputFilePath = "C:temp$($DatabaseInfo.DatabaseName)_$($env:USERNAME)_$($Job.Id)_Output.txt"
        $OutputCapture = @()
        $OutputCapture += "Database: $($DatabaseInfo.DatabaseName)"


    $ReplicationLink = Get-AzSqlDatabaseReplicationLink -DatabaseName $DatabaseInfo.DatabaseName -PartnerResourceGroupName $DatabaseInfo.PartnerResourceGroupName -ServerName $DatabaseInfo.ServerName -ResourceGroupName $DatabaseInfo.ResourceGroupName
    $PrimaryServerRole = $ReplicationLink.Role
    $PrimaryResourceGroupName = $ReplicationLink.ResourceGroupName
    $PrimaryServerName = $ReplicationLink.ServerName
    $PrimaryDatabaseName = $ReplicationLink.DatabaseName

    $PartnerRole = $ReplicationLink.PartnerRole
    $PartnerServerName = $ReplicationLink.PartnerServerName
    $PartnerDatabaseName = $ReplicationLink.PartnerDatabaseName
    $PartnerResourceGroupName = $ReplicationLink.PartnerResourceGroupName


    $UpdateSecondary = $false
    $UpdatePrimary = $false

    if ($PartnerRole -eq "Secondary" -and $PrimaryServerRole -eq "Primary") {
        $UpdateSecondary = $true
        $UpdatePrimary = $true
    }
    #For Failover Scenarios only
    elseif ($PartnerRole -eq "Primary" -and $PrimaryServerRole -eq "Secondary") {
        $UpdateSecondary = $true
        $UpdatePrimary = $true

        $PartnerRole = $ReplicationLink.Role
        $PartnerServerName = $ReplicationLink.ServerName
        $PartnerDatabaseName = $ReplicationLink.DatabaseName
        $PartnerResourceGroupName = $ReplicationLink.ResourceGroupName

        $PrimaryServerRole = $ReplicationLink.PartnerRole
        $PrimaryResourceGroupName = $ReplicationLink.PartnerResourceGroupName
        $PrimaryServerName = $ReplicationLink.PartnerServerName
        $PrimaryDatabaseName = $ReplicationLink.PartnerDatabaseName
    }

    Try
    {
        if ($UpdateSecondary) {
            $DatabaseProperties = Get-AzSqlDatabase -ResourceGroupName $PartnerResourceGroupName -ServerName $PartnerServerName -DatabaseName $PartnerDatabaseName
            #$DatabaseEdition = $DatabaseProperties.Edition
            $DatabaseSKU = $DatabaseProperties.RequestedServiceObjectiveName
            if ($DatabaseSKU -ne $DatabaseInfo.RequestedServiceObjectiveName)  {
                Write-host "Secondary started at $(Get-Date) of DB $UpdateSecondary"
                $OutputCapture += "Secondary started at $(Get-Date) of DB $UpdateSecondary"

                Set-AzSqlDatabase -ResourceGroupName $PartnerResourceGroupName -DatabaseName $PartnerDatabaseName -ServerName $PartnerServerName -Edition "BusinessCritical"  -RequestedServiceObjectiveName $DatabaseInfo.RequestedServiceObjectiveName
                Write-host "Secondary end at $(Get-Date)"
                $OutputCapture += "Secondary end at $(Get-Date)"


                # Start Track Progress
                $activities = Get-AzSqlDatabaseActivity -ResourceGroupName $PartnerResourceGroupName -ServerName $PartnerServerName -DatabaseName $PartnerDatabaseName |
                Where-Object {$_.State -eq "InProgress" -or $_.State -eq "Succeeded" -or $_.State -eq "Failed"} |  Sort-Object -Property StartTime -Descending | Select-Object -First 1

                if ($activities.Count -gt 0) {
                    Write-Host "Operations in progress or completed for $($PartnerDatabaseName):"
                    $OutputCapture += "Operations in progress or completed for $($PartnerDatabaseName):"
                    foreach ($activity in $activities) {
                    Write-Host "Activity Start Time: $($activity.StartTime) , Activity Estimated Completed Time: $($activity.EstimatedCompletionTime) , Activity ID: $($activity.OperationId), Server Name: $($activity.ServerName), Database Name: $($activity.DatabaseName), Status: $($activity.State), Percent Complete: $($activity.PercentComplete)%, Description: $($activity.Description)"
                    $OutputCapture += "Activity Start Time: $($activity.StartTime) , Activity Estimated Completed Time: $($activity.EstimatedCompletionTime) , Activity ID: $($activity.OperationId), Server Name: $($activity.ServerName), Database Name: $($activity.DatabaseName), Status: $($activity.State), Percent Complete: $($activity.PercentComplete)%, Description: $($activity.Description)"
                    }
                    Write-Host  "$PartnerDatabaseName Upgrade Successfully Completed!"
                    $OutputCapture += "$PartnerDatabaseName Upgrade Successfully Completed!"
                } else {
                    Write-Host "No operations in progress or completed for $($PartnerDatabaseName)"
                    $OutputCapture += "No operations in progress or completed for $($PartnerDatabaseName)"
                }
                # End Track Progress
               #
            }
            else {
                Write-host "Database $PartnerDatabaseName is already upgraded."
                $OutputCapture += "Database $PartnerDatabaseName is already upgraded."
            }
        }

        if ($UpdatePrimary) {
            $DatabaseProperties = Get-AzSqlDatabase -ResourceGroupName $PrimaryResourceGroupName -ServerName $PrimaryServerName -DatabaseName $PrimaryDatabaseName
           # $DatabaseEdition = $DatabaseProperties.Edition
            $DatabaseSKU = $DatabaseProperties.RequestedServiceObjectiveName
            if ($DatabaseSKU -ne $DatabaseInfo.RequestedServiceObjectiveName){
            Write-host "Primary started at $(Get-Date) of DB $UpdatePrimary"
            $OutputCapture += "Primary started at $(Get-Date) of DB $UpdatePrimary"
            Set-AzSqlDatabase -ResourceGroupName $PrimaryResourceGroupName -DatabaseName $PrimaryDatabaseName -ServerName $PrimaryServerName -Edition "BusinessCritical"  -RequestedServiceObjectiveName $DatabaseInfo.RequestedServiceObjectiveName
            Write-host "Primary end at $(Get-Date)"
            $OutputCapture += "Primary end at $(Get-Date)"


            # Start Track Progress
            $activities = Get-AzSqlDatabaseActivity -ResourceGroupName $PrimaryResourceGroupName -ServerName $PrimaryServerName -DatabaseName $PrimaryDatabaseName |
            Where-Object {$_.State -eq "InProgress" -or $_.State -eq "Succeeded" -or $_.State -eq "Failed"} |  Sort-Object -Property StartTime -Descending | Select-Object -First 1

            if ($activities.Count -gt 0) {
                Write-Host "Operations in progress or completed for $($PrimaryDatabaseName):"
                $OutputCapture += "Operations in progress or completed for $($PrimaryDatabaseName):"
                foreach ($activity in $activities) {
                Write-Host "Activity Start Time: $($activity.StartTime) , Activity Estimated Completed Time: $($activity.EstimatedCompletionTime) , Activity ID: $($activity.OperationId), Server Name: $($activity.ServerName), Database Name: $($activity.DatabaseName), Status: $($activity.State), Percent Complete: $($activity.PercentComplete)%, Description: $($activity.Description)"
                $OutputCapture += "Activity Start Time: $($activity.StartTime) , Activity Estimated Completed Time: $($activity.EstimatedCompletionTime) , Activity ID: $($activity.OperationId), Server Name: $($activity.ServerName), Database Name: $($activity.DatabaseName), Status: $($activity.State), Percent Complete: $($activity.PercentComplete)%, Description: $($activity.Description)"
                }
                Write-Host  "$PrimaryDatabaseName Upgrade Successfully Completed!"
                $OutputCapture += "$PrimaryDatabaseName Upgrade Successfully Completed!"
            } else {
                Write-Host "No operations in progress or completed for $($PrimaryDatabaseName)"
                $OutputCapture += "No operations in progress or completed for $($PrimaryDatabaseName)"
            }
            # End Track Progress
           #
            }
            else {
                Write-host "Database $PrimaryDatabaseName is already upgraded."
                $OutputCapture += "Database $PrimaryDatabaseName is already upgraded."
            }
        }

        if (!$UpdateSecondary -and !$UpdatePrimary) {
            $DatabaseProperties = Get-AzSqlDatabase -ResourceGroupName $DatabaseInfo.ResourceGroupName -ServerName $DatabaseInfo.ServerName -DatabaseName $DatabaseInfo.DatabaseName
            # $DatabaseEdition = $DatabaseProperties.Edition
             $DatabaseSKU = $DatabaseProperties.RequestedServiceObjectiveName
        If ($DatabaseSKU -ne $DatabaseInfo.RequestedServiceObjectiveName)  {
            Write-Host "No Replica Found."
            $OutputCapture += "No Replica Found."
            Write-host "Upgrade started at $(Get-Date)"
            $OutputCapture += "Upgrade started at $(Get-Date)"
            Set-AzSqlDatabase -ResourceGroupName $DatabaseInfo.ResourceGroupName -DatabaseName $DatabaseInfo.DatabaseName -ServerName $DatabaseInfo.ServerName -Edition "BusinessCritical"  -RequestedServiceObjectiveName $DatabaseInfo.RequestedServiceObjectiveName
            Write-host "Upgrade completed at $(Get-Date)"
            $OutputCapture += "Upgrade completed at $(Get-Date)"

            # Start Track Progress
            $activities = Get-AzSqlDatabaseActivity -ResourceGroupName $DatabaseInfo.ResourceGroupName -ServerName $DatabaseInfo.ServerName -DatabaseName $DatabaseInfo.DatabaseName |
            Where-Object {$_.State -eq "InProgress" -or $_.State -eq "Succeeded" -or $_.State -eq "Failed"} |  Sort-Object -Property StartTime -Descending | Select-Object -First 1

            if ($activities.Count -gt 0) {
                Write-Host "Operations in progress or completed for $($DatabaseInfo.DatabaseName):"
                $OutputCapture += "Operations in progress or completed for $($DatabaseInfo.DatabaseName):"
                foreach ($activity in $activities) {
                Write-Host "Activity Start Time: $($activity.StartTime) , Activity Estimated Completed Time: $($activity.EstimatedCompletionTime) , Activity ID: $($activity.OperationId), Server Name: $($activity.ServerName), Database Name: $($activity.DatabaseName), Status: $($activity.State), Percent Complete: $($activity.PercentComplete)%, Description: $($activity.Description)"
                $OutputCapture += "Activity Start Time: $($activity.StartTime) , Activity Estimated Completed Time: $($activity.EstimatedCompletionTime) , Activity ID: $($activity.OperationId), Server Name: $($activity.ServerName), Database Name: $($activity.DatabaseName), Status: $($activity.State), Percent Complete: $($activity.PercentComplete)%, Description: $($activity.Description)"
                }
                Write-Host  " "$DatabaseInfo.DatabaseName" Upgrade Successfully Completed!"
                $OutputCapture += "$($DatabaseInfo.DatabaseName) Upgrade Successfully Completed!"
            } else {
                Write-Host "No operations in progress or completed for $($DatabaseInfo.DatabaseName)"
                $OutputCapture += "No operations in progress or completed for $($DatabaseInfo.DatabaseName)"
            }
            # End Track Progress
           # Write-Host  " "$DatabaseInfo.DatabaseName" Upgrade Successfully Completed!"
        }
        else {
            Write-host "Database "$DatabaseInfo.DatabaseName" is already upgraded."
            $OutputCapture += "Database $($DatabaseInfo.DatabaseName) is already upgraded."
        }
        $OutputCapture += "Secondary started at $(Get-Date) of DB $UpdateSecondary"
    }
    }
    Catch
    {
        # Catch any error
        Write-Output "Error occurred: $_"
        $OutputCapture += "Error occurred: $_"
    }
    Finally
    {
        Write-Host "Upgrade Successfully Completed!"
        $OutputCapture += "Upgrade Successfully Completed!"
            # Output the captured messages to the file
            $OutputCapture | Out-File -FilePath $OutputFilePath
    }

}

# Loop through each database and start a background job
foreach ($DatabaseInfo in $DatabaseInfoList) {
    Start-Job -ScriptBlock $ScriptBlock -ArgumentList $DatabaseInfo
}

# Wait for all background jobs to complete
Get-Job | Wait-Job

# Retrieve and display job results
#Get-Job | Receive-Job
Get-Job | ForEach-Object {
    $Job = $_
    $OutputFilePath = "C:temp$($Job.Id)_Output.txt"
    Receive-Job -Job $Job | Out-File -FilePath $OutputFilePath  # Append job output to the text file
}

# Clean up background jobs
Get-Job | Remove-Job -Force
write-host "Execution Completed successfully."
$OutputCapture += "Execution Completed successfully."

by Contributed | Aug 16, 2024 | Technology
This article is contributed. See the original author and article here.

Sejam bem-vindos a primeira edição da Comunidade do Azure Static Web Apps! Todo mês, nós compartilharemos os conteúdos que a Comunidade Técnica criou, seja em formato de artigos, vídeos, podcasts que falam sobre o Azure Static Web Apps.
Quer ter o seu conteúdo compartilhado no TechCommunity no #ThisMonthInAzureStaticWebApps? Veja como!
1 – Crie um artigo, vídeo, podcast ou até mesmo algum projeto Open Source que fale ou tenha relação com o Azure Static Web Apps.
2 – Compartilhe o seu conteúdo no Twitter, LinkedIn ou Instagram com a hashtag #AzureStaticWebApps
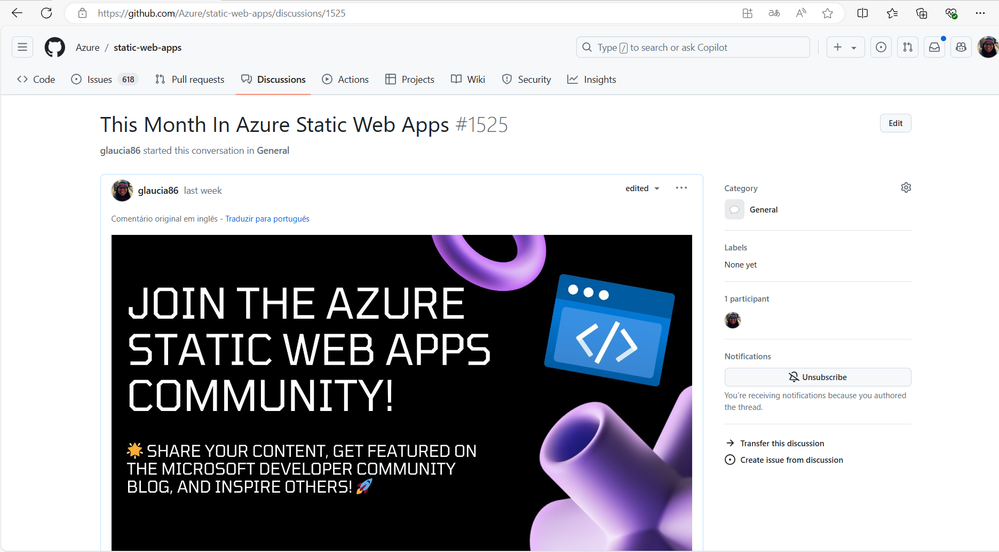
3 – Compartilhe também no nosso repositório oficial do Azure Static Web Apps no GitHub, na aba Discussions. Lá você encontrar um tópico chamado: This Month In Azure Static Web Apps. Compartilhe o link do seu conteúdo lá de acordo com o mês que você deseja que ele seja compartilhado.
4 – Pronto! Nós iremos compartilhar o seu conteúdo no TechCommunity da Microsoft no mês seguinte!
Independente do idioma que você escreva, seja em português, inglês, espanhol, francês, alemão, entre outros, nós queremos compartilhar o seu conteúdo!
Também se você estiver o Azure Static Web Apps com algum outro serviço ou Tecnologia, fique à vontade para compartilhar o seu conteúdo. Difere também da linguagem de programação que você está utilizando. Seja JavaScript, TypeScript, Python, Java, C#, Go, Rust, entre outras, nós queremos compartilhar o seu conteúdo!
Outro detalhe: você não precisa ser um especialista no Azure Static Web Apps para compartilhar o seu conteúdo. Se você está aprendendo sobre o serviço e quer compartilhar a sua jornada, fique à vontade para compartilhar o seu conteúdo!
Agora, vamos para os conteúdos do mês de Julho!
Agradecimentos!
Antes de começar a compartilhar os conteúdos, gostaríamos de agradecer a todas as pessoas que compartilharam os seus conteúdos no mês de Julho! Vocês são incríveis!
Conteúdos Compartilhados | Julho 2024
Agora vamos para os conteúdos compartilhados no mês de Julho de 2024!
Adding an API to an Azure hosted React Static Web App
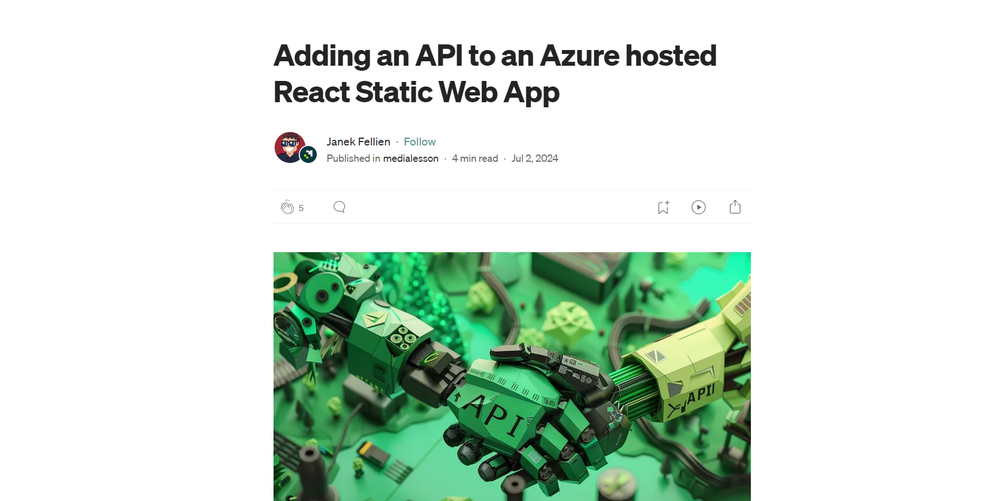
O artigo explica como adicionar uma API a um aplicativo React Static Web App hospedado no Azure, configurando um ambiente de desenvolvimento com SWA CLI e VS Code, criando uma função HTTP em C#, e integrando a API ao app React para exibir dados no site.
Quer aprender a conectar seu aplicativo React a uma API no Azure? Leia o artigo completo e descubra como adicionar funcionalidades dinâmicas ao seu projeto.
Link: Adding an API to an Azure hosted React Static Web App
Hosting Next.JS Static Websites on Azure Static Web App
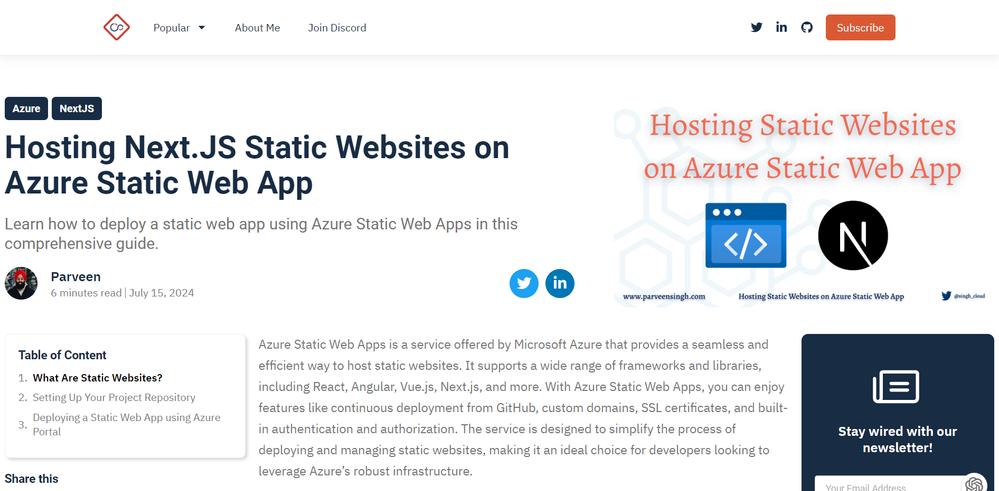
O artigo explica como hospedar sites estáticos criados com Next.js usando Azure Static Web Apps, abordando desde a configuração do repositório GitHub até a implantação contínua na Azure. É uma solução ideal para desenvolvedores que buscam simplicidade, segurança e escalabilidade em seus sites.
Quer aprender como hospedar seu site Next.js de forma simples e eficiente na Azure? Leia o artigo completo e descubra como aproveitar os recursos do Azure Static Web Apps!
Link: Hosting Next.JS Static Websites on Azure Static Web App
How to Deploy a React PWA to Azure Static Web Apps
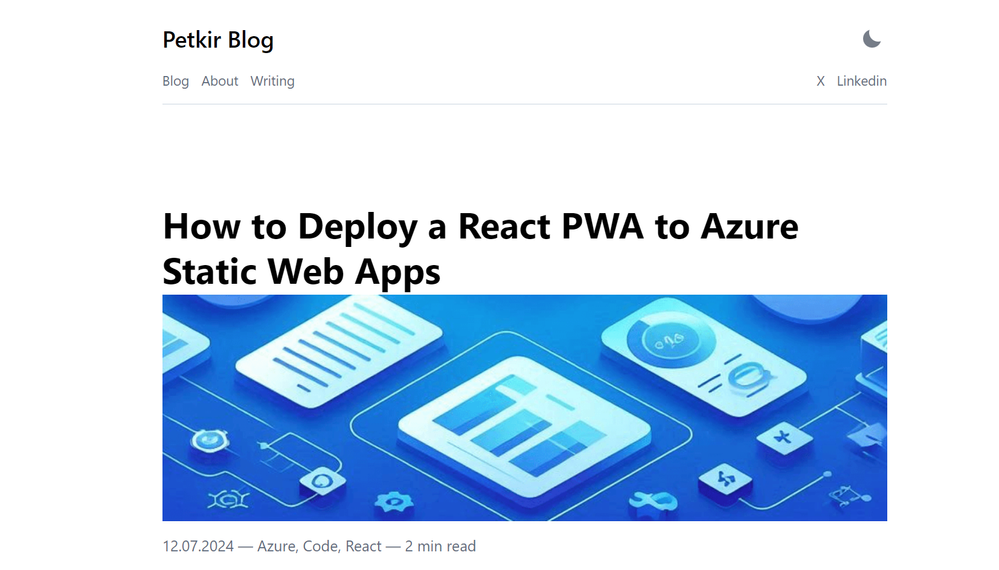
Este artigo ensina como implementar e automatizar o processo de deploy de uma aplicação React PWA para o Azure Static Web Apps usando GitHub Actions e Azure DevOps, além de gerar os recursos necessários com Bicep.
Quer aprender a simplificar o deploy de suas aplicações React PWA? Leia o artigo completo e descubra como automatizar tudo usando GitHub Actions e Azure DevOps!
Link: How to Deploy a React PWA to Azure Static Web Apps
Azure Static Web App: Seamless Microsoft Entra (Azure AD) Integration with Angular
- Autor: Sparrow Note YouTube Channel | Althaf Moideen Konnola
Este vídeo ensina como integrar Microsoft Entra (Azure AD) com uma Azure Static Web App usando Angular, incluindo configuração de SSO, registro de aplicação e exibição de informações do usuário.
Quer aprender a integrar autenticação com Microsoft Entra em suas aplicações Angular? Assista agora e domine essa integração essencial para uma experiência de login unificada!
Link: Azure Static Web App: Seamless Microsoft Entra (Azure AD) Integration with Angular
Trimble Connect Workspace API 007 – Deployment
- Autor: LetsConstructIT YouTube Channel
O vídeo demonstra como implantar uma aplicação local na nuvem usando Azure Static Web Apps, tornando-a acessível na web e integrada ao Trimble Connect, incluindo a configuração de extensões personalizadas.
Quer aprender a implantar suas aplicações na nuvem de forma simples e integrada com Trimble Connect? Assista ao vídeo completo e descubra como!
Link: Trimble Connect Workspace API 007 – Deployment
Blazor WASM Publishing to Azure Static Web Apps
- Autor: Abdul Rahman | Regina Sharon
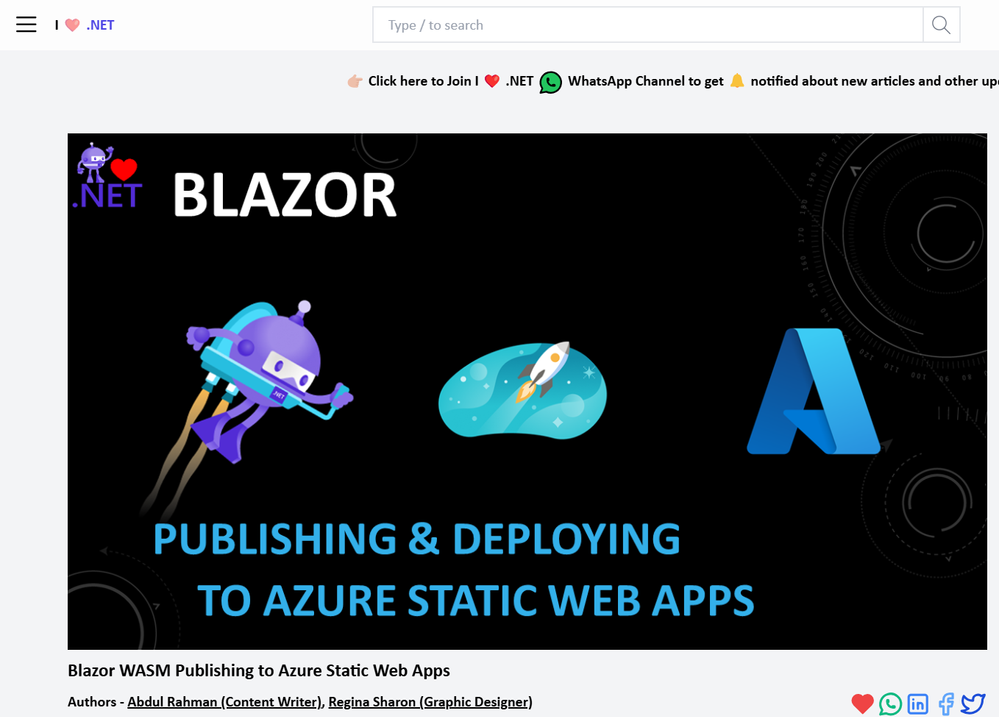
O artigo ensina como publicar aplicações Blazor WebAssembly (WASM) no Azure Static Web Apps, cobrindo desde a configuração inicial do projeto até a resolução de problemas comuns, como o erro 404 em atualizações de página. Ele também explica como personalizar o processo de build e configurar domínios personalizados.
Quer aprender a publicar suas aplicações Blazor WASM no Azure de forma simples e eficaz? Leia o artigo completo e descubra como configurar tudo passo a passo, garantindo que sua aplicação funcione perfeitamente!
Link: Blazor WASM Publishing to Azure Static Web Apps
Azure Static Web Apps Community Standup: Create a RAG App with App Spaces
- Autor: Skyler Hartle | Dheeraj Bandaru
O vídeo apresenta o App Spaces, uma nova ferramenta do Azure que simplifica a criação e o gerenciamento de aplicativos inteligentes, especialmente ao integrar Azure Static Web Apps e Azure Container Apps. Durante a sessão, é demonstrado como criar e implantar um aplicativo de Recuperação Aumentada por Geração (RAG), utilizando uma interface simples que conecta repositórios do GitHub e automatiza o processo de CI/CD.
Descubra como simplificar a criação de aplicativos inteligentes com o Azure App Spaces! Assista ao vídeo completo e aprenda a implantar rapidamente um aplicativo RAG em minutos. Não perca essa oportunidade de elevar suas habilidades de desenvolvimento na nuvem!
Link: Azure Static Web Apps Community Standup: Create a RAG App with App Spaces
Serverless Single Page Application (Vue.js) mit Azure Static Web Apps
- Autor: Florian Lenz
- Idioma: Alemão
Este artigo mostra como criar e implantar uma aplicação de página única (SPA) usando Vue.js e Azure Static Web Apps. Ele guia o leitor desde a criação do projeto até a adição de um backend serverless com Azure Functions, destacando a facilidade de uso e as vantagens do modelo serverless para aplicações full-stack.
Quer aprender a implantar sua aplicação Vue.js na nuvem com Azure Static Web Apps e aproveitar os benefícios do serverless? Leia o artigo completo e descubra como criar e gerenciar uma aplicação full-stack de forma simples e eficiente!
Link: Serverless Single Page Application (Vue.js) mit Azure Static Web Apps
Conclusão
Se você deseja ser destaque no próximo artigo do #ThisMonthInAzureStaticWebApps, compartilhe o seu conteúdo nas redes sociais com a hashtag #AzureStaticWebApps e também no nosso repositório oficial no GitHub. Estamos ansiosos para compartilhar o seu conteúdo no próximo mês!
Lembrando que você não precisa ser um especialista no Azure Static Web Apps para compartilhar o seu conteúdo. Se você está aprendendo sobre o serviço e quer compartilhar a sua jornada, fique à vontade para compartilhar o seu conteúdo!
Até a próxima edição! 
by Contributed | Aug 16, 2024 | Technology
This article is contributed. See the original author and article here.
What are Dev Containers?
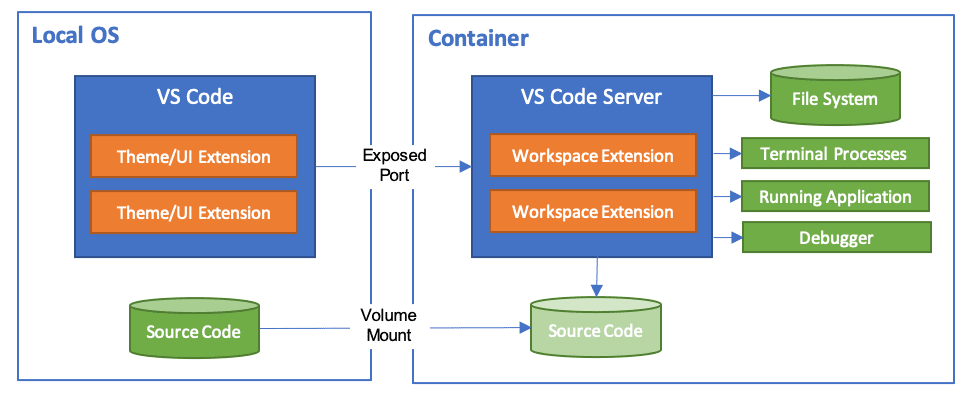
A development container essentially packages up your project’s development environment using the Development Container Specification (devcontainer.json). This specification enriches your container with metadata and content necessary to enable development from inside a container.
Workspace files are mounted from the local file system or copied or cloned into the container. Extensions are installed and run inside the container, where they have full access to the tools, platform, and file system. This means that you can seamlessly switch your entire development environment just by connecting to a different container.

Dev Container Templates are source files packaged together that encode configuration for a complete development environment, while Dev Container Features allow us to add runtimes, tools, and libraries inside a container. As a result, all this put together ensures a consistent and reproducible development environment from any tool that supports the Development Container Specification.
When you open your project in the dev container, your code will just work without downloading anything on your local machine. Furthermore, the best part is that when connected to a dev container, your developer experience is exactly the same as if you opened the project locally in VS Code.
Introducing Dev Container Templates for Azure SQL Database
We are excited to introduce new Dev Container templates specifically designed for Azure SQL Database. These templates support multiple programming languages, including .NET 8, .NET Aspire, Python, and Node.js, making it easier for developers to get started quickly and focus on building their applications.
Dev Containers streamline the development process by providing an out-of-the-box environment configured for Azure SQL Database. This eliminates the need for developers to spend time searching for and setting up VS Code extensions to interact with their database and preferred programming language. With these templates, you can dive straight into coding, boosting productivity and reducing setup friction.
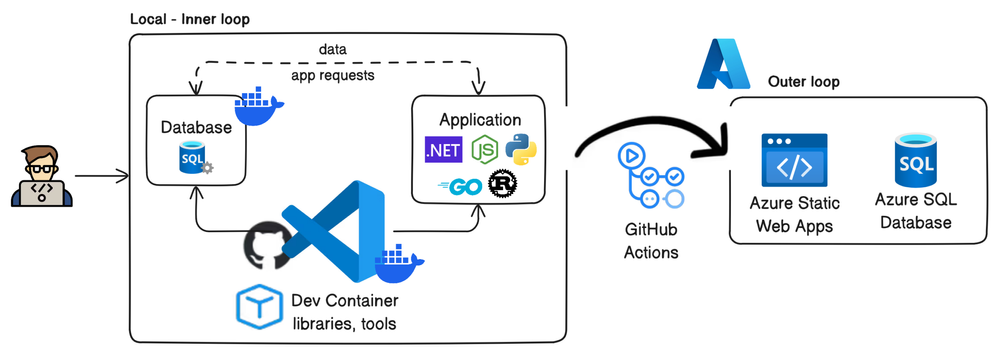
Included with the templates is a pre-built demo database called Library, which serves as a practical example to help developers get started quickly. While these Dev Containers use the Azure SQL Edge container image, which offers a surface area close to Azure SQL Database, using SQL Database Projects ensures that your database code remains compatible with Azure SQL Database. With this demo project, you can easily use the dacpac artifact created by SQL Database Projects and deploy it to Azure SQL Database using the Azure SQL Action for GitHub Actions. This process streamlines your workflow and ensures seamless integration with your production environment.
Whether working locally or in the cloud, dev containers ensure consistency across development environments, making it easier to collaborate and maintain high standards across your team. With the inclusion of essential tools like SQLCMD, SqlPackage, Azure Command-Line Interface (CLI) and Azure Developer CLI (AZD), these templates offer a comprehensive solution for enhancing your development workflow with Azure SQL Database.
Benefits of Using Dev Containers
Dev Containers ensure a consistent and seamless experience, promoting smooth collaboration across teams and workflows, and facilitating an easy transition to Azure environments. Key benefits include:
- Preconfigured environments: These come with all necessary tools and dependencies.
- Consistency: Maintain uniformity across different development setups.
- Simplified setup: Reduce time spent on configuration.
- Enhanced collaboration: Improve teamwork within development teams.
- Seamless transition to Azure: Leverage the scalability and reliability of Azure SQL Database for production deployments.
- Accelerated time-to-market: Streamline development workflows and integrate seamlessly with existing toolsets, giving businesses a competitive edge.
- Cost-efficient development: Reduce dependencies on cloud resources during the development and testing phases.
By using dev containers, developers can avoid the hassle of setting up and configuring their local development environment manually.
Prerequisites
Before you begin, make sure you have the following tools installed on your local machine:
To set up your environment, follow these steps:
- First, ensure you have Git installed for version control.
- Then, install Docker, which is necessary for running containers.
- After that, download and install Visual Studio Code, as it will be your primary IDE for using Dev Containers.
- Lastly, add the Dev Containers extension to Visual Studio Code to enable seamless containerized development.
Setting up the Dev Container template for Azure SQL Database
Creating a Dev Container
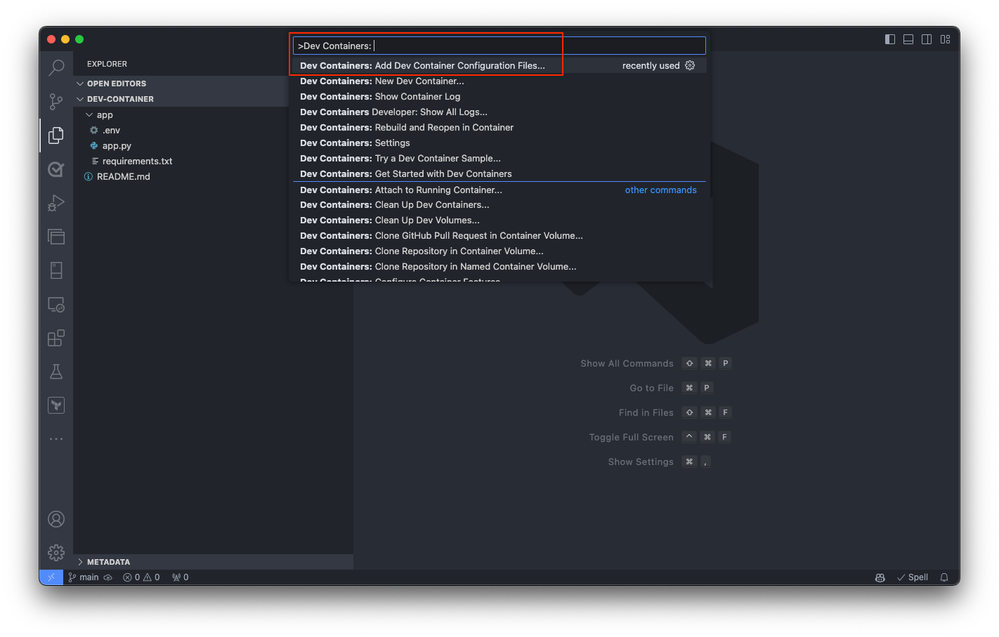
Begin by either opening a local folder containing your application project or cloning an existing repository into Visual Studio Code. This initial step sets the stage for integrating your project with a development container, whether you’re starting from scratch or working on an existing application. In Visual Studio Code, open the command palette (press F1 or Ctrl+Shift+P on Windows and Cmd+Shift+P on macOS). Select the
Dev Containers: Add Dev Container Configuration Files command.
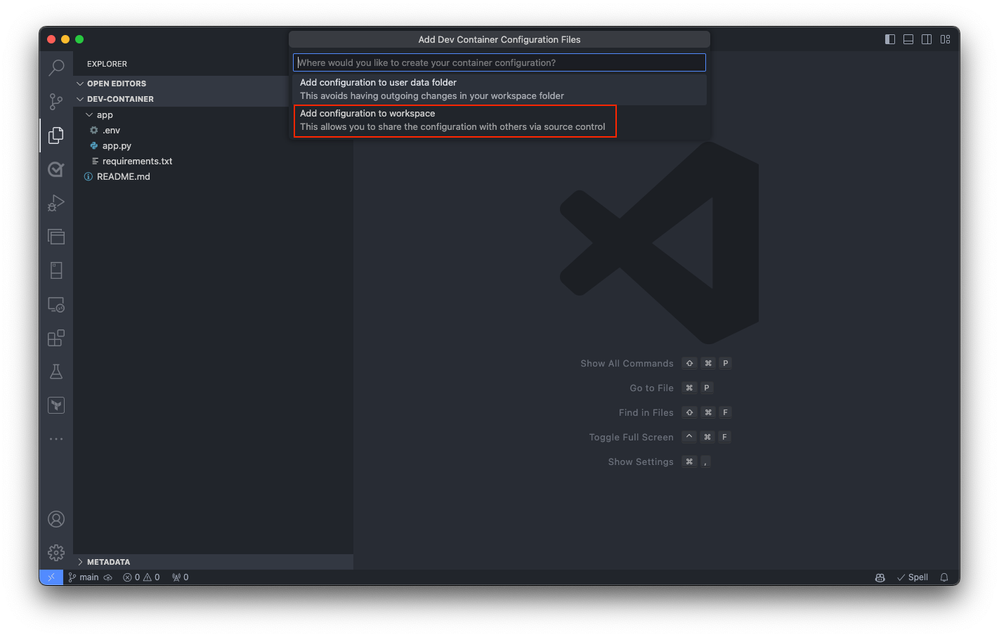
Select the Add configuration file to workspace option if you want to add the dev container configuration file to your current local repository. Alternatively, choose the Add configuration file to user data folder option. For this qiuckstart, select the Add configuration file to workspace option.
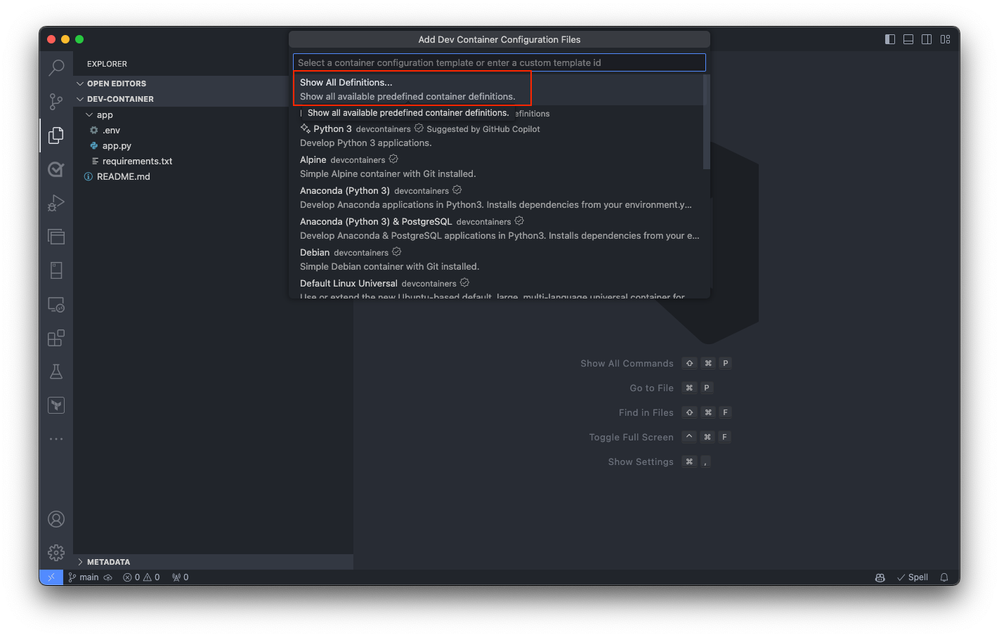
Visual Studio Code prompts you to select a Dev Container template. The available templates are based on the tools and dependencies required for the specific development environment. Select Show All Definitions to view all available templates.
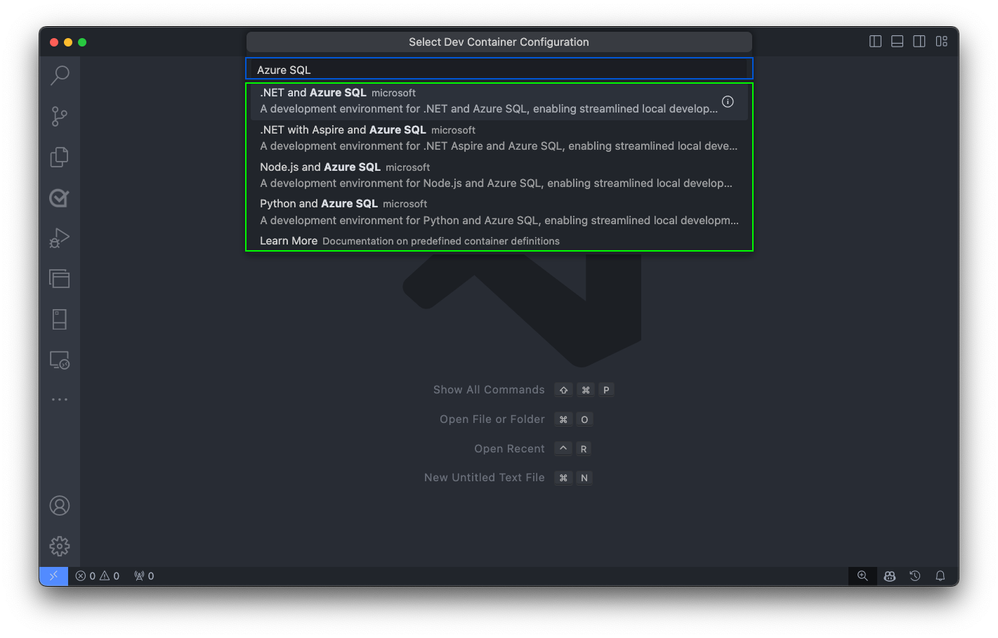
Next, select the desired Dev Container template for Azure SQL Database by typing Azure SQL into the command palette. This action displays a list of available templates designed for Azure SQL Database development.
Building the Container
Upon selection, Visual Studio Code automatically generates the necessary configuration files tailored to the chosen template. These files include settings for the development environment, extensions to install, and Docker configuration details. They’re stored in a .devcontainer folder within your project directory, ensuring a consistent and reproducible development environment.
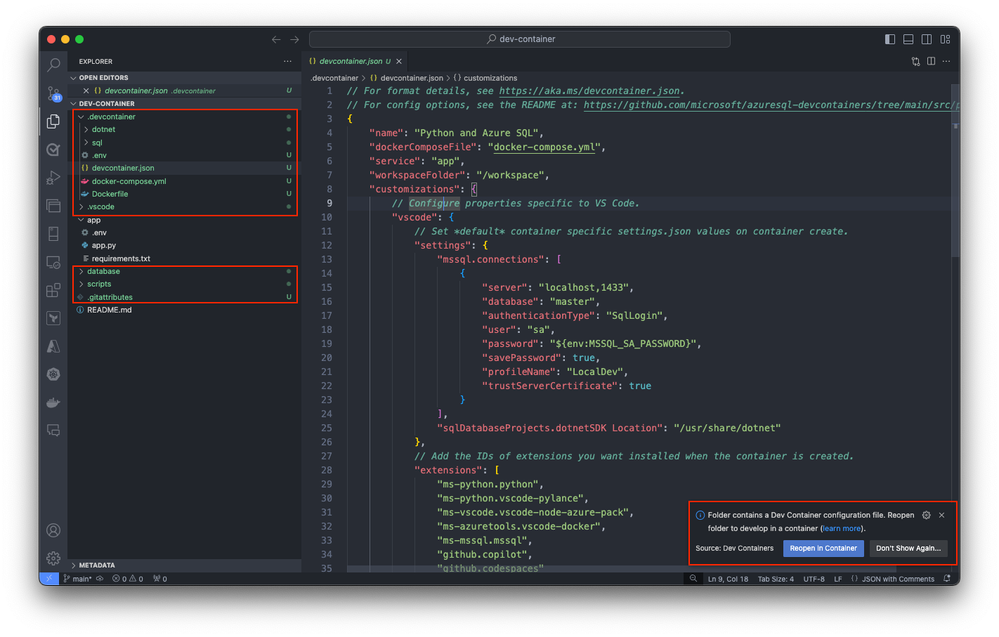
Following the configuration file generation, Visual Studio Code prompts you to transition your project into the newly created Dev Container environment. You can do it by selecting Reopen in Container. This step is crucial as it moves your development inside the container, applying the predefined environment settings for Azure SQL development.
If you haven’t already, you can also initiate this transition manually at any time using the Dev Containers extension. Use the Reopen in Container command from the command palette or select on the blue icon at the bottom left corner of Visual Studio Code and select Reopen in Container.
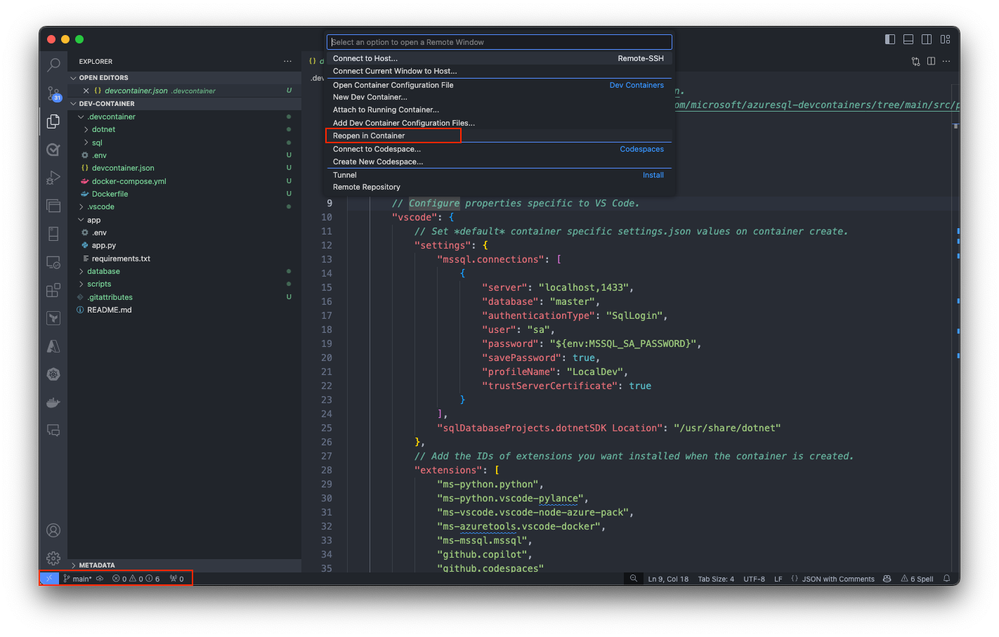
This action initiates the setup process, where Visual Studio Code generates the necessary configuration files and builds the development container based on the selected template. The process ensures that your development environment is precisely configured for Azure SQL Database development.
Visual Studio Code builds the container based on the selected configuration. The build process might take a few minutes the first time.
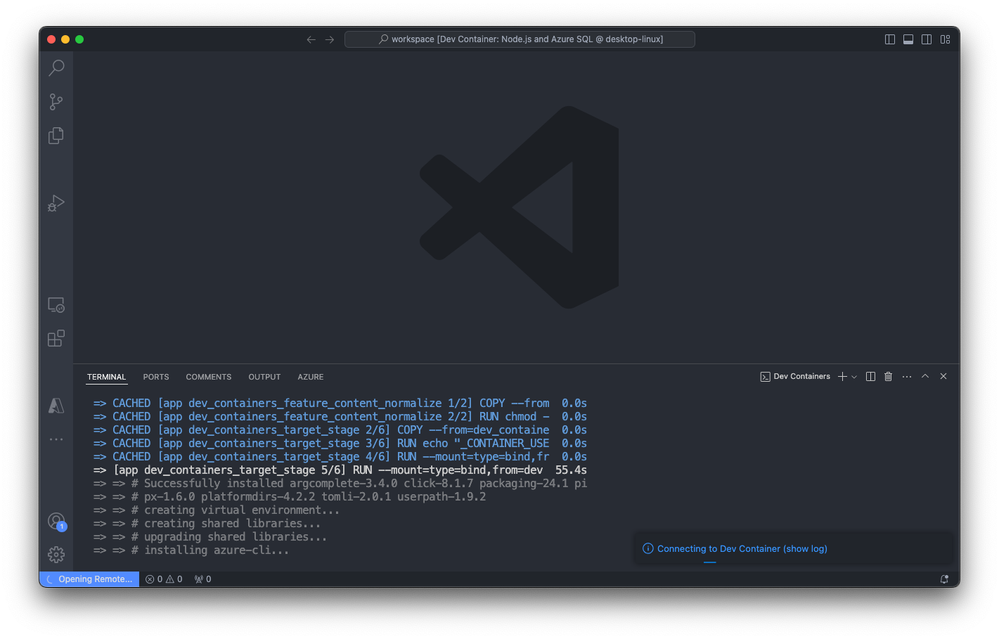
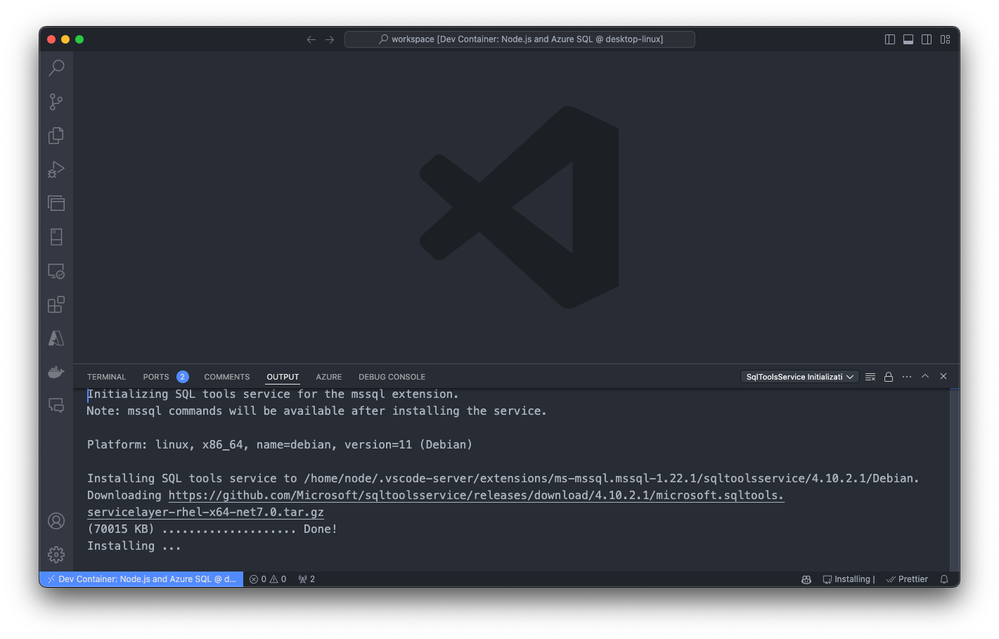
Exploring and verifying the Dev Container
After you build the dev container, start exploring and verifying the setup. Open a terminal within Visual Studio Code to check that all necessary tools are installed and working correctly.

As an optional step, you can also run predefined tasks directly from the command palette, streamlining your development workflow and allowing you to focus on writing code.
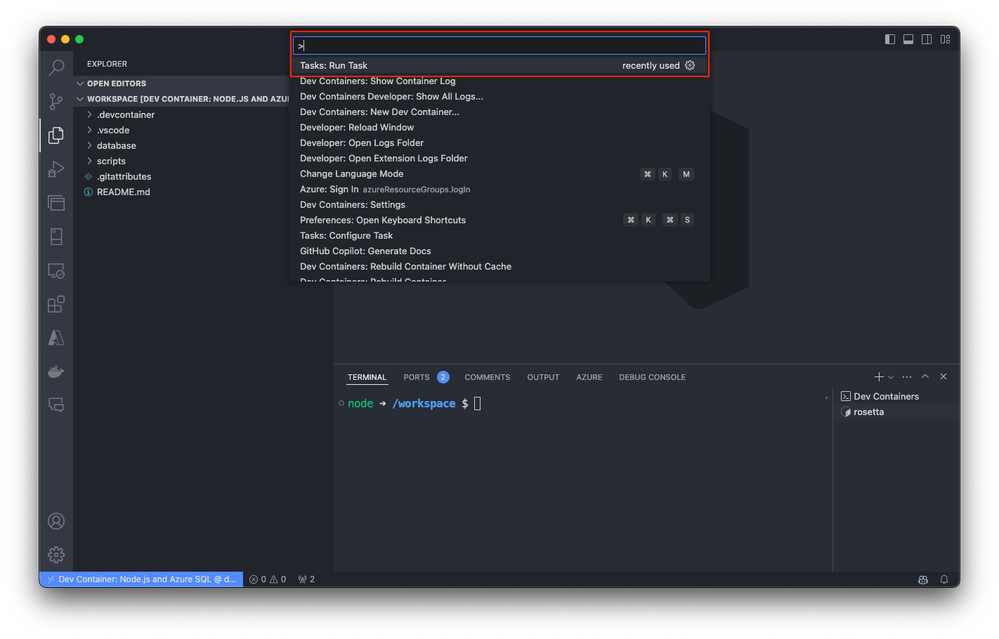
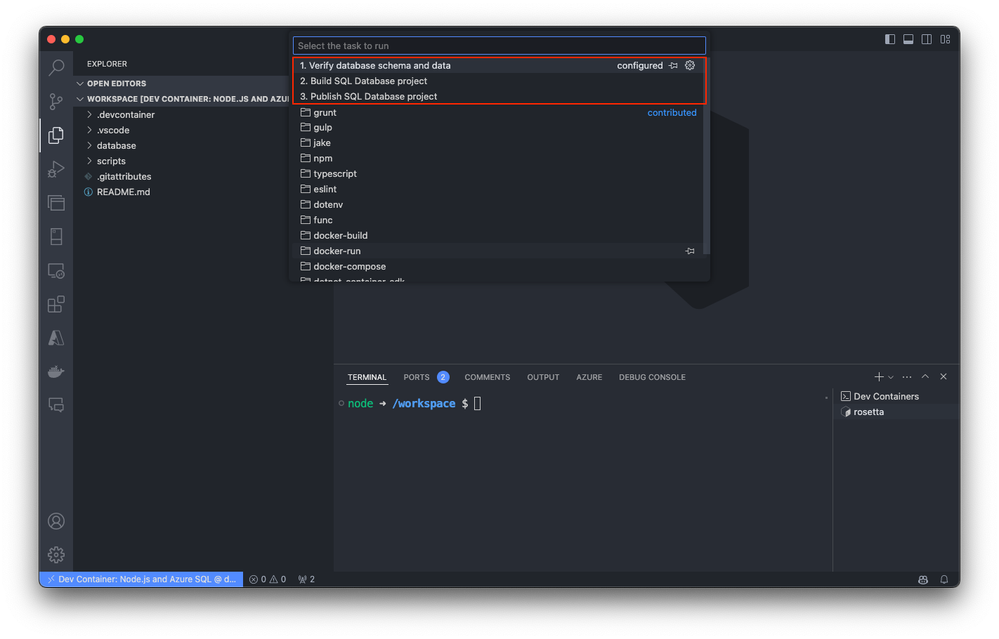
For more detailed information about specific templates, visit Azure SQL Database Dev Container templates.
Conclusion
Dev Containers for Azure SQL Database offer a powerful and efficient way to streamline your development process. By providing a consistent, portable environment, they help you focus on writing code and building features rather than configuring your setup. We encourage you to explore these templates and see how they can enhance your development workflow for Azure SQL Database.
Looking ahead, we will delve into more advanced topics like integrating Azure services with Dev Containers to further optimize your development process. Stay tuned for more insights and practical guides to help you get the most out of Azure SQL Database and Dev Containers.
More about Dev Container templates for Azure SQL Datatabase.
![]() Use this link to register and join live: https://aka.ms/OneDriveCommunityCall. Each call is recorded and made available on demand shortly after. Our next call is Wednesday, August 21st, 2024, 8:00am – 9:00am PDT. This month’s special topic: “Copilot in OneDrive” with @Arjun Tomar, Senior Product Manager on the OneDrive team at Microsoft. “Add to calendar” (.ics file) and share the event page with anyone far and wide.
Use this link to register and join live: https://aka.ms/OneDriveCommunityCall. Each call is recorded and made available on demand shortly after. Our next call is Wednesday, August 21st, 2024, 8:00am – 9:00am PDT. This month’s special topic: “Copilot in OneDrive” with @Arjun Tomar, Senior Product Manager on the OneDrive team at Microsoft. “Add to calendar” (.ics file) and share the event page with anyone far and wide.OneDrive Community Call – August 21, 2024, 8am PDT. Special guest, Arjun Tomar, to share more about our special topic this month: “Copilot in OneDrive.”
![]() Register and join live: https://aka.ms/OneDriveCommunityCall
Register and join live: https://aka.ms/OneDriveCommunityCall 


Recent Comments