by Contributed | Oct 1, 2020 | Azure, Technology, Uncategorized
This article is contributed. See the original author and article here.
Azure Machine Learning service expands support for MLflow (Public Preview)
Background
Many data scientists start their machine learning projects using Jupyter notebooks or editors like Visual Studio Code. To ensure models can be used in production, it is essential to systematically track all aspects of an ML workflow, such as the data, environment, code, and models produced. These challenges with reproducibility can become complex when working in a hybrid cloud environment – but are mitigated if both environments conform to open standards.
AzureML’s support for MLflow
Azure ML now supports managing the end to end machine learning lifecycle using open MLflow standards, enabling existing workloads to seamlessly move from local execution to the intelligent cloud & edge. Azure Machine Learning has expanded support for running machine learning workflows to train, register and deploy models via native integration (API compatibility) with MLflow.
Let’s walk through some of the latest enhancements to the Azure ML and MLflow interoperability.
MLflow Projects
MLflow Projects provide a way to organize and describe your code to enable other data scientists or automated tools to run it. Any local directory or Git repository can be treated as an MLflow project. You can enable MLflow’s tracking URI and logging API, collectively known as MLflow Tracking, to connect your MLflow experiments and Azure Machine Learning. You can submit your MLflow experiments locally or remotely using MLflow Projects with full tracking support in AzureML by setting the project backend to “azureml”.
A project includes the following:
- Conda environment specification (conda.yaml)
- Any .py or .sh file in the project can be an entry point, with no parameters explicitly declared. When you run the command with a set of parameters, MLflow passes each parameter on the command line using –key <value> syntax.
- You specify more options by adding an MLproject file, which is a text file in YAML syntax. An example MLproject file looks like this:
name: tutorial
conda_env: conda.yaml
entry_points:

  main:
    parameters:
      alpha: float
      l1_ratio: {type: float, default: 0.1}
    command: "python train.py {alpha} {l1_ratio}"
Here’s an example set up for a local run. I’ve set the backend to “azureml” to get all the tracking support and error logging from Azure ML. The backend config object is used to store necessary information such as the compute target, local managed environment or a system managed environment.
local_env_run = mlflow.projects.run(uri=".",
                                    parameters={"alpha":0.3},
                                    backend = "azureml",
                                    use_conda=False,
                                    backend_config = {"USE_CONDA": False})
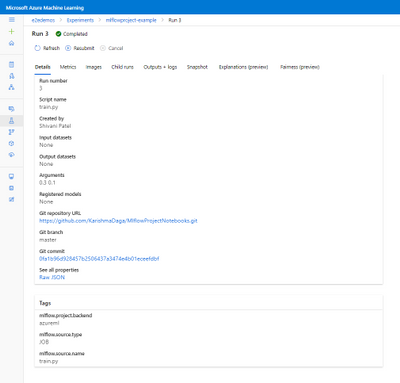
In the image below you can see that Azure ML automatically tags the run with MLflow related metadata for visibility and logs the git info.

You can then log and visualize your run metrics in Azure Machine Learning Studio or the MLflow Experimentation UI.

You can see the same metrics in the Azure ML studio and MLflow UI.

MLflow Model Registry and Deployment
With the new support for the MLflow model format, it becomes even easier to track and deploy models on Azure ML. You can register models from local files or a run and use it to make predictions online or in batch mode.
From the MLflow project run, you can see the output model from the projects run is registered following the MLflow model schema.

The MLmodel file contains all the model details and metadata.

If you want to register, containerize, and deploy the model, you can now do that in one step. Using the mlflow.azureml.deploy() Python SDK method, AzureML will register the model in AzureML, build the docker container and deploy it to the chosen target. The deployed service will also retain the MLflow metadata as tags as show in the image below.

With the continuous support for MLflow, Azure ML is committed to being interoperable with Open source standards providing flexibility for users to work on-prem or on the cloud.
To get more details about the Mlflow and Azure ML integration show out the following links:
How to use MLflow with Azure Machine Learning
MLflow and Azure Machine Learning notebook examples
Framework Specific notebooks
by Contributed | Oct 1, 2020 | Azure, Technology, Uncategorized
This article is contributed. See the original author and article here.
Authors: Wolfgang M. Pauli and Manash Goswami

AI applications are designed to perform tasks that emulate human intelligence to make predictions that help us make better decisions for the scenario. This drives operational efficiency when the machine executes the task without worrying about fatigue or safety. But the effectiveness of the AI application is defined by the accuracy of the model used to address the end user scenario.
To build the accurate model, package in application and execute in the target environment requires many components to be integrated into one pipeline, e.g. data collection, training, packaging, deployment, and monitoring. Data scientists and IT engineers need to monitor this pipeline to adjust to changing conditions, rapidly make updates, validate, and deploy in the production environment.
This continuous integration and continuous delivery (CI/CD) process needs to be automated for efficient management and control. It also helps in developer agility to shorten the lifecycle to update and deploy the application.
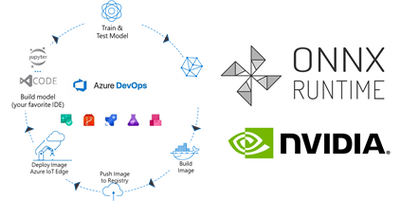
Today, we are introducing a reference implementation for a CI/CD pipeline built using Azure DevOps to train a CNN model, package the model in a docker image and deploy to a remote device using Azure IoT Edge for ML inference on the edge device. We will be training a TinyYolo Keras model with TensorFlow backend. The trained model is converted to ONNX and packaged with the ONNX Runtime to run on the edge device.
The sample is published here.

Before we get started, here are a few concepts about the tools we are using in this sample:
What is Azure DevOps?
Azure DevOps is the collection of tools that allows developers to setup the pipeline for the different steps in the development lifecycle. Developers can automate and iterate on software development to ship high quality applications.
ONNX and ONNX Runtime for ML on Edge device
ONNX (Open Neural Network Exchange) is the common format for neural networks that can be used as a framework-agnostic representation of the network’s execution graph. Models in ONNX format allow us to create a framework-independent pipeline for packaging and deployment across different hardware (HW) configurations on the edge devices.
ONNX Runtime is the inference engine used to execute models in ONNX format. ONNX Runtime is supported on different OS and HW platforms. The Execution Provider (EP) interface in ONNX Runtime enables easy integration with different HW accelerators. There are packages available for x86_64/amd64 and aarch64. Developers can also build ONNX Runtime from source for any custom configuration. The ONNX Runtime can be used across the diverse set of edge devices and the same API surface for the application code can be used to manage and control the inference sessions.
This flexibility, to train on any framework and deploy across different HW configuration, makes ONNX and ONNX Runtime ideal for our reference architecture, to train once and deploy anywhere.
Pre-requisites and setup
Before you get started with this sample, you will need to be familiar with Azure DevOps Pipelines, Azure IoT and Azure Machine Learning concepts.
Azure account: Create an Azure account in https://portal.azure.com. A valid subscription is required to run the jobs in this sample.
Devices: There are many options for Edge HW configurations. In our example, we will use two devices from the Jetson portfolio – they can be any of Nano / TX1 / TX2 / Xavier NX / AGX Xavier. One device will be the dev machine to run the self-hosted DevOps agent, and the other will be the test device to execute the sample.
-
Dev Machine: This machine will be used to run the jobs in the pipeline for CI/CD. This requires some tools to be installed on the device:
-
Azure DevOps agent: Since the test device is based on Ubuntu/ARM64 platform, we will setup a self-hosted Azure DevOps agent to build the ARM64 docker images in one of the devices. Another approach is to setup a docker cross-build environment in Azure which is beyond the scope of this tutorial.
-
Azure IoT Edge Dev Tool: The IoT Edge Dev Tool (iotedgedev) helps to simplify the development process for Azure IoT modules. Instead of setting up the dev machine as an IoT Edge endpoint with all the tools and dependencies, we will install the IoT Edge Dev container. This will greatly simplify the dev-debug-test loop to validate the inner loop of this CI/CD pipeline on the device before pushing the docker images to the remote IoT endpoint. You will need to manually setup the iotedgedev tool on this arm64 device.
-
AzureML SDK for Python: This SDK enables access to AzureML services and assets from the dev machine. This will be required to pull the re-trained model from the AzureML registry to package in the docker image for the IoT Edge module.
-
Test Device: This device is used to deploy the docker containers with the AI model. It will be setup as an IoT Edge endpoint
Training in TensorFlow and converting to ONNX
Our pipeline includes a training step using AzureML Notebooks. We will use a Jupyter notebook to setup the experiment and execute the training job in AzureML. This experiment produces the trained model that we will convert to ONNX and store the model in the model registry of our AzureML workspace.

Setup the Release Pipeline in Azure Dev Ops
A pipeline is setup in Azure DevOps to package the model and the application code in a container. The trained model is added as an Artifact in our pipeline. Everytime a new trained model is registered in the AzureML model registry it will trigger this pipeline.
The pipeline is setup to download the trained model to the dev machine using the azureml sdk.
Packaging the ONNX Model for arm64 device
In the packaging step, we will build the docker images for the NVIDIA Jetson device.
We will use the ONNX Runtime build for the Jetson device to run the model on our test device. The ONNX Runtime package is published by NVIDIA and is compatible with Jetpack 4.4 or later releases. We will use a pre-built docker image which includes all the dependent packages as the base layer to add the application code and the ONNX models from our training step.
Push docker images to Azure Container Registry (ACR)
The docker images are pushed to the container registry in Azure from the dev machine. This registry is accessible for other services like Azure IoT Edge to deploy the images to edge devices.
Deploy to IoT Edge device
The Azure IoT Hub is setup with the details of the container registry where the images are pushed in the previous step. This is defined in the deployment manifest – deployment.json. When new docker images are available in the ACR, they are automatically pushed to the IoT Edge devices.
This completes the deployment step for the sample.
Additional Notes
We can monitor the inference results in the IoT Hub built-in event point.
This sample can be enhanced to store the inference results in Azure Storage and then visualize in PowerBI.
The docker images can be built for other HW platforms by changing the base image in the Dockerfiles.
by Contributed | Oct 1, 2020 | Azure, Technology, Uncategorized
This article is contributed. See the original author and article here.
The Azure cloud offers a lot of services to make our daily work easier. In this post, we will read about an ordinary reflection for IT/DevOps departments, and to build our solution we use Logic Apps and Automation Account services.
Case
The main case is to automatically scale-down the VM size in a case an employee deployed a costly VM instance.
Prerequisites
- A valid Azure Subscription
- Register at the subscription the Resource Provider “Microsoft.EventGrid”
The Deployments
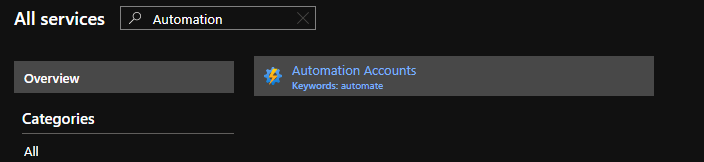
For the demo purposes, we will deploy Azure Logic Apps and an Azure Automation Account. To begin with, from the left-hand sidebar, click All Services, type Automation in the search box and select Automation Accounts.

Select +Add or Create automation account, to begin

On the Add Automation Account form, type a unique Name for the automation account, select a valid subscription and a Resource group, the location should be the same where the resource group created and then click Create.

Create the Run book
The Automation account has been created, and the next step is to create the Runbook. To do this from the left-hand side bar we select Process Automation – Runbooks – + Create a runbook.

param
(
    [Parameter(Mandatory = $true)]
    [string]$ResourceGroupName
)
$connectionName = "AzureRunAsConnection"
try
{
    # Get the connection "AzureRunAsConnection "
    $servicePrincipalConnection=Get-AutomationConnection -Name $connectionName
    "Logging in to Azure..."
   Connect-AzAccount `
        -ServicePrincipal `
        -TenantId $servicePrincipalConnection.TenantId `
        -ApplicationId $servicePrincipalConnection.ApplicationId `
        -CertificateThumbprint $servicePrincipalConnection.CertificateThumbprint
}
catch {
    if (!$servicePrincipalConnection)
    {
        $ErrorMessage = "Connection $connectionName not found."
        throw $ErrorMessage
    } else{
        Write-Error -Message $_.Exception
        throw $_.Exception
    }
}
# Get Virtual Machine Name and Size To Proceed With The Checks
#$ResourceGroupName = "AzureAutomationRG"
$VMName = (Get-AzVM -ResourceGroupName $ResourceGroupName).Name
$VMSize = (Get-AzVM -ResourceGroupName $ResourceGroupName).HardwareProfile
# If the size of the VM is not Standard_F4s,then resize the size to Standard_F4s.
if ($VMSize -eq "Standard_F4s"){
write-host "VM is allready a Standard_F4s"}
else {
$vm = Get-AzVM -ResourceGroupName $ResourceGroupName -VMName $VMName
$vm.HardwareProfile.VmSize = "Standard_F4s"
Update-AzVM -VM $vm -ResourceGroupName $ResourceGroupName
write-host The Virtual Machine $vm has been resized to "Standard_F4s"
}
Create A Blank Logic App
From the left-hand main blade select Create a resource, search for Logic App and then click Create.

Next, type the useful information (Subscription, Resource Group, Logic App name, Location) about the Logic App and then type Review + Create

After the Logic App deployment finish, we start to build the flow on the Logic App designer.
Add the Event Grid Trigger
To begin with, select to create a Blank Logic App.

In the search box type “Event Grid” and select the trigger “When a resource event occurs” to start the logic app flow building.

First, we signed in the trigger with Azure credentials, and provide all the necessary fields as the image below shows.

At the next actions, we will initialize four different variables (Subject, Virtual Machine Name, Resource Group, Resource).

Repeat the step above also for the other three variables. After we added actions to initialize the variables we add a Parse JSON action

{
    "items": {
        "properties": {
            "data": {
                "properties": {
                    "authorization": {
                        "properties": {
                            "action": {
                                "type": "string"
                            },
                            "evidence": {
                                "properties": {
                                    "role": {
                                        "type": "string"
                                    }
                                },
                                "type": "object"
                            },
                            "scope": {
                                "type": "string"
                            }
                        },
                        "type": "object"
                    },
                    "claims": {
                        "properties": {
                            "aio": {
                                "type": "string"
                            },
                            "appid": {
                                "type": "string"
                            },
                            "appidacr": {
                                "type": "string"
                            },
                            "aud": {
                                "type": "string"
                            },
                            "exp": {
                                "type": "string"
                            },
                            "groups": {
                                "type": "string"
                            },
                            "http://schemas.microsoft.com/claims/authnclassreference": {
                                "type": "string"
                            },
                            "http://schemas.microsoft.com/claims/authnmethodsreferences": {
                                "type": "string"
                            },
                            "http://schemas.microsoft.com/identity/claims/objectidentifier": {
                                "type": "string"
                            },
                            "http://schemas.microsoft.com/identity/claims/scope": {
                                "type": "string"
                            },
                            "http://schemas.microsoft.com/identity/claims/tenantid": {
                                "type": "string"
                            },
                            "http://schemas.xmlsoap.org/ws/2005/05/identity/claims/givenname": {
                                "type": "string"
                            },
                            "http://schemas.xmlsoap.org/ws/2005/05/identity/claims/name": {
                                "type": "string"
                            },
                            "http://schemas.xmlsoap.org/ws/2005/05/identity/claims/nameidentifier": {
                                "type": "string"
                            },
                            "http://schemas.xmlsoap.org/ws/2005/05/identity/claims/surname": {
                                "type": "string"
                            },
                            "http://schemas.xmlsoap.org/ws/2005/05/identity/claims/upn": {
                                "type": "string"
                            },
                            "iat": {
                                "type": "string"
                            },
                            "ipaddr": {
                                "type": "string"
                            },
                            "iss": {
                                "type": "string"
                            },
                            "name": {
                                "type": "string"
                            },
                            "nbf": {
                                "type": "string"
                            },
                            "puid": {
                                "type": "string"
                            },
                            "rh": {
                                "type": "string"
                            },
                            "uti": {
                                "type": "string"
                            },
                            "ver": {
                                "type": "string"
                            },
                            "wids": {
                                "type": "string"
                            }
                        },
                        "type": "object"
                    },
                    "correlationId": {
                        "type": "string"
                    },
                    "operationName": {
                        "type": "string"
                    },
                    "resourceProvider": {
                        "type": "string"
                    },
                    "resourceUri": {
                        "type": "string"
                    },
                    "status": {
                        "type": "string"
                    },
                    "subscriptionId": {
                        "type": "string"
                    },
                    "tenantId": {
                        "type": "string"
                    }
                },
                "type": "object"
            },
            "dataVersion": {
                "type": "string"
            },
            "eventTime": {
                "type": "string"
            },
            "eventType": {
                "type": "string"
            },
            "id": {
                "type": "string"
            },
            "metadataVersion": {
                "type": "string"
            },
            "subject": {
                "type": "string"
            },
            "topic": {
                "type": "string"
            }
        },
        "required": [
            "subject",
            "eventType",
            "id",
            "data",
            "dataVersion",
            "metadataVersion",
            "eventTime",
            "topic"
        ],
        "type": "object"
    },
    "type": "array"
}
Add a For each Action with variables
The next action in the flow is to add a “For each” action and within it to add the next actions. Specifically the first action we add into the “For each” is the “Set variable” action

Add a Compose Action
Add a compose action to separate the string to separate values.
Subject Variable Value: /subscriptions/a3c3e263-f1bc-42ad-ae5b-8860641336c8/resourceGroups/DemoScaleDownVmRG/providers/Microsoft.Compute/virtualMachines/demovm
To achieve this, we need to write a simple expression using the split function, as the image below shows.
split(variables('Subject'),'/')

The result after the Logic App run would be the below
[
  "",
  "subscriptions",
  "a3c3e263-f1bc-42ad-ae5b-8860641336c8",
  "resourceGroups",
  "DemoScaleDownVmRG",
  "providers",
  "Microsoft.Compute",
  "virtualMachines",
  "demovm"
]
Now that successful split into several parts can proceed with the rest variables. For the “Resource” variable we type the expression,
outputs('Compose_Variable_Subject')[7]

to get the “Virtual Machine Name” type the expression,
outputs('Compose_Variable_Subject')[8]

and final, the last variable “Resource Group” type,
outputs('Compose_Variable_Subject')[4]

Add A Switch Action
From the action list select to add a Switch

Add an Automation Account Create job action
Last but not least step we add the automation account “Create job” action, this would execute the job with the PowerShell script we created in the Automation Account step.

In the end, the deployment should be like the one in the image below.


Test the Logic App Workflow
The video file below shows how the workflow works. We have deployed a new Azure VM with “Standard_D16as_v4” size, and after the workflow successful run the size of the virtual machines changed to “Standard_F4s”.
https://www.youtube.com/watch?v=mZNqG0c2PcM&ab_channel=GeorgeGrammatikos
See Also
by Contributed | Oct 1, 2020 | Azure, Technology, Uncategorized
This article is contributed. See the original author and article here.
The last six months have seen an unprecedented acceleration in digital transformation. There has never been a more important time for DBAs and developers to prepare for an increasingly cloud-centric future. That’s why we’ve partnered with PASS, a worldwide community of over 300,000 data professionals, to create an interactive learning experience that allows you to test your talent and build your skill set for the future, all while earning to chance to win prizes! Sign up now for the Azure SQL Championship, starting October 12th. Here are three great reasons to compete:
1. Learn about Azure SQL the fun way.
Who says that learning about virtualized instances of SQL Server can’t be exciting? The Azure SQL Championship is more than just a webinar or training session. Enjoy special videos from SQL experts like Bob Ward as he introduces the challenges and provides helpful hints for participants. Be sure to watch for the daily quizzes and trivia to earn badges and climb the leaderboard! If you’ve been meaning to learn more about Azure SQL, this is a fantastic way to start.
2. Translate your SQL Server knowledge to Azure SQL.
If you’re already familiar with SQL Server, this championship is a great opportunity to start future-proofing your skills by applying them to SQL on Azure. The Azure SQL Championship will feature three real-world challenges that take participants through a range of essential topics as they answer questions about Azure SQL and submit architectures, which will be reviewed by a judging panel. These examples are designed to help you think through common use-cases and migration scenarios, giving you opportunities to leverage your existing SQL Server expertise in new ways.
3. Win recognition and prizes!
A little competition never hurt anyone! Complete the weekly challenges and daily quizzes to earn bragging rights as you watch yourself climb the leaderboard and compete against other players to earn the top honors. The top contenders will join us on stage at PASS Summit 2021 and have the chance to win other cool prizes, like free PASS Summit conference passes with included travel accommodations, a Raspberry Pi, and more! Participants must complete a web form to submit answers for our expert community judging panel. Official rules are posted on the website for more details.
Ready to get started? Register for the Azure SQL Championship today. And after you’ve finished competing, continue your learning at PASS Virtual Summit 2020, where we’ll be showcasing top teams. See you on the leaderboard!
by Contributed | Oct 1, 2020 | Azure, Technology, Uncategorized
This article is contributed. See the original author and article here.
In this episode of Data Exposed with Vladimir Ivanovic, he announces a set of major performance improvements for Azure SQL Managed Instances, which enable customers to migrate their more performance-hungry database workloads to Azure SQL Managed Instance. These improvements are automatically enabled for all existing and future Azure SQL Managed Instances at no extra charge, making Azure SQL Managed Instance the best fully-managed database platform for mission-critical workloads.
Watch on Data Exposed
Resources:
Azure SQL Managed Instance Resource Limits
Service Tier Characteristics
View/share our latest episodes on Channel 9 and YouTube!
by Contributed | Oct 1, 2020 | Azure, Technology, Uncategorized
This article is contributed. See the original author and article here.
Another Azure Sphere release has occurred and to accommodate the release I am presenting another security blog post. We are committed to keep our system secure against evolving security threats which takes both internal and external effort, the most recent external effort being the Azure Sphere Security Research Challenge that has wrapped up. Let’s get to the list of changes and fixes done on the system without wasting any further time.
Our list of security enhancements and fixes:
- Upgrade to Linux Kernel 5.4.59
- Fix littlefs pagecache memory information leak
- Modify littlefs to zero memory on truncate
- Validate file sizes during truncation in littlefs
- Identified and added more input validations in Pluton Runtime
- Add missing mprotect check from previously reported unsigned code execution bug by Cisco Talos
- More memory pointer validations in SW to avoid using pointers pointing to improper areas between NW and SW
- Set proper Azure Sphere capabilities on azcore when executed by the kernel per report from McAfee ATR
We are always striving in our work to improve our security promises and to enhance the platform. It is known that we have been doing fuzzing for awhile, however all of our fuzzing has been pieces of the system. We have been working hard and have now advanced our ability to allow full end to end fuzzing of the system, expanding our testing abilities and giving us one more tool to use to help identify coding flaws. Coding flaws are only part of the issue though, tools looking for a crash will never catch information leakage nor catch bugs that allow for privilege escalation due to improper validations which opens up whole new arenas of validations that need to be reviewed.
As I’ve heard a lot recently “onwards and upwards”.
Jewell Seay
Azure Sphere OSP Security Lead

Recent Comments