This article is contributed. See the original author and article here.
Hello Dear Reader, when last we were together in
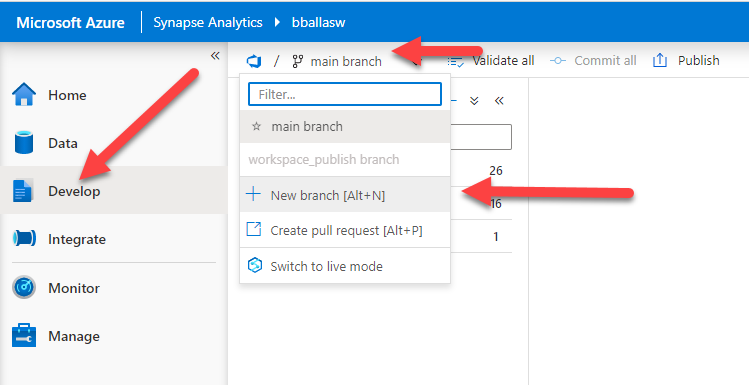
We will start by opening up our Azure Synapse Analytics environment by navigating to https://web.azuresynapse.net and signing in, and then navigating to the Develop blade. We will then click on the down arrow next to the main branch and select + New Branch.
Our DevOps project stores SQL scripts, Pipelines, Notebooks, Linked Services, and many other items from our Azure Synapse Analytics environment. It also stores meta-data. Today we will make pure meta-data changes by creating folders to organize our SQL Scripts. So we will create a working branch that describes our change and name it Folders.

Looking at the Develop blade we can see that the main working branch has been supplanted by the Folders branch. We will click on the three ellipsis … next to SQL scripts and create a new folder.

Now we create our folders. We will repeat this step for each folder that we will create. The first folder will be for our SQL Serverless demos. Now a quick song montage while I create the rest of the folders for us.

Before we start organizing we will take a before picture. Here is a good look at all of my SQL Scripts without any folders.

These demos are all over the place!!! We start by hovering over one of the SQL Scripts and then clicking the three ellipsis … by the script and selecting Move to.

We will select the College demos folder for the 01 Create College Tables script, and then click move here. One more quick song montage while I organize all of the scripts for us.

Now that all of the scripts are organized there are some very IMPORTAINT things to point out. Each script has a dot next to the name. This signifies that the changes to our Folders branch have not yet been committed. We need to click on Commit all in order to save these.
If we navigated off of this page prior to committing the change all of the folders we created and the organization we’ve done would be gone.
If we were writing a new SQL script, Notebook, or Pipeline each of those items have a Commit button in the user interface. That will commit just that item as you work. You can also use the Commit all button if you want to commit all changes you’ve made to the branch. The good news is we have options!
So now we commit and preserve these changes.

After committing notice all of the dots have gone away. This means our commit to branch Folders was successful.
Now we go to the Folders Branch click the drop down button and click Create pull request.

This will launch Azure DevOps and bring us to a Pull Request window. Now is a good moment for a quick sidebar.
A few items <begin sidebar>:
- I’m an army of one right now
- In your environment you should have a sprint you are working on, and a work item associated with the work you are doing. That would get entered into the pull request for me (see item 1)
- You should have Reviewers identified for your code, and you would select them here, for me (see item 1)
- When you create this other processes would be in place, for the sake of the tutorial I will show you everything because….. (see item 1)
- </end sidebar>
We create a title stating what we are doing “Folders Merge”, in the description we give a little more info. We do not have Reviewers or a Work Item, remember the sidebar, then we click Create.

We will approve and then Complete these changes. This will merge the Folders branch with the main branch and the Folders branch will cease to exist.

Navigating back to our Azure Synapse Analytics environment we can see we are in the main branch and all of our beautiful folders are in place.

Next in our series we will migrate all of these changes to a new squeaky clean QA environment by creating an Azure DevOps pipeline to create an artifact and then a release pipeline to deploy our artifact to a new Azure Synapse Analytics QA.
Thank you for stopping by!
Brought to you by Dr. Ware, Microsoft Office 365 Silver Partner, Charleston SC.

Recent Comments