This article is contributed. See the original author and article here.
| Before implementing data extraction from SAP systems please always verify your licensing agreement. |
Welcome to the third episode of this mini blog series, where I show you how to deal with OData extraction from the SAP system using Synapse Pipelines. In the first episode, we’ve built a simple pipeline that extracts data from a selected OData service and saves it to the data lake. Then, a week later, we enhanced the design to support parameters, which eliminated some of the hardcoded values. It allows us to change the OData service we want to use without modifying the pipeline or resources.
It was a great improvement, but the process still has two main disadvantages. The extraction job can only extract a single OData service at a time, and we still have to provide parameter values manually. If we want to extract data from many services, we have to start the pipeline multiple times, each time providing the OData service name, entity and host. Not the most effective approach.
But what if we could provide all OData services upfront in an external datastore? That’s the plan for today. Let’s further enhance our pipeline and make it even more agile!
THE METADATA STORE
There is a GitHub repository with source code for each episode. Learn more: https://github.com/BJarkowski/synapse-pipelines-sap-odata-public |
To store information about OData services, we need a service, that is easy to provision and maintain. We could use a SQL database, which meets many of our goals, but it is quite a heavy service. Instead, use Azure Table Storage which seems to offer exactly the functionality we need. It can be part of the same storage account that we use for data lake, it’s simple to deploy, and it doesn’t require any maintenance. And, as we store small amounts of data, the cost will be minimal.
To create a Table in Azure Storage, open the Storage Account blade in Azure Portal and choose Tables from the menu. Click the plus button, provide the table name and click OK to confirm. That couldn’t be more straightforward.
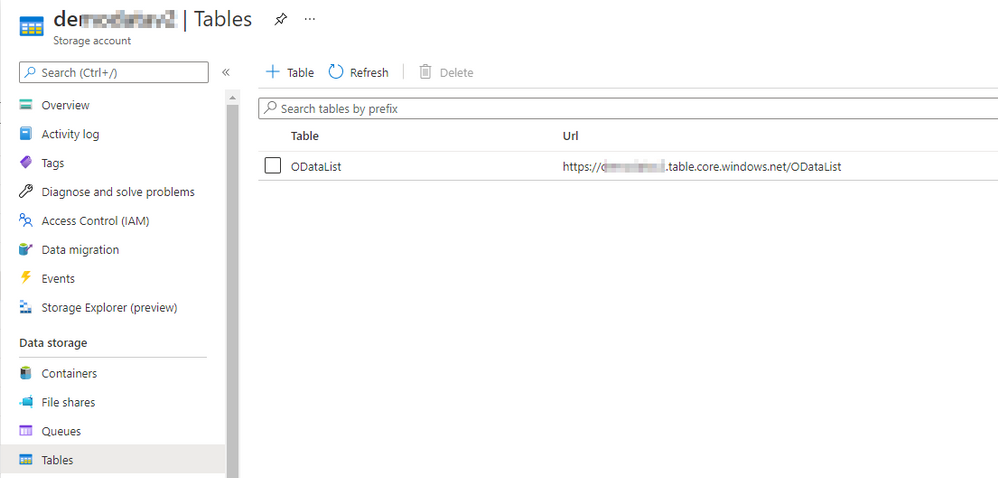
You can use Storage Explorer to add entries to the table. Select the table that you’ve just created and click the plus button to add an entry. By default, each Azure Table has two properties: PartitionKey and RowID, that together form the primary key. You can add more properties if needed. In the PartitionKey I store the OData service name and the RowID keeps the Entity name. In the pipeline, we’ve defined three parameters so we have to create an additional property for the Host information.
I add two previously used OData services to the table.

The metadata table is now ready!
READING METADATA FROM THE PIPELINE
To access the metadata table from the pipeline we have to create resources in Synapse Studio. There is a dedicated connector that allows us to consume data from Azure Table. Create the Linked Service and a dataset as we did in previously in this series.
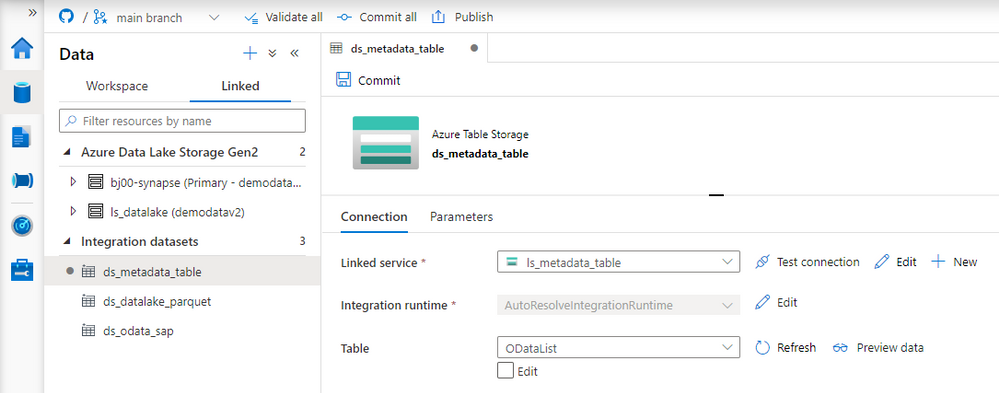
To read the metadata table, we will create another pipeline that will fetch information about OData services to process and then, one by one, it will trigger the child pipeline responsible for the extraction. The child pipeline is the one that we’ve been working on during previous episodes.
Create a new pipeline and add the Lookup activity. On the Settings tab, choose the dataset associated with the Azure Table. Uncheck the option First Row only as we want to read all data from the table.
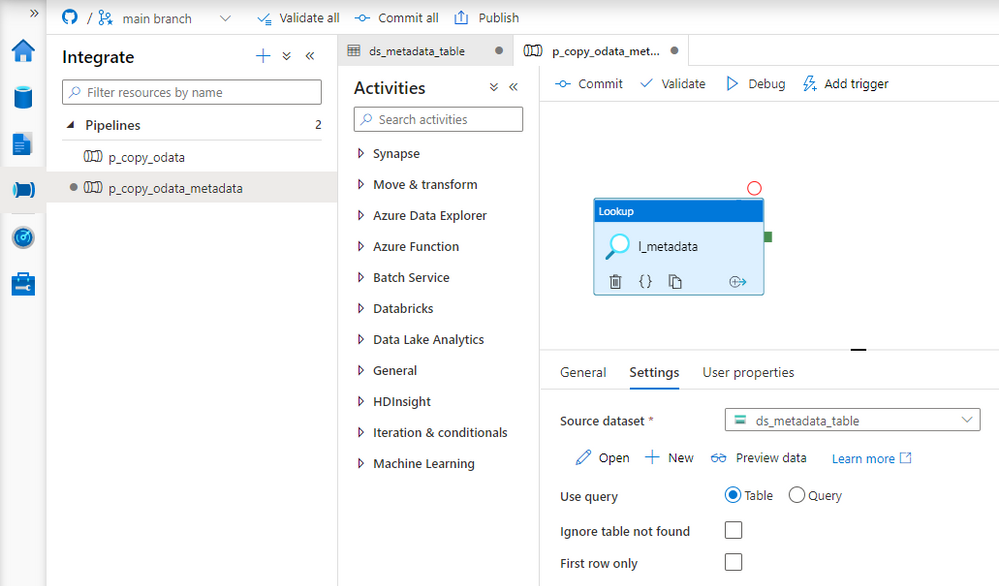
The Lookup activity reads all records from the table and exposes them as an array in the pipeline, which we can pass to subsequent activities. Each OData defined in the table should trigger the child pipeline. To achieve that, we will use the ForEach loop that goes through the array, and each record starts the pipeline that we’ve created in previous episodes.
Add ForEach loop to the pipeline. Connect the Lookup activity with the loop. Open the Settings tab and provide the following expression in the Items field to pass the array to the ForEach loop.
@activity('l_metadata').output.value
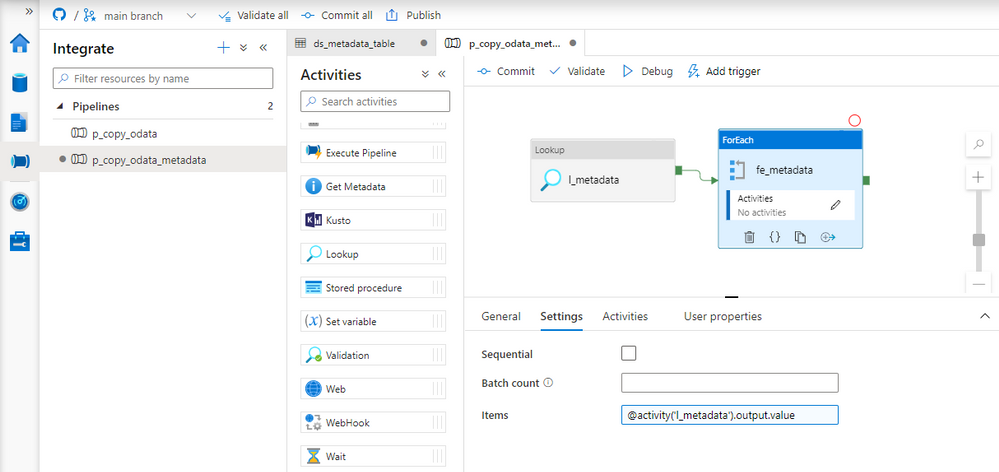
Great! The ForEach loop iterates through all elements of the array. Click on the small pencil button to define actions contained in the loop. On the new screen, add the Execute Pipeline activity and select the pipeline with the Copy Data process that we’ve created in previous episodes. You’ll notice three input boxes that correspond to the pipeline parameters. We will use them to pass information from the metadata table about the current OData service to process. Referencing items from the loop is quite simple:
URL: @item().Host
ODataService: @item().PartitionKey
Entity: @item().RowKey
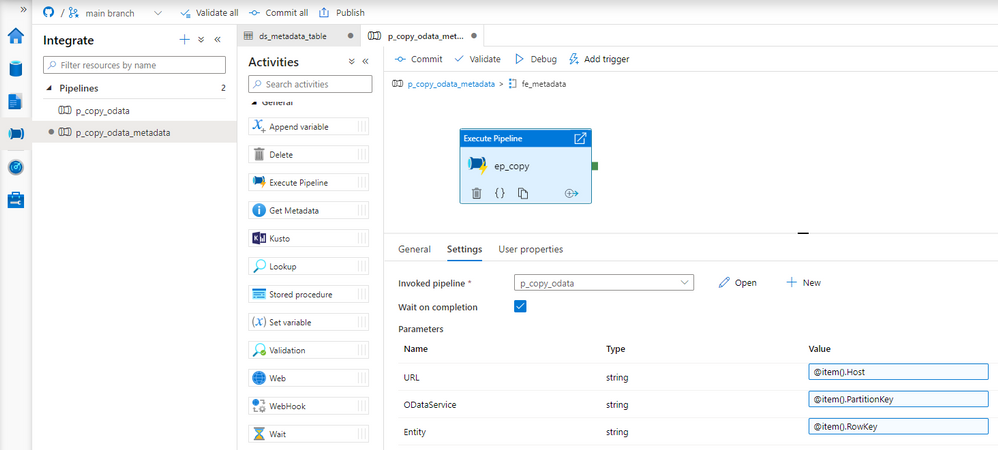
Each record stored in the metadata table will trigger the pipeline with Copy Data activity. Values stored in the table are passed to the child pipeline as parameters. Using the external metadata store allows maintaining the list of OData services independently of the pipeline. To add a new record, we don’t have to launch Synapse Studio. It’s enough to add an entry to the table.
EXECUTION AND MONITORING
There is one important setting in the ForEach loop, that I haven’t mentioned earlier. You can decide to run the loop sequentially, or in parallel, which is the default behavior. This setting has a significant influence on job performance. Triggering multiple parallel extraction processes can decrease the overall time required to extract data, but at the same time, it increases the load on the application server. As long as we’re working with one or two OData services it should not cause any troubles. But if you plan to run the extraction on a larger scale, I’d recommend defining the maximum number of concurrent jobs in the Batch Count field.
We’ve created two entries in the metadata table – one for the sales order and one for the business partner.

You can immediately spot the difference. This time we can see three pipelines executed instead of one! One for the parent pipeline that read values from the Azure Table, and then triggered two child pipelines that run the extraction. The number of child pipelines is directly related to the number of OData services defined in the metadata table.
Adding a new OData service doesn’t require any changes in the Synapse Studio. Instead, you can define it directly in the Azure Table Storage. Whenever you run the extraction, the job automatically picks up all entries and process them in parallel.
So far, I haven’t explained how to deal with large data volumes. My test system contains only a couple hundred sales orders. In real life, you probably have to deal with millions of records, which can cause serious troubles. In the next episode, I’ll focus on extracting a large amount of data – it’s easier than you think!
Brought to you by Dr. Ware, Microsoft Office 365 Silver Partner, Charleston SC.


Recent Comments