This article is contributed. See the original author and article here.
A few days ago I was discussing with a customer about backup and restore on the SQL DW so I made this lab: https://techcommunity.microsoft.com/t5/azure-synapse-analytics/lab-how-to-restore-a-deleted-database-on-azure-sql-dw/ba-p/1589360
After some discussion, another doubt was raised about how to schedule a user restore point. Remember SQL DW will create 42 restore points and the user can additionally create more 42 restore points. Basically it is a point in time restore.
Between some possibilities, one of them is to use the run book to schedule a power shell restore point.
Here it goes…Step by Step:
Let’s start with the Run Book.
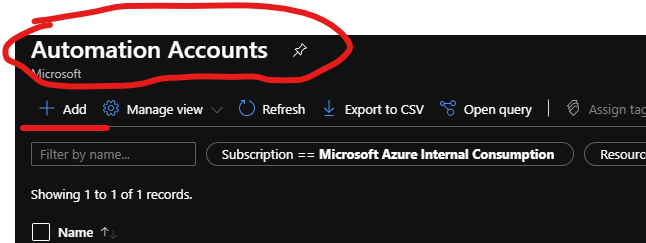
- Create an automation account by searching on the azure portal
- Add a new account – Fig 1:

Fig 1 New Account
- Runbooks -> Create a runbook – Fig 2

Fig 2 Create a Run book
3. Our runbook will use power shell code as this is pretty much the example available on the public doc. Fig 3

Fig 3 Power Shell
4. Here is the power shell script for a customer restore point: https://docs.microsoft.com/en-us/azure/synapse-analytics/sql-data-warehouse/sql-data-warehouse-restore-points
$SubscriptionName="<YourSubscriptionName>"

$ResourceGroupName="<YourResourceGroupName>"

$ServerName="<YourServerNameWithoutURLSuffixSeeNote>"  # Without database.windows.net

$DatabaseName="<YourDatabaseName>"

$Label = "<YourRestorePointLabel>"


Connect-AzAccount

Get-AzSubscription

Select-AzSubscription -SubscriptionName $SubscriptionName


# Create a restore point of the original database

New-AzSqlDatabaseRestorePoint -ResourceGroupName $ResourceGroupName -ServerName $ServerName -DatabaseName $DatabaseName -RestorePointLabel $Label
5. Once you fill the gaps, open power shell and test the script
6. You can check the script’s result on the SSMS by running the following:
select * from sys.pdw_loader_backup_runs
You can confirm it worked by checking the label that you defined for the restore point on the power shell script. My label was portal_test – Fig 4:

Fig 4 check label
6. If everything is working as it should. Proceed in creating the Job, in other words, back to run book:
Here the public doc for runbooks:https://docs.microsoft.com/en-us/azure/automation/learn/automation-tutorial-runbook-graphical
$SubscriptionName="Name of your Subscription"
$ResourceGroupName="Name of your resource group"
$ServerName="Your Server Name "   # Without database.windows.net
$DatabaseName="Your Database Name"
$Label = "Any label you want - I defined as test as I do not have imagination"

	# Ensures you do not inherit an AzContext in your runbook
	Disable-AzContextAutosave –Scope Process

	$Conn = Get-AutomationConnection -Name AzureRunAsConnection
	Connect-AzAccount -ServicePrincipal -Tenant $Conn.TenantID -ApplicationId $Conn.ApplicationID -CertificateThumbprint $Conn.CertificateThumbprint

	New-AzSqlDatabaseRestorePoint -ResourceGroupName $ResourceGroupName -ServerName $ServerName -DatabaseName $DatabaseName -RestorePointLabel $Label
Note: If by any chance when you tried to use the notebook you experience the same errors as follows ( I did):
Error: The term ‘Connect-AzAccount’ is not recognized as the name of a cmdlet, function, script file, or operable program. Check the spelling of the name, or if the path was included verify that the path is correct and try again.
This has been documented on the troubleshooting public doc:
https://docs.microsoft.com/en-us/azure/automation/troubleshoot/runbooks
The script to update the cmdlet is on the GitHub – run it on the runbook:
I Needed the Az Modules. Therefore, I created a runbook to run the GitHub script.
Note: [string] $AzureModuleClass = ‘Az’,
[Diagnostics.CodeAnalysis.SuppressMessageAttribute("PSUseApprovedVerbs", "")]
param(
    [Parameter(Mandatory = $true)]
    [string] $ResourceGroupName,

[Parameter(Mandatory = $true)]
    [string] $AutomationAccountName,

[int] $SimultaneousModuleImportJobCount = 10,

[string] $AzureModuleClass = 'Az',

[string] $AzureEnvironment = 'AzureCloud',

[bool] $Login = $true,

    [string] $ModuleVersionOverrides = $null,

    [string] $PsGalleryApiUrl = 'https://www.powershellgallery.com/api/v2'
)
This one was importing the AzureRM, but I ran a second time to import the Az as well. Fig 5:

Fig 5 Update the modules
You also can check the modules available on the portal.
Automation accounts->name of your account->Shared Resources ->modules – Fig 6:

Fig 6 Check Modules
7. The next step would be linked to a schedule. This option is on the run book and allows you to add an existing schedule or create a new one. Fig 7

Fig 7 Schedule link
That is it!
Liliam
UK Engineer
Brought to you by Dr. Ware, Microsoft Office 365 Silver Partner, Charleston SC.

Recent Comments