This article is contributed. See the original author and article here.
Looking for an online way to consume data from Azure SQL Database on Managed Instance?
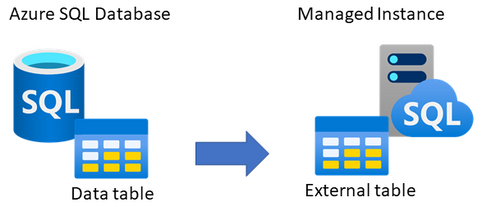
One of the ways to consume data online from Azure SQL Database on Managed Instance is to link the two by creating an external table, using CREATE EXTERNAL DATA SOURCE (Transact-SQL). The external table is created on Managed Instance, which with appropriate credentials can be used to query data from a matching table on SQL Database.

This type of setup could be useful to applications that need to consume both Managed Instance and SQL Database data, or perhaps for an online migration of data from SQL Database to Managed Instance. This article explains how to set this up.
Networking requirements
As the first step, there has to exist connectivity between Azure SQL Database and Managed Instance. The easiest option is to configure public endpoint on SQL Database and an allow inbound traffic on port 1433 from Managed Instance. This will allow Managed Instance to log in and query data from SQL Database. Alternatively, if you would like to use the private endpoint for SQL Database, the easiest option would be to deploy its private endpoint in the same VNet as Managed Instance. In this case as well, please do not forget to allow inbound traffic to SQL Database on port 1433 from Managed Instance subnet. Please note that detailed instructions on setting up the networking is beyond the scope of this article.
You’d need to have either of these options setup as the networking requirement:
- Option 1 – public endpoint connection
- Ensure that public endpoint access is working on SQL Database using a database client (such is SSMS)
- If needed, open NSG rule on SQL Database side to allow 1433 the inbound traffic
- Option 2 – private endpoint connection
- Create an additional subnet in Managed Instance VNet
- Deploy SQL Database private endpoint to the new subnet created inside Managed Instance VNet (see this tutorial for details)
In case that you perhaps have a VM inside the same VNet as Managed Instance, you can use it to test the connectivity to SQL Database. For example, use SSMS from a VM inside the Managed Instance VNet to connect to SQL Database. If this works, then Managed Instance will be able to successfully connect to SQL Database to read data.
Prepare table to use Azure SQL Database
As the first step, decide which table on SQL Database would you like to expose to Managed Instance. This could be an existing table, or you could perhaps create a new table.
The sample code below creates a new table AzureDBtable on an existing SQL Database, and inserts the current time stamp. Hopefully, we’d be able to read off this time stamp from Managed Instance.
-- Execute on Azure SQL Database
-- Create table and insert some sample data
CREATE TABLE AzureDBtable (TimeTable datetime2)
INSERT INTO AzureDBtable values (getutcdate())
SELECT @@servername AS [Server name], * FROM AzureDBtable
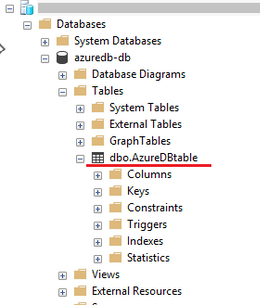
Using SSMS, the below shows the table created on SQL Database.

For the purpose of this article, we have inserted the following time stamp to the table on SQL Database.

Create authentication credentials on Managed Instance
Create authentication credentials for SQL Database on Managed Instance. This will allow Managed Instance to log onto SQL Database and query data. Use an existing database on Managed Instance for which you need to create a master key first. Then, create login credentials for SQL Database in the context of this database.
Provided below is a sample script which you’ll need to modify with the name of your database, new master key password, and credentials to login to SQL Database.
-- Execute on Managed Instance
-- Create auth credentials to SQL DB for a database on Managed Instance

-- Use an existing database on Managed Instance
USE [databasename-on-mi];
-- Create master key for database on Managed Instance
CREATE MASTER KEY ENCRYPTION BY PASSWORD='password';
-- enter credetials to login to Azure SQL Database
CREATE DATABASE SCOPED CREDENTIAL AppCredential WITH IDENTITY = 'username', SECRET = 'password';
Create external data source on Managed Instance
The next step is to create an external data source on Managed Instance. This will allow Managed Instance to know to which SQL Database to connect to. Modify the sample script below to include the name of database on Managed Instance, the connection URL (FQDN) to connect to SQL Database server, and also include SQL Database name. Think of it as providing connection parameters to Managed Instance on how to connect to SQL Database. You would use similar parameters is if you were connecting to SQL Database from another client, such is for example SSMS.
-- Execute on Managed Instance, in the context of the database used
-- Create external table on Managed Instance, link it with Azure SQL Database
CREATE EXTERNAL DATA SOURCE RemoteReferenceData
WITH
(
TYPE=RDBMS,
LOCATION='tcp:server-name.database.windows.net', -- insert SQL Database server FQDN
DATABASE_NAME='sqldb-databasename', -- insert SQL Database name
CREDENTIAL= AppCredential
);
Create external table on Managed Instance
The final step is to create an external table on database on Managed Instance, which will be linked with the table on SQL Database. The below script is an example connecting to the “AzureDBtable” created as the first step of this article, as a show case. In this step, it is very important that the data type(s) you define for the external table match the same data types defined for the source table on SQL Database. If data types perhaps do not match, there will be an error in querying data. This also means that if the external table structure on SQL Database changes, you will need to re-create external table on Managed Instance matching this new structure.
-- Execute on Managed Instance, in the context of the database used
-- Connect external table on Managed Instance with Azure SQL Database
CREATE EXTERNAL TABLE AzureDBtable
(TimeTable datetime2) -- must ensure data structure matches the one on SQL Database
WITH
(
DATA_SOURCE = RemoteReferenceData
);
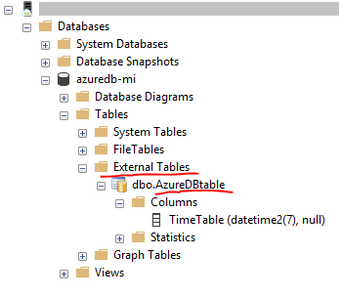
Screenshot below shows that through SSMS we can see that an external table, connected to SQL Database, has been successfully created on Managed Instance.

Test querying data from SQL Database on Managed Instance
As in the first step we have inserted a time stamp on Azure SQL Database, after creating an external table on Managed Instance, let’s see if we can query it. Execute this query on Managed Instance.
-- Execute on Managed Instance, in the context of the database used
-- Read data from the external table on Managed Instance. This should pull the table data from Azure SQL Database
SELECT @@servername AS [Server name], * FROM AzureDBtable
The result shows that the server where this query was executed was on Managed Instance, and that the time stamp matches the same time stamp inserted into the table on SQL Database. This shows that with external data source were were able to query data from SQL Database on Managed Instance online and in-real time.
Closing remarks
Using external table on Managed Instance will allow you to read from, but not insert data into SQL Database. It is also possible to setup the external table the other way around — an external table on SQL Database that can be used to read data from a table on Managed Instance. See this article for details.
If you find this article useful, please like it on this page and share through social media.
To share this article, you can use the Share button below, or this short link: http://aka.ms/mi-sqldb-externaltable
Brought to you by Dr. Ware, Microsoft Office 365 Silver Partner, Charleston SC.


Recent Comments